Ever tried to blend a hot pot of tomato soup in a countertop blender, only to have the lid pop and spray crimson everywhere? That’s the problem an immersion blender was built to solve. If you’ve been wondering what an immersion blender is, here’s the direct version: it’s a handheld electric tool that blends food right in the pot, bowl, or pitcher you already have out.
The design has been around for decades, but it’s having a real moment. As of 2026, most major kitchen brands sell a stick blender in the 150 to 600 watt range. They’re compact, easy to store, and they cut way down on dishwasher loads.
Ready to see why so many home cooks swear by one? Let’s get into it.
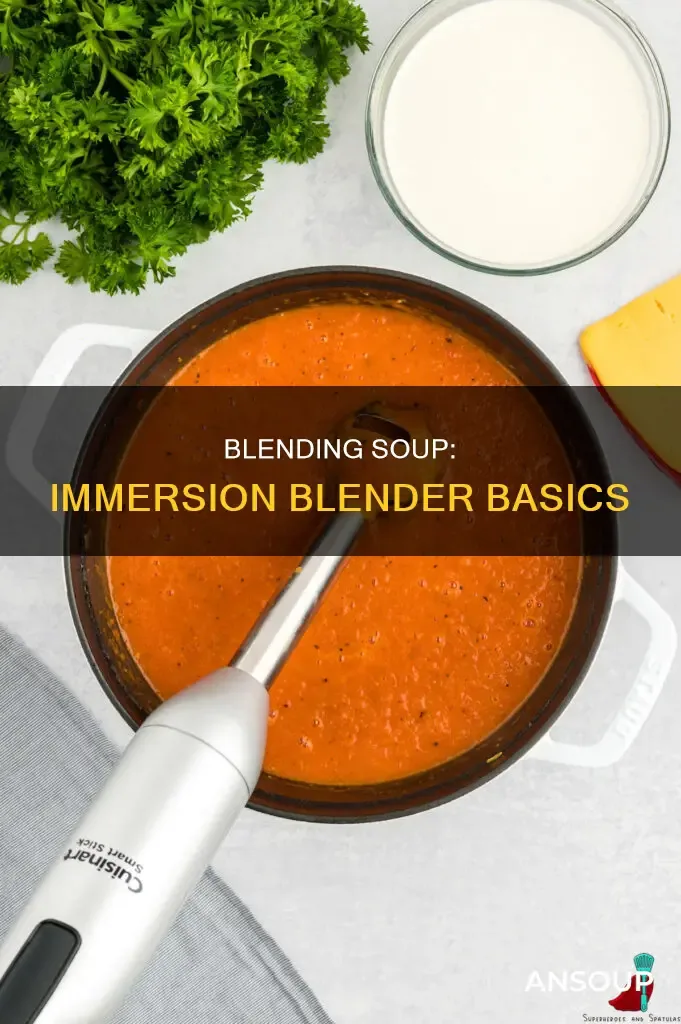
Image source: Bing (Web (fair-use with source credit))
What Is an Immersion Blender, Exactly?
An immersion blender is exactly what its name says: a blender you dunk into food instead of pouring food into a blender jar. It’s also called a stick blender, hand blender, or wand blender. Some chefs jokingly call it a “boat motor” because of the buzzing sound it makes while blending soup.
The construction is simple. A motor sits in the top housing, and a metal shaft extends down to a bell-shaped blade guard. Inside that guard, small blades spin to purée vegetables, whip cream, or emulsify dressings.
You hold the top, submerge the shaft into the food, and press a button or squeeze a trigger to start blending.
Quick Answer: Why It’s Not Just a Blender
An immersion blender is a handheld electric tool. It purées food right in the container you’re cooking in. The motor sits on top.
The blades sit at the bottom of a long shaft. It blends soup, sauce, or batter without transferring anything, unlike a countertop blender.
Visual Breakdown: The Parts and What They Look Like
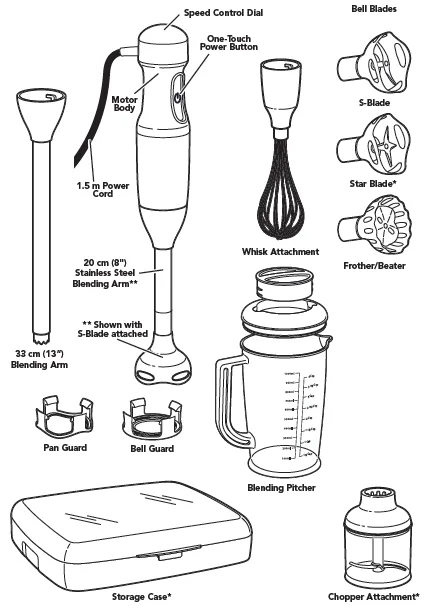
Image source: Web (Bing) / pinterest.com (Web image (fair-use with source credit))
A typical immersion blender has four main parts: the motor head, the shaft, the blade guard, and the attachments. Some models also ship with a blending beaker that locks to the base. That beaker is handy, but it’s not required.
The Motor Head
This is the top piece you hold. It contains the electric motor, speed controls, and power button. Manufacturer specifications indicate most home models fall between 150 and 600 watts.
Higher wattage usually means smoother blending and less strain when you work through thick mixtures.
Most motor heads have a detachable shaft release button. That makes cleaning easier because the electronics never touch water. Look for a UL mark on the cord or housing if you’re in North America.
Underwriters Laboratories tests small appliances for electrical safety, and that certification matters if you’re buying used. It’s also smart to check the Consumer Product Safety Commission recall database before grabbing a secondhand unit.
The Shaft and Blade Guard
The shaft is the long tube that connects the motor head to the blades. On most models it’s stainless steel, which doesn’t absorb odors or stain from tomato sauce. The blade guard is the bell-shaped housing around the cutting blades.
It keeps the spinning metal away from the sides and bottom of your pot.
That bell shape isn’t random. It creates a channel that pulls food up and into the blades, which is what makes an immersion blender blend instead of just chop. The guard also prevents splashing when the blades sit deep enough in the liquid.
The Attachments
Many immersion blenders come with a few extras. The common ones are:
- Whisk attachment: For whipping cream, egg whites, or making mayonnaise.
- Chopper attachment: A small bowl with its own lid and blades for onions, nuts, or herbs.
- Frother attachment: A small circular whisk that froths milk for coffee drinks.
These attachments swap onto the motor head in seconds. They’re often what turns a basic hand blender into a genuinely versatile tool.
How an Immersion Blender Works (Visual Walkthrough)
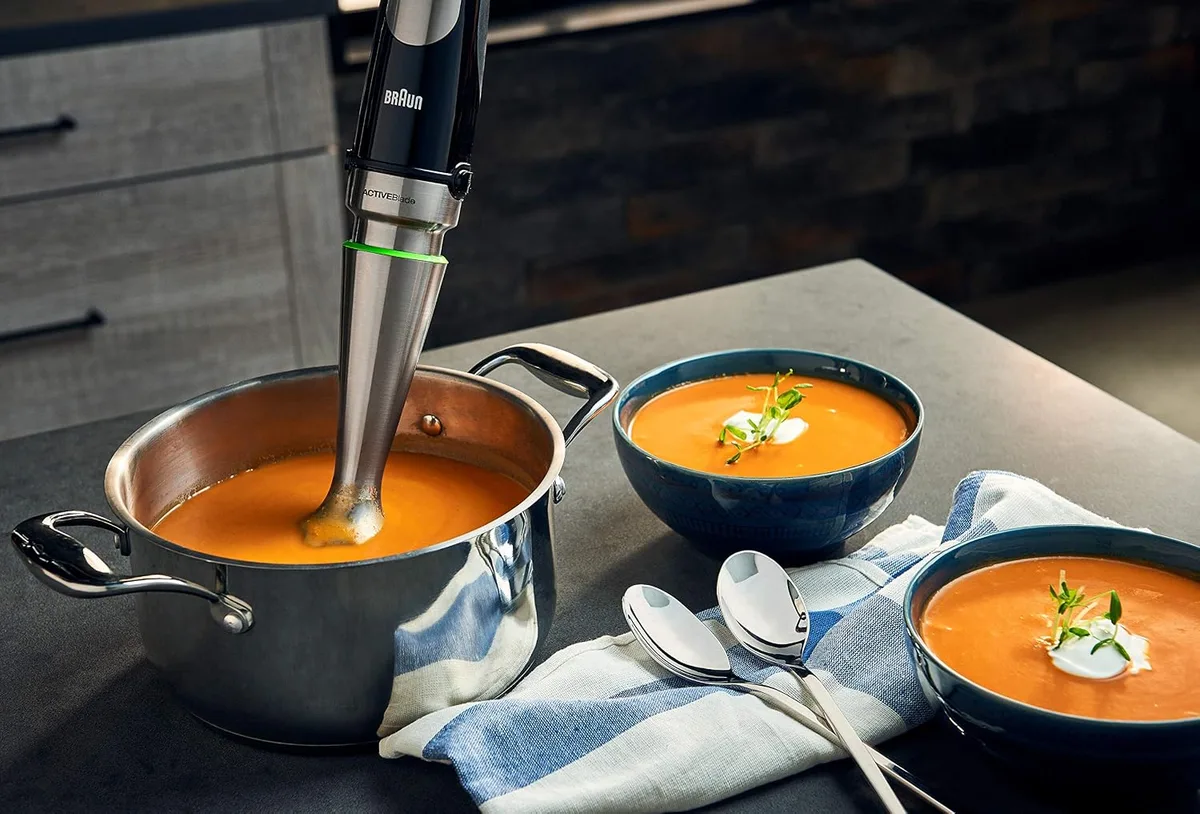
Image source: Bing (Web (fair-use with source credit))
Take a look at the photo above. The blade guard is fully submerged, and the wand is angled slightly instead of jammed straight down. That’s the most important visual cue for using one.
Here’s the basic workflow:
- Plug it in and set the speed low. High speed at the surface creates splatter.
- Submerge the blade guard completely. This stops suction and keeps air out of the blend.
- Tilt the wand slightly. This helps food circulate into the blades.
- Move it in a gentle up-and-down motion. That pulls bigger chunks down and gives you an even texture.
- Run it for 30 to 60 seconds. Soups usually turn silky in under a minute.
- Let hot liquids cool slightly first. Steam can build up inside the pot and cause hot splashes.
For small kitchens that lack counter space, this workflow is a big win. It’s the same thinking behind choosing ductless range hoods when you can’t run ductwork.
What You Can Do With It: Real-World Uses
The immersion blender shines in everyday small-batch cooking. It’s not great for crushing ice or blending a gallon of frozen margaritas, but for everyday cooking, it’s surprisingly versatile.
| Task | How to Do It | Why It Works |
|---|---|---|
| Puree soup | Blend directly in the stockpot until smooth | No need to transfer hot liquid |
| Smoothies | Use a tall jar or the included beaker | Blends quickly in the container you drink from |
| Whipped cream | Attach the whisk and whip cold cream | Faster than doing it by hand, easier to store than a mixer |
| Mayonnaise | Start at low speed with the blade near the bottom | The blades create a stable emulsion in seconds |
| Baby food | Steam vegetables, then blend with cooking water | You control the texture and skip preservatives |
An immersion blender is also great for making sauces, salad dressings, dips, hummus, pancake batter, and muffin batter. You can blend ingredients directly in a mixing bowl or large measuring cup, which means fewer dishes to wash afterward.
Because it blends directly in the pot, bowl, or pitcher you’re already using, an immersion blender saves time during both cooking and cleanup. That’s one of the main reasons it’s become a favorite tool for home cooks who prepare soups, sauces, smoothies, and other everyday recipes.
Immersion Blender vs. Countertop Blender vs. Food Processor
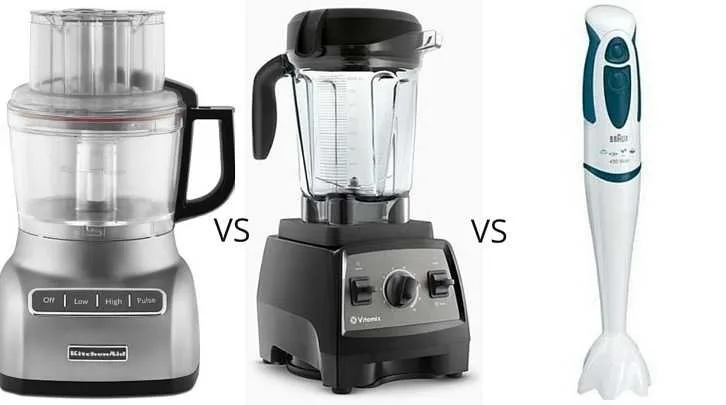
Image source: Web (Bing) / kitchenadvising.com (Web image (fair-use with source credit))
The quickest way to understand what an immersion blender is? Look at what it’s not. Here’s a simple breakdown of the three kitchen workhorses.
| Tool | Best At | Weakest At | Who It Suits |
|---|---|---|---|
| Immersion blender | Soups, sauces, small batches, hot liquids, quick cleanup | Crushing ice, large volumes, smooth nut milks | Everyday cooks, small kitchens, one or two servings |
| Countertop blender | Smoothies, frozen drinks, large batches, powdered bases | Soups straight off the stove, cleaning, counter space | Families, smoothie drinkers, bakers |
| Food processor | Chopping, shredding, dough, pesto, spreads | Liquid soups, hot liquids, small volumes | Prep-heavy cooks, bakers, meal preppers |
A countertop blender wins for big smoothies and frozen drinks. A food processor wins for slicing carrots and making dough. But neither does hot soup well.
That’s the immersion blender’s home turf.
If you’re choosing between them, think about your actual kitchen problems. Counter space limited? The stick blender stores in a drawer.
You cook for a household of four? A countertop blender might serve you better. You’re already researching compact appliances like best ductless range hoods, so you know the drill: pick tools that fit your real setup.
Pros and Cons: The Honest Trade-Offs
No kitchen gadget is perfect. Here’s the balanced picture from our research, plus aggregate user feedback.
The Good
- Blends hot food safely. No transferring a steaming pot to a jar. No lid blowouts.
- Fast cleanup. Rinse the shaft under warm water. Thirty seconds, done.
- Compact storage. It sits in a drawer instead of ruling the counter.
- Versatile attachments. Whisk, chop, froth, and blend with one motor base.
- Works in any container. Pot, pitcher, mixing bowl, or the included beaker.
The Not-So-Good
- Can’t crush ice. Countertop blenders handle frozen fruit and hard ice better.
- Needs technique. Hold it flat against the pot bottom, and it suction-locks. Move it wrong, and soup splashes.
- Small batch limits. You can’t blend a gallon of chili into silk in one pass.
- Hand fatigue. Extended blending fatigues your wrist, especially in thick mixtures.
- Blade exposure. The blades sit in the open at the end of a long stick. That demands care when cleaning.
The honest take? For soups and small batches, nothing beats it. For frozen drinks and large families, a countertop blender will frustrate you less.
If you do a lot of prep work, food processors earn their spot.
Who Is It Actually For?
An immersion blender is a great choice if you make soup regularly. It’s also ideal for people who enjoy smoothies but don’t want to pull out a full-size blender for a single serving. Simply blend in the included beaker or a tall container for quick preparation and easy cleanup.
It’s especially great for:
- One- or two-person households: Small portions blend quickly without dirtying bulky equipment.
- Home cooks who make sauces: Perfect for hollandaise, mayonnaise, vinaigrettes, tomato sauce, and other smooth sauces.
- Parents making baby food: Steam vegetables, then blend them with a little cooking liquid to control the texture and ingredients.
- Campers and RV owners: Compact, lightweight, and easy to pack when space is limited.
- People who want less cleanup: Blend directly in the pot or bowl you’re already using, reducing the number of dishes to wash.
How to Use One: Step-by-Step Visual Cues
Picture a stockpot of chunky vegetable soup sitting in front of you. Now imagine you’re using the wand for the first time. These steps will get you through it.
Step 1: Prep the Tools and Food
Plug in the immersion blender, and set the speed to low. Add a little liquid if your soup is thick. Blend works best with enough moisture to circulate.
Let hot liquids cool for about five minutes before making blending. Steam build-up causes messy splatters and potential burns. If you want an extra-smooth texture, you can strain it afterward, but an immersion blender generally does the job on its own.
Step 2: Submerge and Angle
Place the blade guard fully below the surface. Tilt the wand at about a 15-degree angle. That tilt is basically the whole trick.
It creates a vortex that pulls food into the blades instead of pushing it away.
Step 3: Move, Don’t Hammer
Start blending on low, and move the wand in slow, gentle up-and-down strokes. Don’t jab it in and out like you’re churning butter. Smooth, deliberate motions give an even texture and prevent suction.
After 30 to 60 seconds, stop and check the texture. For a creamy soup, you usually need a full minute. For chunky salsa, a few pulses will do.
Step 4: Add Ingredients While Running
Here’s a pro move: add liquid ingredients while the blender runs. Olive oil for dressing, cream for soup, milk for smoothies. The slow stream helps everything emulsify better.
Common Mistakes That Ruin the Experience
Most immersion blender frustration comes down to the same handful of errors. Avoid these, and the tool becomes much more enjoyable.
Running it above the surface
Start with the blades submerged, or you’ll spray food everywhere. This is the number one beginner mistake. The blade guard needs to be fully covered before you switch it on.
Blending thick mixtures on high
Thick mash clogs the blades and strains the motor. Use low or medium speed. Add a splash of liquid if the mixture seems too dense.
One common culprit? Blending potatoes directly in the pot. The starch turns them gummy.
Holding it flat on the bottom
That suction-lock ring you’ve heard about? It happens when you press the blade guard against the pot floor. Keep the wand slightly angled or a little above the bottom.
The blades will still pick up the food.
Forgetting to unplug before cleaning
The blade guard is open, and the blades are sharp. Always unplug the immersion blender before detaching the shaft or cleaning it. This helps prevent accidental activation and reduces the risk of injury.
When cleaning the blade area, use a sponge or brush and handle the sharp edges carefully. Following these simple safety steps keeps both you and your blender in good condition.
Overloading the beaker
That tall blending cup looks big, but overfilling it helps the mixture escape past the blades and across the counter. Fill it about two-thirds full. The same rule applies to soup in a stockpot.
Safety First: What to Watch Out For
An immersion blender is a sharp, fast-spinning tool. Treat it with the same respect you’d give any electric kitchen appliance.
The biggest risks come from hot liquids, bare blades, and electrical parts. Here’s how to stay safe:
- Never submerge the motor head. Water and electronics don’t mix. Wipe the top with a damp cloth only.
- Unplug before cleaning. The blade sits in the open, and it’s sharp. Removing the shaft while the unit is live is a bad idea.
- Let hot liquids cool slightly. Steam can scald your hands or face when you start blending. Five minutes of cooling makes a big difference.
- Keep hands and utensils clear. Spatulas, spoons, and fingers should stay far from the blade guard while it’s running.
- Watch children closely. The long shaft and exposed blades make it easy for a curious hand to get hurt. Store it out of reach.
Check your model for a UL or ETL certification mark. That’s your assurance the unit passed independent electrical safety testing. It’s a quick search that can prevent a serious accident.
Cleaning and Maintenance: Keeping It in Shape
A stick blender needs almost no upkeep. The whole point is a tool that rinses clean in seconds.
After each use, unplug the unit. Detach the shaft from the motor head. Rinse the shaft under warm water to remove food residue.
Then wash it with dish soap and a sponge.
Most shafts are dishwasher-safe, but check your manual first. The motor head never goes in water. Wipe it with a damp cloth and dry it completely.
Store the unit upright or hanging so the cord doesn’t tangle.
Every so often, check the blade guard for food buildup. If the shaft has visible wear or a cracked seal, replace it. A damaged shaft can leak moisture into the motor and ruin the unit.
Quick Buying Guide: What to Look For
You don’t need an expensive immersion blender to get great results. Instead, focus on the features that match the way you cook.
- Wattage: Look for 300 to 600 watts if you regularly blend thick soups, sauces, or smoothies. Lower-powered models are usually sufficient for lighter tasks.
- Detachable shaft: A removable shaft makes cleaning much easier and is a feature worth having.
- Variable speed control: Multiple speed settings give you better control, especially when blending delicate sauces or thicker mixtures.
- Included attachments: Whisks, choppers, and blending beakers add versatility if you plan to use the blender for more than soups.
- Build materials: Stainless steel shafts are generally more durable and better suited for hot foods, while plastic shafts can work well for lighter everyday tasks.
- Beaker size: A 20- to 40-ounce blending beaker is ideal for most small-batch recipes. Measurement markings are a useful bonus.
Choose the model that best fits your cooking habits, budget, and the types of recipes you make most often.
Frequently Asked Questions
Can you use an immersion blender in hot soup?
Yes. That’s its best feature. Let the soup cool for a few minutes first to reduce splashing and steam burns.
Submerge the blade guard fully before starting, and blend on low speed.
Can an immersion blender crush ice?
No, not well. The small blades can shave soft ice, but they’ll struggle with large cubes. For frozen drinks, a countertop blender is the better tool.
How is an immersion blender different from a regular blender?
The immersion blender works directly in your pot or bowl. There’s no jar to fill and no lid to seal. You hold it in your hand and move it through the food.
A countertop blender uses a tall container with a sealed lid and spinning blades at the base.
How do you clean an immersion blender?
Unplug it and detach the shaft. Rinse the shaft under warm water, then wash it with soap. The motor head only gets a damp wipe-down.
Most shafts are dishwasher-safe, but check your manual first.
What size immersion blender should I buy?
For most home cooks, a 300 to 500 watt model is plenty. Go higher if you blend thick ingredients often. The included beaker size matters too.
A 20 to 24 ounce cup works for single servings and small batches.
Final Verdict: Should You Get One?
Yes, if you cook soups, sauces, or smoothies more than once a week. It’s a compact, affordable, and genuinely handy tool. The cleanup alone makes it worth the shelf space.
A countertop blender still has its place. It’s better for frozen drinks and feeding a crowd. But for everyday cooking, the immersion blender does the job with less mess and less fuss.
If your kitchen is short on counter space, this is the blender for you. It’s one of those tools you’ll reach for constantly once you own one.