You have probably pressed the pulse button without thinking much about it. A quick tap, a brief whir, and the blades stop. It feels almost too simple to matter. But that small button is often the difference between a perfect chunky salsa and a watery puree, between fluffy whipped cream and butter, between crushed ice and a puddle of slush.
Pulse is not a secondary feature or a leftover from older blender designs. It is a deliberate engineering choice that gives you the one thing a spinning motor cannot: control. This guide explains exactly how pulse technology works, when it outperforms continuous blending, and how to use it with precision for better results in your kitchen. You can also read our guide on how to make protein shake in blender.
What Pulse Technology Means in a Blender
Pulse technology is a motor control system that delivers power in short, deliberate bursts. When you press and hold the pulse button, the blades spin at full speed for as long as you keep pressure on the button. Release it, and the motor stops almost instantly.
The mechanism itself is straightforward. The button acts as a momentary switch, completing an electrical circuit only while pressed. Some modern blenders add a soft-start feature that ramps up blade speed over a fraction of a second, which reduces splatter and protects the motor from sudden torque demands. But the core principle remains identical across nearly every brand: the operator controls the duration, and the blender provides the power. You can also read our guide on is it safe to put ice in blender.
This manual control is what sets pulse apart from preset programs. A soup setting runs for a fixed time at a fixed speed. Pulse puts you in charge of every second of operation, which matters more than you might expect for texture-sensitive recipes.
How Pulse Control Differs from Continuous Blending
Continuous blending runs the motor at a constant speed until you switch it off. This is ideal for liquefying ingredients completely: smoothies, pureed soups, milkshakes, and nut milks. The blades maintain a steady vortex that pulls ingredients down and breaks them down uniformly. For more on this, see our guide on why water isnt used in fire extinguisher.
Pulse blending works in an entirely different way. Each burst is a short, sharp blast of power that jolts ingredients around the jar. The brief pause between pulses lets the mixture settle, which serves two crucial purposes:
- Settling pulls ingredients back down toward the blade assembly, so the next pulse catches them properly.
- The pause prevents the blade from pulverizing everything into a uniform paste, preserving the physical texture of individual pieces.
Think of it like using a chef's knife. Continuous blending is a machine chopping everything into identical pieces. Pulse is closer to a hand chop, where you control every stroke and stop the moment the pieces look right.
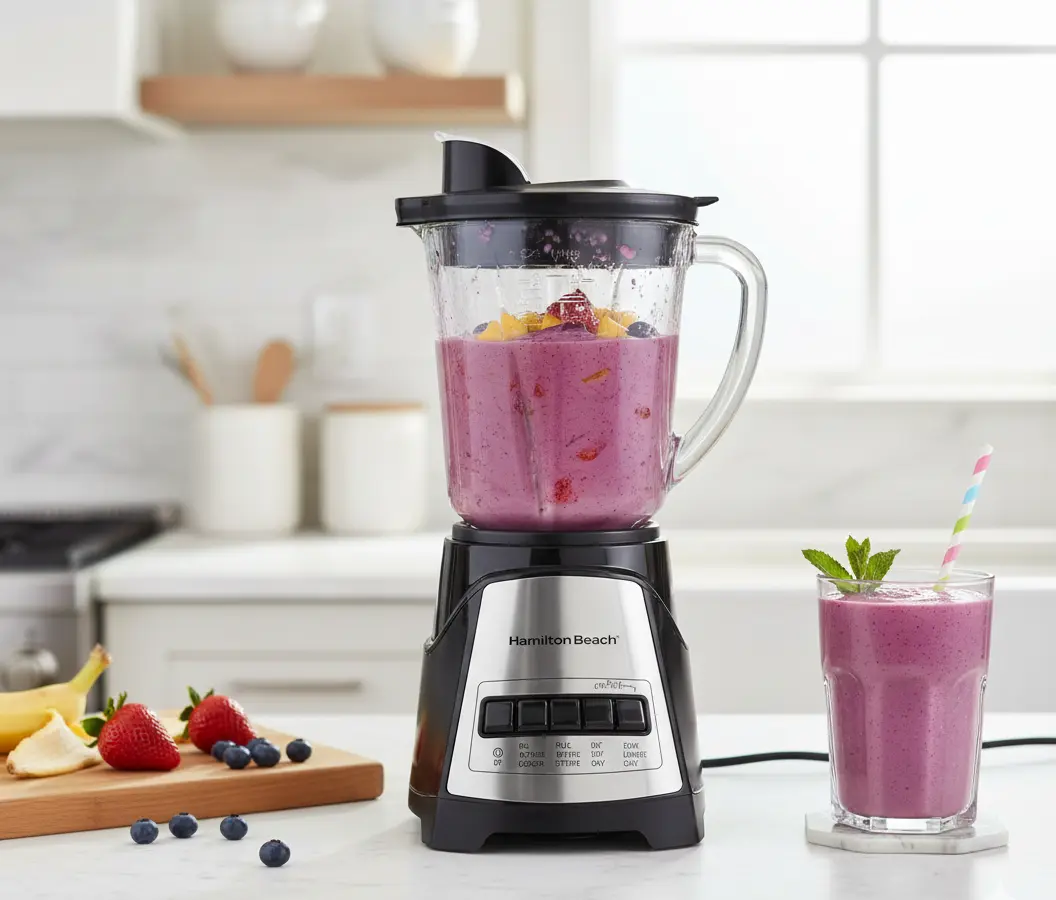
The pulse button interrupts the motor circuit so each tap delivers a short, controllable burst of power.
A common mistake is treating pulse as "just lower speed blending." It is not. Low speed still runs continuously and will eventually break down ingredients completely. Pulse is unique because it builds pauses into the process, and those pauses are exactly what preserve texture. For more on this, see our guide on why is my blender so loud.
Why Blenders Include Pulse Technology
Blender manufacturers include pulse for one practical reason: continuous motors are too aggressive for many common kitchen tasks. Without pulse, you would have no way to chop, crush, or mix without pulverizing your ingredients. The benefits that follow explain why the feature has become universal.
Precise Texture Control
Pulse gives you the ability to stop at the exact moment your food reaches the right consistency. Need coarse breadcrumbs? Two or three short pulses. Want a chunky guacamole? Pulse until the avocado pieces are about a quarter-inch. You can check progress after every burst, which is impossible with a continuous run. For more on this, see our guide on why is my blender not blending smoothly.
This control is particularly valuable for coarse chopping nuts. Almonds and pecans turn into butter quickly when blended continuously. A few pulses give you the uneven, crunchy pieces that work best in salads and baked goods.
Prevention of Over-Blending
Over-blending is a hidden kitchen problem. A smooth hummus becomes a thin, watery paste. A creamy pesto turns bitter because the basil leaves oxidize and the nuts release too much oil. The pulse function prevents this by forcing you to work in short, observable steps.
Each pulse releases only a small amount of oil and breaks down only the outer layer of the ingredients. The pauses allow you to judge whether you have reached the finish line, rather than discovering you have passed it when you open the lid.
Efficient Ice Crushing
Crushing ice is one of the most demanding tasks a blender performs. Continuous operation at high speed can generate enough heat in the jar to melt the ice, leaving you with slush instead of crushed cubes. Pulse is far more effective.
Each short burst slams the ice into the blade surface with maximum impact. The pause between bursts lets the crushed pieces fall away and fresh cubes drop into position. The result is broken, textured ice rather than melted water. It also spares the motor from prolonged high-torque operation, which can trigger thermal overload protection on some models.
Protection for the Motor
Pulse operation is easier on the motor than continuous running at high speed. When you press the pulse button repeatedly, the motor has time to cool between bursts. This is especially important when blending thick, heavy mixtures like frozen fruit or nut butters, which strain the motor the hardest.
Beyond heat management, a soft-start control ramp also reduces wear on the drive mechanism. Sudden full-speed starts from a dead stop can stress the coupling and blades. The short, sharp pulses of pulse mode are surprisingly gentle on the machine's internal components.
Smart Times to Use Pulse in Your Blending Routine
Knowing how pulse works is only part of the skill. Equally important is knowing when to use it. Here are the most practical applications you will encounter in the kitchen.
Chopping Vegetables, Nuts, and Herbs
For any ingredient you want in recognizable pieces, pulse is the right tool. Add roughly chopped garlic, onion, or bell pepper to the jar and pulse two to three times. Stop when the pieces reach the size you need. This produces a more consistent chop than a knife for large quantities and delivers it in seconds.
The same applies to fresh herbs. Parsley, cilantro, and basil bruise easily. Continuous blending darkens them and releases bitter compounds. A few pulses give you evenly chopped leaves without the damage.
Making Chunky Salsa, Pico de Gallo, and Relishes
A smooth salsa can be lovely, but classic pico de gallo depends on visible chunks. Pulse the tomatoes, onions, peppers, and cilantro just enough to combine them without turning them into juice. You retain the individual character of each ingredient while still achieving a cohesive mix.
The same logic applies to vegetable relish, corn salad, and any condiment where texture carries the dish.
Starting Tough Blends More Efficiently
Thick ingredients like frozen berries, whole nuts, or dates tend to stick. They sit at the top of the jar, spinning above the blades, and the motor whines without progress. Pulse solves this common problem.
Two or three pulses break the large pieces down and force them toward the blade assembly. Once everything is moving freely, you can switch to continuous blending to finish the job. This prevents the air pocket problem that makes smoothies and almond butter frustrating to make.
Finishing Sauces and Dips with Control
You can also use pulse at the end of a blend to fine-tune the final texture. If your soup is a touch too fibrous, a single pulse or two will smooth it slightly without destroying its body. If your dip is too thin, pulsing in a bit more solid ingredient integrates it without over-aerating.
A good habit is to end the program on the pulse button. That way, the very last movement of the blades is one you controlled manually, not one the timer dictated.
The fine texture control that pulse offers makes it ideal for stages like crushing ice or chopping nuts.
Pulse vs. Puree vs. Ice Crush: Understanding the Difference
Modern blenders often come with several programmed settings, and it is easy to confuse them. Here is a straightforward breakdown of how pulse compares to the other modes you are likely to see.
| Setting | Operation | Best Used For | Result |
|---|---|---|---|
| Pulse | Short, controlled bursts via manual button | Chopping, crushing, preserving texture | Chunky, uneven pieces |
| Puree | Continuous blending until smooth | Soups, sauces, dips | Uniform, velvety texture |
| Ice Crush | Steady continuous power at high speed | Regular crushed ice | Fine, snow-like ice |
The key distinction is control. Pulse gives you manual authority. Puree and ice crush are automated programs that run independently. Neither of them allows you to stop mid-cycle based on visual inspection.
For softer ingredients like vegetables and nuts, pulse is almost always the better choice. For ice in large quantities, ice crush mode is more efficient, but pulse offers finer control over the final texture. Learn to use all three in combination and your blender becomes a far more flexible tool.
Step-by-Step: How to Use Pulse Effectively
You do not need any special skill to master the pulse function, but a reliable method makes results more consistent. Follow these steps every time you use it.
Step 1: Load the Jar Correctly
Begin with smaller pieces rather than whole ingredients. Cubing your ingredients into roughly one-inch pieces ensures that a single pulse reaches every part of the batch. This one extra minute of prep saves you several pulses later and produces a more even result.
Step 2: Press and Hold the Pulse Button
Press the pulse button firmly and hold it for one to two seconds. Release it completely and let the blades come to a full stop. While the motor coasts down, the ingredients redistribute. This pause is when the magic happens.
Never hold the button for five or more seconds at a time. Long bursts defeat the purpose of pulse blending by acting just like continuous operation.
Step 3: Shake or Stir Between Bursts
Depending on how full the jar is, ingredients can sometimes get stuck above the blades. If you notice the blades spinning freely without moving the food, stop the blender, remove the lid, and stir with a rubber spatula. Alternatively, give the jar a gentle shake (with the lid firmly on) to redistribute the contents.
Step 4: Check Texture Frequently
Open the lid after every two or three pulses and inspect the pieces. Compare them against what you visually expect from the recipe. Chopping can go from perfect to overdone in a single long burst, so train yourself to check early and often.
Step 5: Adjust Timing to the Ingredient
Softer items like strawberries only need sub-second taps. Harder items like carrots or ice require slightly longer bursts. The right duration is a learned skill, but a good starting point is a one-second press for hard ingredients and a quick tap for soft ones. Adjust from there based on what you see.
Common Pulse Mistakes to Avoid
Even experienced cooks make these errors. Knowing what they are will help you skip the learning curve.
- Holding the button too long turns pulse into continuous blending and destroys texture. Keep bursts to one or two seconds.
- Overfilling the jar prevents proper circulation. Fill the jar no more than two-thirds full when using pulse.
- Pulsing liquids at maximum speed causes splatter. For liquids, use a lower speed setting instead of aggressive pulsing.
- Skipping the rest period between pulses creates a continuous blend in disguise. Always let the blades stop completely.
What to Look For in a Blender's Pulse Feature
All pulse buttons are not created equal. If you are shopping for a new blender, pay attention to these details.
Feel and Responsiveness
The best pulse buttons respond instantly. There should be no noticeable delay between pressing and blade movement. Some budget blenders use a spring that is too stiff or too loose, which makes precise timing difficult. Test the button in the store before you buy.
Soft-Start Integration
More advanced blenders integrate a soft-start function that ramps up blade speed over the first half-second. This reduces splashing and protects delicate ingredients. It also prevents ingredients from jumping around the jar before the blades reach full speed.
Independent Pulse Control
Some blenders require you to select a speed first, then press pulse. Others allow pulse operation regardless of the dial position. Independent control is more versatile, as you can pulse at any power level without adjusting settings.
Variable-Speed Pulse
High-end blenders like Vitamix tie pulse into their variable-speed dial. This means you can pulse at speed 3 for a gentle chop or speed 10 for aggressive crushing. It is a meaningful difference for serious cooks who want maximum flexibility.
If you are comparing models, consider whether you need a simpler machine or a professional-grade one. The range of options spans from reliable budget blenders to the heavy-duty machines you see in professional kitchens. Weight the pulse feel heavily in your decision because you will use it more than any other function.
Is Pulse High or Low Speed?
Pulse is technically its own mode rather than a speed setting. In most blenders, pulse operates at the maximum speed of the machine, regardless of what the dial suggests. Some premium models route pulse through whatever speed you have selected, but this is the exception rather than the rule.
Understanding this matters for result prediction. A maximum-speed pulse is aggressive by design. It is meant to shatter ice and process tough ingredients quickly, not to blend gently. For delicate tasks, you may need to press for shorter intervals to compensate for the high power.
The Bottom Line: Why Pulse Technology is Used in Blenders
Pulse technology exists because it hands control back to you. It prevents over-blending, preserves texture, crushes ice efficiently, and protects the motor from strain. It is not a gimmick or a marketing feature. It is a fundamental piece of blender design that every home cook should understand.
Mastering the pulse function is one of the quickest ways to improve your kitchen output. The recipes that previously failed with a smooth puree will suddenly work: chunky hummus, crushed ice for cocktails, chopped nuts for baking, and salsas with actual bite.
Frequently Asked Questions
What does the pulse button do on a blender?
The pulse button delivers short bursts of motor power while held down. It stops immediately when released, allowing for precise, incremental control over the blending process.
Is pulse the same as low speed on a blender?
No. Pulse delivers full motor power in short bursts. Low speed runs the motor continuously at a reduced rate. Pulse is for texture control; low speed is for gentle continuous blending.
Can I crush ice using the pulse function?
Yes. Pulse is actually better than continuous blending for ice. Short bursts break the cubes into textured pieces without generating enough heat to melt them into slush.
Should I use pulse or puree for making soup?
It depends on your goal. Use puree mode for a perfectly smooth, velvety soup. Use pulse if you want a slightly chunky texture with visible pieces of vegetables.
Why does my blender have both pulse and ice crush settings?
They serve different purposes. Ice crush is an automated program that runs continuously at high speed for fine, snow-like ice. Pulse gives you manual control for coarser, more uneven crushing.
Does using pulse damage the blender motor?
No. Pulse is generally easier on the motor than continuous high-speed operation. The pauses allow the motor to cool slightly between bursts, reducing the risk of overheating.
Ready to get more from your blender? Try the pulse button tonight with a simple chunky salsa. Chop the vegetables, pulse three times, and taste the difference that control makes. Then apply the same technique to your next smoothie or dessert and notice how the texture improves.