So, can i use an immersion blender for smoothies? Yes, you can, but the honest answer is “it depends on the smoothie.” An immersion blender is a single-serving workhorse that handles soft ingredients beautifully, but it struggles with frozen fruit, thick greens, and ice. The key is knowing your ingredients before you pick up the tool.
Manufacturer specifications tell the story. Most immersion blenders run between 6,000 and 12,000 RPM, while a typical countertop blender spins at 20,000 RPM or more. That difference matters when you’re trying to crush frozen mango or kale.
As of 2026, the market still splits into two camps: lightweight stick blenders for sauces and one-cup shakes, and serious jar blenders for heavy-duty blending. The trick is deciding which camp your smoothie habit falls into.
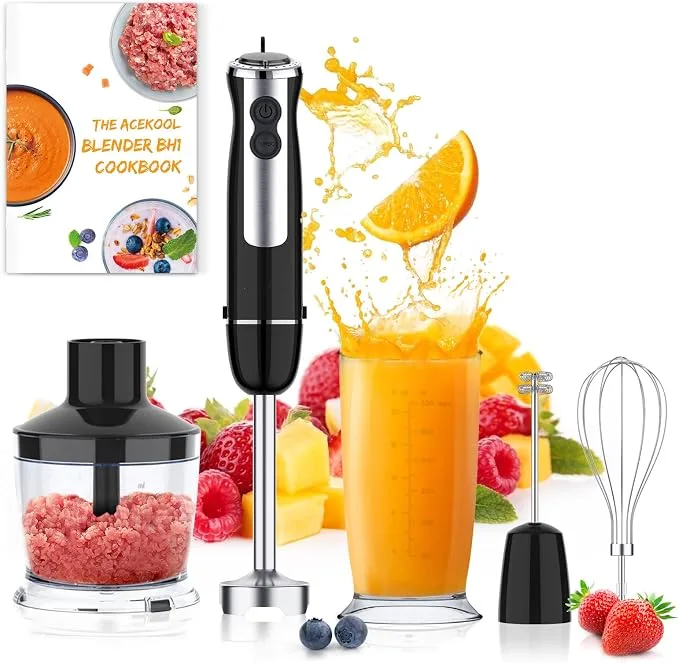
Image source: Bing (Web (fair-use with source credit))
Quick Answer
Yes, an immersion blender works for smoothies if the ingredients are soft. Bananas, yogurt, milk, and protein powder blend fine. Frozen berries, ice, and fibrous greens will cause problems.
Use the pulse setting and cut fruit into small pieces. For heavy frozen smoothies, a countertop blender is better.
The Real Question: What Kind of Smoothie Are You Making?
Before you worry about wattage or blade shape, ask yourself what you’re actually blending. That single question decides whether the immersion blender saves you time or leaves you fighting chunks.
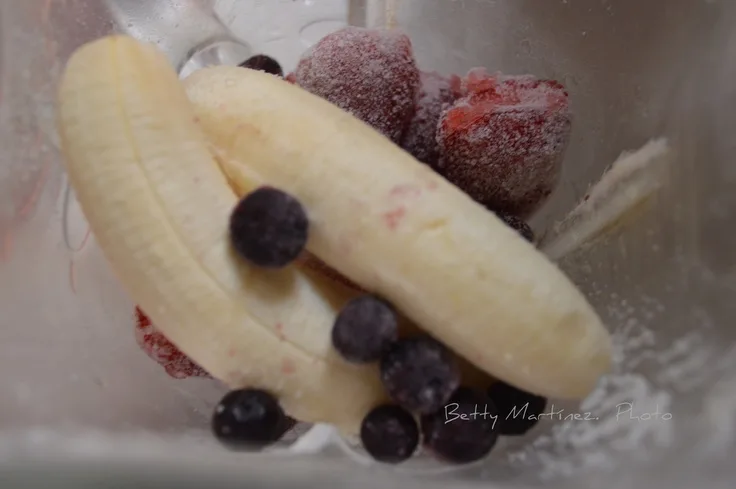
Image source: Bing (Web (fair-use with source credit))
Soft-Only Smoothies (Bananas, Yogurt, Plant Milk, Protein Powder)
This is the immersion blender’s sweet spot. A soft smoothie has no ice, no frozen berries, and no whole leafy greens. Think banana, peanut butter, oat milk, a scoop of protein powder, and maybe a few ice-free blueberries.
The stick blender cuts through that in about sixty seconds, especially if you pulse and swirl. Aggregate reviews consistently report that a 300-watt immersion blender gives smooth, drinkable results for these recipes. Cleanup takes fifteen seconds.
Frozen-Fruit Heavy (Berries, Mango, Ice Cubes)
This is where the tool hits its wall. Frozen fruit is hard, and most immersion blenders simply don’t have the torque to break down large pieces. A single frozen strawberry or a few ice cubes can stall the blade entirely.
If you really want to use the stick blender, you need to let the fruit thaw for five to ten minutes or cut it into half-inch pieces before blending. That extra prep time tends to defeat the convenience. Most people end up with a half-blended mess and a warm smoothie.
Leafy Green Smoothies (Kale, Spinach, Celery)
Leafy greens are a different problem. Spinach blades can get shredded by a high-speed blender, but an immersion blender at 8,000 RPM tends to leave long, fibrous strings in the drink. Kale is even tougher.
The result isn’t unblendable, but it’s not the smooth, homogeneous texture you expect from a green smoothie. You can mitigate this by blending the greens with liquid first and letting the mixture sit for a minute before adding other ingredients. It helps, but it still won’t match a jar blender.
How to Recognize Your Blender’s Limits (Motor Power and Blade Design)
Manufacturer specs reveal a lot if you know what to look for. Two numbers matter most: wattage and blade speed. Wattage tells you how much electrical power the motor draws, while blade speed tells you how fast the cutting edge moves.
A 600-watt immersion blender with a four-prong blade handles frozen fruit much better than a 200-watt model with a two-prong blade.
Higher wattage doesn’t automatically mean better results. As research into blender performance shows, the design of the blade and the depth of the blending cup play huge roles. A narrow beaker forces ingredients up into the blade repeatedly.
A wide glass allows everything to slosh around and just spin in place. That’s why most immersion blenders come with a tall, narrow beaker specifically matched to the blade width. If you use a different cup, you’ll notice uneven blending almost immediately.
Also, pay attention to the motor’s duty cycle. Most manufacturers specify a maximum continuous run time, usually around one minute. After that, the motor needs to rest to avoid overheating.
That one-minute window is enough for a soft smoothie, but it becomes a real constraint if you’re pulsing through frozen fruit. If you find yourself running the motor for two straight minutes, you’ve picked the wrong tool for the job.
The Decision Tree: Should You Use the Immersion Blender for Your Smoothie?
Here’s the practical way to decide, branch by branch.
- Are you blending only soft ingredients (banana, yogurt, milk, powders)? Use the immersion blender. It’s fast, easy, and leaves almost no cleanup.
- Do you have frozen fruit or ice? Either thaw the fruit first or switch to a countertop blender. If you’re in a hurry, this isn’t the tool for you.
- Is your smoothie mostly leafy greens? Make the greens the first thing blended with liquid. If the fibrous texture bothers you, use a full-size blender instead.
- Are you making more than one serving? Immersion blenders work best in single batches of up to 500 milliliters, roughly two cups. Anything larger means blending in stages, which gets tedious.
- Is the motor overworking (hot smell, loud straining)? Stop immediately. Let the motor rest and switch your strategy. Pushing through usually leads to a burnt-out motor.
If you land in the “use the immersion blender” branch, the next section walks you through the technique. If you land in the “switch” branch, that’s not a failure. It just means you’ve found the boundary of the tool.
This practical guide to the stick blender’s limits covers all the jobs it actually does well.
Step-by-Step: Blending a Smoothie With an Immersion Blender (The Right Way)
Getting it right comes down to order, depth, and motion. Follow this method and you’ll get a noticeably smoother drink from the same equipment.
Image source: Bing (Web (fair-use with source credit))
Layering Ingredients: Why Liquid Goes in First
Liquid first is non-negotiable. Milk, yogurt, juice, or water goes into the beaker before anything else. This creates a fluid base that pulls the other ingredients down toward the blade.
If you pack fruit in first and then add liquid, the blade starts in a semi-solid mass and struggles to rotate freely. The same layering advice applies in a regular blender, but it matters even more here because the motor is smaller.
For a single smoothie, pour about a cup of liquid into the beaker. Add soft fruit next, then powders, then any thawed frozen pieces. If you’re using greens, submerge them in the liquid and pulse twice before adding the rest.
That pre-blend gives the leaves a head start.
Pulse, Swirl, and Scrape: Technique That Makes or Breaks the Texture
Do not hold the trigger down and let the blender run continuously. That’s the fastest way to overheat the motor and create a thin, watery smoothie. Instead, use short pulses of two to three seconds.
Each pulse pulls the ingredients down and cuts them, and the brief stop lets the mixture settle back onto the blade.
While you pulse, move the head in a slow circle. Start at the bottom, where the blade sits, and gradually lift upward. This motion creates a vortex and pulls the top layer down.
If you see dry chunks sticking to the sides, stop and scrape them with a spatula. Then pulse again. This one habit does more for texture than any other trick, and it mirrors the process in our step-by-step smoothie method, though we recommend reading both if you want the full picture.
Adding Frozen Fruit Without Stalling the Blade
If you insist on frozen fruit, take fifteen seconds to prep it. Cut each piece into half-inch cubes. Large chunks are the usual culprit when the blade locks up.
You should also run the pulse function at a lower speed setting before ramping up. Let the blade bite off small pieces gradually instead of slamming into a full cube.
A note on safety: never let the blade run in an empty container, and unplug the unit before cleaning. For another task where the stick blender genuinely shines, the same basic approach applies when blending hot soup safely in a blender, where venting and liquid levels matter just as much.
Follow these four steps and most soft smoothies will come out creamy within sixty to ninety seconds. If you find yourself fighting the mixture the whole time, that’s a cue to check the wattage, compare it with a more powerful unit, or understand how energy usage and motor strength affect output. The motor specs, the layering, and the pulsing rhythm all work together.
Get those right and the immersion blender becomes a genuinely useful smoothie tool for single servings.
When It Works Great: Scenarios Worth Picking Up the Stick Blender
The immersion blender earns its place in the kitchen for specific smoothie situations. If your pattern matches any of these, skip the big blender entirely.
- You’re making one serving. A single smoothie in a tall glass is exactly what the stick blender was designed for. You blend, drink, and rinse the head. No jug to pour from, no extra bowl to wash.
- Your ingredients are soft. Ripe banana, yogurt, oat milk, peanut butter, spinach (if you pulse it first), and protein powder all blend cleanly. The result is genuinely smooth and drinkable.
- You’re short on counter space. Dorm kitchens, tiny apartments, and weekend cabins don’t have room for a 6-liter jar blender. The stick blender stores in a drawer, which makes it the practical choice in compact spaces.
- You’re making a quick meal-prep base. Mixing oats, milk, chia seeds, and fruit into single servings is faster with a stick blender than hauling out a big machine.
- You already need it for soup later. If you’re also blending soups or sauces that day, use the stick blender for the smoothie too and clean it once. One tool covers both jobs, and the technique is similar to what we outlined in our hot soup blending process.
The through-line is simple: soft ingredients, small batches, and quick cleanup. Hit all three and the stick blender wins.
When It Struggles: Red Flags That Mean You’re Better Off Using a Countertop or Personal Blender
Some signals tell you clearly that you’ve reached the limit of the tool. Watch for these and switch gears.
- The blade stalls on frozen fruit. If a strawberry or a handful of ice locks the blade completely, you need more torque. A personal blender with a higher wattage motor is the better call for frozen-heavy shakes.
- The motor smells hot. That warm electric smell is a warning. Most manufacturers only rate the motor for about one minute of continuous run time. Pushing past that risks permanent damage.
- The smoothie comes out chunky and watery. When the motor can’t chop finely enough, the ice stays fragmented and the texture turns thin. That’s a blade-speed problem, not a technique problem.
- You’re making a thick smoothie bowl. Smoothie bowls rely on a dense, spoonable texture that only a high-speed blade can create. The stick blender thins it out before it gets there.
- You blend for more than two minutes. If you’re still seeing whole pieces after a couple of minutes, no amount of pulsing will fix it. The motor is simply outmatched.
Each of these red flags points toward the same conclusion. Switch to a countertop blender for the heavy stuff and keep the stick blender for the soft shakes. If your jar blender has a loose blade or performs unevenly, fixing that might be simpler than replacing the whole unit.
Our guide on troubleshooting a poorly blending jar walks through the most common causes.
Immersion vs Countertop vs Personal Blender for Smoothies: The Honest Comparison
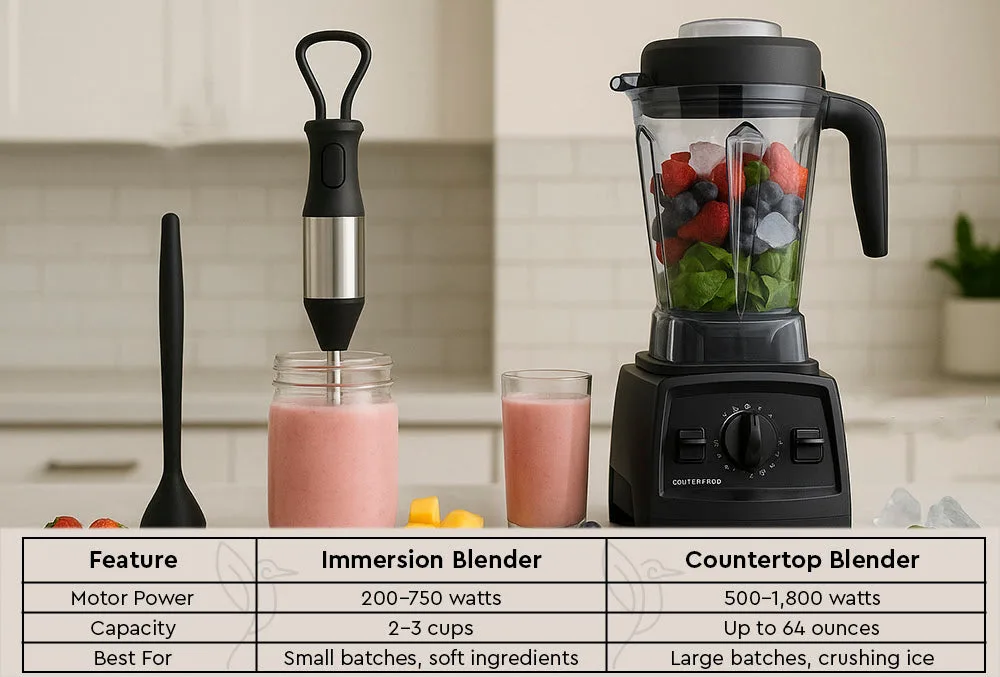
Image source: Bing (Web (fair-use with source credit))
Each blender type solves a different problem. Your choice should match the smoothie you make most often, not the one you wish you made.
| Feature | Immersion Blender | Countertop Blender | Personal Blender |
|---|---|---|---|
| Best batch size | 1 to 2 cups | 2 to 8 cups | 1 to 2 cups |
| Frozen fruit handling | Poor to fair | Excellent | Good |
| Leafy greens | Leaves fibrous bits | Fully smooth | Mostly smooth |
| Cleanup time | Under 30 seconds | Several minutes | Under a minute |
| Counter space needed | Almost none | Large footprint | Small footprint |
| Typical price range | $15 to $100 | $60 to $400 | $30 to $120 |
The countertop blender is the clear winner for frozen fruit, green smoothies, and big batches. The personal blender wins for single-serve frozen shakes with a small footprint. The immersion blender only wins for soft, single-serve shakes where cleanup speed matters most.
That narrower winning zone is why the honest answer to the original question is “sometimes.” It isn’t a weakness. It’s just a tool with a specific job.
7 Common Mistakes That Make Immersion-Blender Smoothies Clumpy or Thin
Most bad results come from predictable errors. Avoid these and your smoothies improve immediately.
- Adding liquid last. The blade can’t pull dry ingredients down without a fluid base. Always pour the liquid in first.
- Holding the trigger down nonstop. Continuous running creates heat and a thin texture. Use short pulses instead.
- Overfilling the beaker. More than two-thirds full leaves no room for the mixture to move. It just spins in place and stalls.
- Using the wrong container. A wide glass lets everything slosh sideways. Use the tall beaker that came with the unit so the blade grips the ingredients.
- Dropping in whole frozen pieces. Large chunks jam the blade. Cut them into half-inch pieces or thaw them briefly.
- Ignoring the sides. Dry powder and fruit stick to the walls. Stop and scrape with a spatula at least once.
- Running the motor past its limit. If it overheats, you lose the appliance entirely. Respect the one-minute duty cycle.
These mistakes all share a root cause. The user expects the immersion blender to behave like a full-size jar blender. It doesn’t, and adjusting your expectations changes the outcome.
Quick Fixes and Pro Tips for Thicker, Smoother Results
You don’t need a new blender to get better results. These tweaks close most of the gap.
- Use ice-cold liquid. Cold milk or chilled juice keeps the smoothie thick and reduces heat buildup during blending.
- Add a frozen banana, but slice it first. Let it sit for five minutes on the counter, then cut it into rounds. It adds creaminess without stalling the blade.
- Blend greens into the liquid before anything else. Two quick pulses break the leaves down enough to mix smoothly with the rest.
- Add a spoonful of yogurt or nut butter. These fats create body and help the blade grip the mixture instead of spinning through it.
- Pulse, rest, scrape, repeat. The rhythm matters more than the run time. Short bursts give the blade a fresh grip each time.
- Use the included beaker. It’s sized to the blade geometry. A different cup changes the blending dynamics.
One final tip worth keeping: if your smoothie still turns out thin, check the moisture content of your fruit. Very ripe fruit releases more water. That single variable affects texture more than any motor spec.
Combine these fixes with a soft ingredient list and the immersion blender gets surprisingly close to the full-size machines. For most single-serve, soft-fruit shakes, it’s genuinely enough.
There’s one more layer worth a quick mention. If you ever need a tool that does double duty chopping, a food processor and that same jar blender might overlap more than you think. We took a closer look at that relationship in our comparison of blenders versus food processors, which helps you decide which appliance deserves the counter space.
Cleanup and Maintenance: Why This Is the Big Advantage
Here’s where the immersion blender genuinely beats every other option. Rinse the shaft under warm running water, add a drop of dish soap, and pulse it in a cup of water for ten seconds. That’s the entire cleanup.
The blade head is fully exposed, so nothing hides in corners or under a heavy base.
Check your specific model for a detachable shaft. Most mid-range and premium units let you pop the wand off the motor body and wash both parts in the sink, or place the shaft on the top rack of the dishwasher. The motor housing itself only needs a damp wipe.
Never submerge it, since that pushes water into the motor and risks an electrical short. Storing the unit takes a drawer or a wall bracket. That compact footprint is a major reason apartments and dorms favor the stick blender.
The one maintenance habit that actually matters is drying the shaft before storage. Leftover water around the blade collar can rust the spring mechanism over time. A quick shake and a thirty-second air dry prevents that entirely.
The Verdict: Keep the Stick Blender for These Smoothie Types, Outsource These
The honest bottom line is simple. Use the immersion blender for soft, single-serving smoothies made with banana, yogurt, milk, and protein powder. It blends those in about a minute, leaves a single cup to rinse, and takes up almost no space.
It’s also the right tool for meal-prep bases and any smoothie you’re making alongside soup night.
Outsource anything frozen-heavy, leafy-green-dense, or larger than two cups. For those, a countertop blender or a personal cup blender works faster and delivers a smoother texture without the motor strain. You don’t need to own both.
But if you already own a full-size blender, use it for the heavy loads, and let the stick blender handle the quick single-serve afternoon shakes. That division of labor keeps both appliances within their sweet spots.
Frequently Asked Questions
Can an immersion blender crush ice for a smoothie?
Most models cannot crush ice well. A standard 200-watt to 400-watt immersion blender will stall on whole ice cubes. A high-wattage model with a four-prong blade can handle crushed ice in short pulses, but it still produces a slushier texture than a full-size blender.
For icy smoothies, a countertop blender is the reliable choice.
Is an immersion blender the same as a hand blender?
Yes, they are the same tool. “Immersion blender” and “hand blender” both refer to the handheld motor unit with a blade shaft that you lower directly into a container. The terms are interchangeable in product listings and recipes.
If you’re comparing the two names, they describe identical appliance categories.
Why does my smoothie turn out thin with an immersion blender?
Thin smoothies usually come from running the motor too long. Continuous blending heats the mixture and breaks down fiber, which loosens the texture. Use short pulses instead of holding the trigger down.
Thick fruit like banana and an ice-cold liquid base also help keep the texture dense.
Can I use an immersion blender in a regular glass cup?
It’s risky. A narrow glass can shatter if the blade head touches the side while running. Use the included beaker or a wide-mouth jar made of sturdy material.
If you must use a glass, pick one with thick walls and keep the blade centered. The safest choice is always the container that came with the blender.
How long should I blend a smoothie with an immersion blender?
A soft smoothie typically needs sixty to ninety seconds of pulsing. That includes the short rest breaks between pulses. If you’re still seeing chunks after two minutes, the motor is struggling or the ingredients are too hard.
Stop, adjust the ingredient sizes, and consider a more powerful blender for that recipe.