Skip to content
Can You Make Bread Without A Stand Mixer?
The image of a stand mixer, its dough hook spinning a smooth ball of dough, is everywhere in baking videos and cookbooks. For many, it seems like making bread at home must start with this powerful kitchen tool. But what if you don’t own a stand mixer?
Are you left with flat, disappointing loaves? Not at all. In fact, home bakers have made delicious bread for centuries—long before electric mixers existed. Making bread without a stand mixer is not only possible; it can be satisfying and even produce better results for certain recipes.
Let’s explore how you can bake excellent bread with only your hands, simple tools, and a bit of patience. We’ll cover manual kneading, common challenges, recipe adaptations, and practical tips. By the end, you’ll see that a stand mixer is a convenience, not a necessity.
Your own two hands are powerful tools for bread making.
Why People Think Stand Mixers Are Essential
Stand mixers are popular for a reason. They make mixing and kneading dough faster and less tiring. For dense or enriched doughs—like brioche or bagels—a mixer can help you achieve a perfectly smooth texture without breaking a sweat. Many modern recipes are written with a mixer in mind, which makes it seem like you must own one for success.
But this belief overlooks a few key facts:
- Bread existed long before mixers. Most traditional breads are made entirely by hand.
- Many doughs benefit from gentle handling. Some styles, like ciabatta or rustic French bread, develop better textures with less aggressive mixing.
- Kneading by hand gives you control. You can feel the dough change, which helps you learn when it’s ready.
In short, a stand mixer is convenient, but not required.
The Science Of Kneading: What Really Matters
To understand why hand kneading works, it helps to know what kneading does. When you mix flour and water, proteins in the flour (mainly glutenin and gliadin) combine to form gluten. Gluten is a stretchy network that traps gas, lets dough rise, and creates a chewy texture.
Kneading helps align and stretch these proteins, making the dough elastic and smooth. However, you don’t always need brute force. Time, water content, and gentle folding can also develop gluten. That’s why some breads, like no-knead bread, rely on long fermentation instead of heavy kneading.

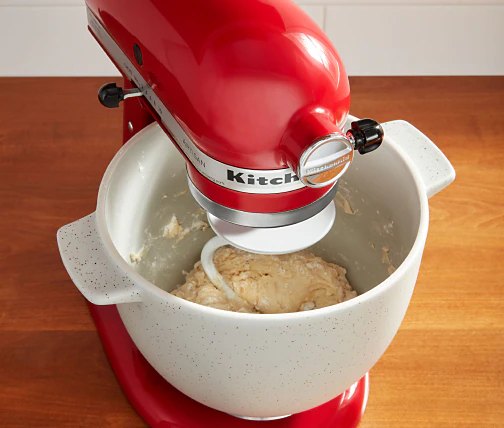
Credit: www.kitchenaid.com
Manual Bread Making Methods
You don’t need expensive gadgets to make good bread. Here are the main ways to mix and develop dough without a stand mixer:
1. Traditional Hand Kneading
This method is classic and effective for most yeast breads.
- Mix the dough in a bowl with a spoon until it comes together.
- Turn it onto a floured surface.
- Push and fold the dough with the heels of your hands, rotating as you go.
- Continue for 8-12 minutes, or until the dough is smooth, elastic, and springs back when poked.
You’ll feel the dough change texture as you knead. If it’s sticky, add flour sparingly.
2. Stretch-and-fold Technique
Some doughs are too wet or sticky to knead in the traditional way. The stretch-and-fold method works well for these.
- Mix the dough in a bowl until ingredients are combined.
- Let it rest for 20-30 minutes (autolyse).
- Reach under the dough, stretch it up, then fold it over itself. Turn the bowl and repeat 3-4 times.
- Let rest, then repeat the stretch-and-fold every 20-30 minutes, usually 3-4 times.
This gentle process slowly builds gluten and traps air, producing an open crumb.
3. No-knead Method
This method became famous through Jim Lahey’s bread recipes. Here, time does most of the work.
- Mix flour, water, yeast, and salt until just combined.
- Let the dough rest for 12-18 hours at room temperature.
- Shape, let rise, and bake.
The long fermentation creates gluten, so you don’t need to knead at all. The result is a rustic, flavorful loaf with a chewy crust.
Step-by-step: Making Bread By Hand
Let’s walk through a basic hand-kneaded bread recipe. This approach works for classic white or whole wheat bread.
Ingredients
- 4 cups (500g) bread flour (plus more for dusting)
- 1 1/2 cups (355ml) warm water (about 100°F/38°C)
- 2 teaspoons (7g) instant yeast
- 2 teaspoons (10g) salt
- 1 tablespoon (13g) sugar (optional, for faster rise)
- 2 tablespoons (28g) butter or oil (optional, for softer crumb)
Instructions
- Mix the dough: In a large bowl, combine flour, yeast, salt, and sugar. Add water and butter/oil. Stir with a wooden spoon until a shaggy dough forms.
- Rest (autolyse): Let the dough sit for 15-20 minutes. This helps hydrate the flour and starts gluten formation.
- Knead by hand: Turn the dough onto a lightly floured surface. Push down and forward with the heel of your hand, fold the dough back, and repeat. Knead for about 10 minutes. The dough should become smooth and elastic.
- First rise: Place the dough in a greased bowl, cover with plastic wrap or a towel, and let rise until doubled (1-2 hours depending on room temperature).
- Shape and second rise: Punch down the dough, shape into a loaf, and place in a greased pan or on a baking sheet. Cover and let rise until nearly doubled (about 45 minutes).
- Bake: Bake in a preheated oven at 375°F (190°C) for 30-35 minutes. The bread should sound hollow when tapped.
- Cool: Remove from pan and cool on a rack for at least 30 minutes before slicing.
Tips For Success
- If the dough is too sticky, add flour one tablespoon at a time.
- If too dry, add water a little at a time.
- Use a bench scraper to help handle sticky dough.
Comparing Hand Kneading Vs. Stand Mixer
How does hand kneading compare to using a mixer? Here’s a quick overview.
| Aspect | Hand Kneading | Stand Mixer |
|---|---|---|
| Effort | Requires physical work | Mostly hands-off |
| Time | 8-12 minutes kneading | 5-8 minutes kneading |
| Control | Feel dough develop | Easy to over-knead if not careful |
| Equipment | Just a bowl and hands | Requires mixer and attachments |
| Cleanup | Minimal | More parts to clean |
While a mixer is faster, hand kneading gives you direct feedback. You’ll learn to recognize the “feel” of ready dough, which is a valuable skill.
When A Stand Mixer Is Helpful (and When It Isn’t)
A stand mixer truly shines for certain bread types:
- Very wet doughs (like focaccia or ciabatta) can be messy to knead by hand, but stretch-and-fold works well.
- Enriched doughs with lots of butter, eggs, or sugar (like brioche or challah) are sticky and tiring to knead for long periods.
- Large batches are easier to mix in a powerful stand mixer.
But for most basic breads—baguettes, sandwich loaves, rustic boules—hand kneading works perfectly. Some artisan bakers even prefer hand mixing because it’s gentler and gives them more control.
Common Mistakes When Making Bread Without A Stand Mixer
Baking bread by hand is simple, but there are pitfalls. Watch out for these common mistakes:
1. Adding Too Much Flour
Beginners often add extra flour to stop sticking. This can make the bread dense and dry. It’s normal for dough to be a little sticky at first.
2. Under-kneading
If you don’t knead enough, the dough won’t develop enough gluten. The bread will be flat and crumbly.
3. Over-kneading
Rare with hand kneading, but if you work the dough for too long, it can become tough.
4. Not Letting Dough Rest
Resting (autolyse) helps gluten start forming and makes kneading easier.
5. Impatience With Rising Times
Yeast needs time to work. Let the dough double in size during each rise for the best texture.
6. Cutting The Bread Too Soon
Freshly baked bread smells amazing, but slicing while hot can ruin the crumb. Let it cool at least 30 minutes.
No-knead Bread: The Easiest Way Without A Stand Mixer
If kneading sounds intimidating or tiring, try no-knead bread. This method uses time and high hydration to create gluten.
Simple No-knead Bread Recipe
Ingredients
- 3 cups (375g) all-purpose or bread flour
- 1 1/2 cups (355ml) cool water
- 1/4 teaspoon (1g) instant yeast
- 1 1/4 teaspoons (8g) salt
Instructions
- Mix all ingredients in a large bowl with a spoon until just combined.
- Cover and let rise 12-18 hours at room temperature.
- Turn out onto a floured surface. Shape into a ball.
- Let rise 1-2 hours, covered with a towel.
- Preheat oven to 450°F (230°C) with a Dutch oven inside.
- Place dough in hot pot, cover, and bake for 30 minutes. Remove lid and bake 10-15 minutes more.
- Cool before slicing.
This bread has a crackling crust and chewy, open crumb. No kneading, no mixer, just patience.
How To Tell When Dough Is Ready
Judging dough readiness is easier by hand. Here’s what to look for:
- Smooth and elastic: The dough should stretch without tearing.
- Windowpane test: Take a small piece of dough, stretch it gently. If it forms a thin, translucent “window,” gluten is developed.
- Springs back: Press with a finger. If the dough bounces back, it’s ready to rise.
Useful Tools For Hand-made Bread
You don’t need a mixer, but a few tools make things easier:
- Bench scraper: Helps lift and fold dough, especially sticky types.
- Mixing bowls: Large and sturdy, for mixing and rising.
- Kitchen scale: For accurate measuring, especially with flour.
- Proofing basket (banneton): Helps shape and support dough during the final rise.
- Dough whisk: A strong wire whisk designed for mixing sticky doughs.
These are optional, but they make hand bread making neater and more enjoyable.

Credit: 1840farm.com
Can You Make All Types Of Bread Without A Stand Mixer?
Most bread recipes can be adapted for manual mixing. Some types are easier than others:
| Bread Type | Hand Mixing Feasibility | Recommended Technique |
|---|---|---|
| Sandwich Loaf | Very easy | Traditional knead |
| Baguette | Easy | Stretch-and-fold |
| Ciabatta | Moderate | Stretch-and-fold |
| Brioche | Challenging | Traditional knead (patience needed) |
| No-knead Artisan | Very easy | No-knead method |
The only real exception is for very large batches or extremely enriched doughs, which are much easier in a mixer. For home bakers, this is rarely a dealbreaker.
Hand Kneading For Special Diets
If you bake gluten-free bread, you may not need kneading at all. Gluten-free doughs act more like batter than dough. Just mix until ingredients are combined, then pour into a pan. No stand mixer or hand kneading required.
For sourdough, hand mixing is common. Many artisan sourdough bakers use only stretch-and-fold and long fermentation to develop structure.
Credit: www.kitchenaid.com
The Experience: Why Some Prefer Hand Kneading
Many home bakers love the sensory experience of kneading bread by hand. The feel of dough changing under your fingers, the rhythm of kneading, and the satisfaction of shaping a loaf create a deeper connection to the process. It’s a chance to unplug and slow down.
For some, it’s even a form of stress relief.
Hand kneading also teaches you to “read” the dough. With practice, you’ll recognize when a dough needs more water, more flour, or more time to rise. These skills make you a better baker, with or without fancy equipment.
When You Might Want To Invest In A Stand Mixer
While you don’t need a stand mixer, there are times when it can make your life easier:
- You bake bread several times a week or in large batches.
- You have mobility or joint issues that make kneading difficult.
- You love making enriched doughs like cinnamon rolls, babka, or brioche often.
If you decide to buy one, look for a mixer with a strong motor (at least 325 watts), solid dough hook, and a large bowl. Be aware that mixers are heavy, take up space, and require cleaning.
For most people, though, a stand mixer is a nice-to-have, not a need-to-have.
Bread Making Without A Mixer: Insights For Beginners
Here are two non-obvious insights new bakers often miss:
- Dough is stickier than you expect: Many beginners add too much flour to avoid sticky hands. But slightly sticky dough bakes up lighter and airier. Use a bench scraper and wet your hands instead of adding flour.
- Rest is as important as kneading: Letting dough rest (for 15-20 minutes after mixing, and again between folds) lets gluten develop with less effort. Don’t rush the process—time does wonders.
Also, remember that weather and flour type affect dough. In humid climates, you might need more flour; in dry climates, less. Trust your senses and adjust as needed.
Essential Bread Baking Resources
For a deeper dive into bread science and techniques, check out the book “Flour Water Salt Yeast” by Ken Forkish, or visit King Arthur Baking Company. These resources offer clear guides for both hand and mixer methods.
Frequently Asked Questions
Can I Use A Hand Mixer With Dough Hooks Instead Of Kneading By Hand?
A hand mixer with dough hooks can help with small batches, but it’s less powerful than a stand mixer. For heavy doughs, it can strain the motor. For most breads, kneading by hand is easier and gives better control.
How Do I Know If I’ve Kneaded My Dough Enough?
Look for dough that’s smooth, elastic, and springs back when poked. Try the windowpane test: stretch a small piece—if it forms a thin, see-through “window,” it’s ready.
Why Is My Hand-kneaded Bread Dense?
Dense bread usually means not enough kneading, too much flour, or not enough rising time. Make sure to knead until elastic, measure flour by weight, and let the dough double in size during each rise.
Is It Okay If My Dough Is Sticky?
Yes, especially for artisan or no-knead breads. Slight stickiness is normal and helps create a lighter texture. Avoid adding too much flour—use a scraper and wet hands instead.
What’s The Easiest Bread To Make Without A Stand Mixer?
No-knead bread is the easiest. Just mix, let rise overnight, shape, and bake—no kneading or mixer required.
Baking bread without a stand mixer is not only possible, it’s enjoyable and educational. With patience, practice, and a little confidence, you can create bakery-quality loaves in your own kitchen—no fancy equipment needed.