Skip to content
Undermount sinks are a popular choice in modern kitchens and bathrooms. Their seamless look and easy-to-clean design make them appealing for homeowners and designers alike. However, while they offer many benefits, undermount sinks can also bring specific challenges that are not always obvious at first glance. If you’re considering installing one or are already dealing with issues, understanding common undermount sink problems can help you avoid headaches and make better decisions.
Why Undermount Sinks Are Different
Unlike drop-in sinks, undermount sinks are installed beneath the countertop. This creates a smooth transition from countertop to sink, making cleaning easier and giving a sleek look. However, this design also means that the sink relies heavily on secure installation and proper sealing.
Even small mistakes during installation or daily use can lead to problems later.
Most Frequent Undermount Sink Problems
Let’s explore the key issues that homeowners and professionals often encounter with undermount sinks, along with causes, examples, and practical guidance.
1. Sink Separation From The Countertop
One of the most common — and serious — problems is sink separation. Over time, the adhesive or mounting hardware holding the sink can fail. When this happens, the sink may drop slightly or, in extreme cases, fall completely.
Causes:
- Poor-quality adhesive or improper application during installation
- Heavy pots or leaning on the sink edge
- Water damage weakening the seal
What to watch for: If you notice a gap forming between the countertop and sink, or if the sink feels loose, this is a warning sign. Ignoring early separation can lead to costly repairs or even damage to your cabinets.
Non-obvious insight: Many people think that granite or quartz countertops will always hold the sink securely. In reality, the stone can crack if the sink pulls away, especially if the sink is full of dishes or water at the time.
2. Water Leaks And Mold Growth
Water leaks are a silent but damaging issue. Because undermount sinks are sealed underneath the counter, any water that escapes can go unnoticed for a long time. This moisture can lead to mold growth and even rot the cabinet base.
Causes:
- Sealant wearing out or cracking
- Not wiping spills promptly, allowing water to seep into the seam
- Incorrect sink alignment creating small gaps
Example: You might see swelling or softening of the cabinet wood below the sink, or notice a musty smell. By the time mold appears on the surface, there could already be significant hidden damage.
Practical tip: Regularly inspect the seam and re-seal it every few years, even if leaks aren’t visible.
3. Cracks Or Chips In The Countertop
The cutout for an undermount sink reduces the strength of the countertop, especially around the edges. Cracks or chips can appear if the area is not properly supported or if heavy objects are dropped near the sink.
Factors:
- Thin or low-quality stone
- Inadequate support brackets
- Impact from pots or appliances
Data point: Quartz countertops are less prone to chipping than natural granite, but both need extra support around the sink area.
Non-obvious insight: Small chips can quickly become bigger cracks if not addressed. Even a minor chip should be filled to prevent water infiltration.
4. Staining And Discoloration
The seam between the sink and the countertop is a common spot for staining. Over time, food particles, coffee, and cleaning chemicals can discolor the joint or the adhesive itself.
Causes:
- Using harsh cleaners
- Not cleaning the seam regularly
- Sealant that is not stain-resistant
Example: White or light-colored countertops often show yellow or brown lines where the sink joins the stone.
Tip: Consider using a color-matched, stain-resistant silicone during installation for better long-term appearance.
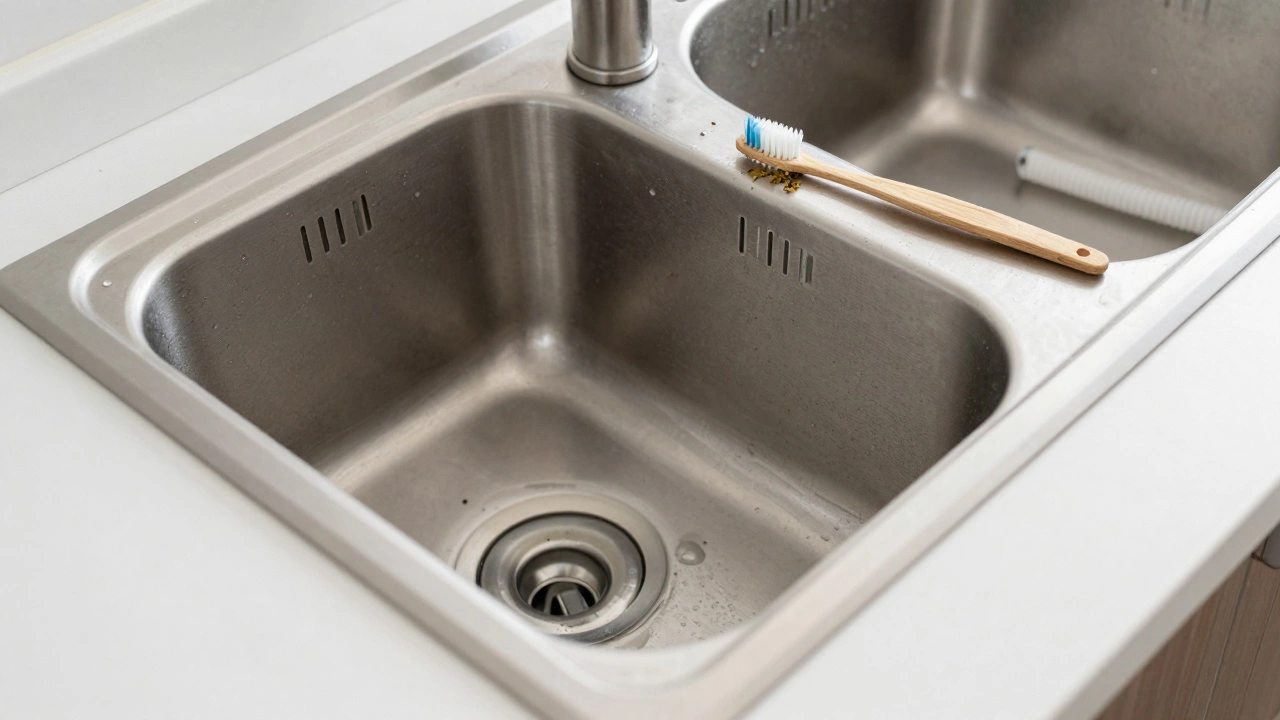
5. Difficulty Cleaning The Seam
Many people choose undermount sinks for easier cleaning, but the seam can actually trap debris. Cleaning the seam is often more difficult than expected because crumbs and grime collect in the tiny gap.
Why it happens:
- The seam is slightly below the countertop surface
- Sealant can peel or wear off, creating a dirt trap
Practical advice: Use a toothbrush and mild cleaner to scrub the seam once a week. This prevents build-up and keeps the area hygienic.
6. Rust Or Corrosion On Mounting Clips
Undermount sinks are typically held in place by mounting clips under the counter. If these clips are made from low-quality metal or are exposed to moisture, they can rust or corrode.
Consequences:
- Reduced holding strength
- Difficulty removing or repairing the sink later
Example: In older installations, rusted clips can snap, causing sudden sink separation.
Tip: Always request stainless steel mounting hardware when installing or replacing your sink.
7. Sink Sagging Over Time
A less obvious but important issue is sink sagging. Even if the sink doesn’t separate completely, it can slowly drop over time, creating a visible gap or uneven edge.
Causes:
- Heavy use, especially with large, deep sinks
- Weak or improperly spaced brackets
- Water-saturated wood supports
Sign to notice: Water pooling at the edge of the sink, or the sink looking lower on one side.
Solution: Professional installers often use a combination of adhesive and mechanical supports. Homeowners should check under the sink annually to ensure supports are still solid.
8. Difficult Repairs And Replacement
Repairing or replacing an undermount sink is more complicated than for drop-in models. The sink is glued and bolted in place, often with the countertop installed over it.
Challenges:
- Risk of breaking the countertop during removal
- Hard-to-reach mounting hardware
- Matching the old sink cutout with a new sink
Data: According to the National Kitchen & Bath Association, undermount sink replacements can cost 30-50% more than drop-in replacements due to these challenges.
Tip: If you’re remodeling, keep the sink cutout template. It’s much easier to find a replacement that fits exactly.
9. Silicone Sealant Failure
Silicone sealant is critical for keeping water out of the gap. Over time, even high-quality silicone can break down due to heat, cleaning chemicals, or age.
Signs of failure:
- Sealant turns dark, peels, or cracks
- Water seeps under the sink
- Unpleasant smells develop
Non-obvious insight: Bleach and other harsh cleaners can speed up sealant breakdown. Use mild soap or specialty cleaners designed for kitchen surfaces.
10. Noise Issues
Undermount sinks, especially those made from stainless steel, can be noisy when water hits the bowl or when items are dropped in.
Causes:
- Thin-gauge steel
- Lack of sound-dampening pads
Solution: Many modern sinks include sound-absorbing coatings or pads underneath. If yours does not, adhesive pads can be added later to reduce noise.
11. Improper Slope Leading To Water Pooling
If the sink is not installed with the correct slope, water can pool around the drain or at the seam, making cleaning harder and increasing the risk of leaks.
What to check:
- Water should flow freely toward the drain when you rinse the sink
- Pooled water can lead to mineral deposits or odor over time
Professional tip: Always check the slope with a marble or small ball after installation. It should roll naturally toward the drain.
12. Incompatibility With Countertop Material
Not all countertops are ideal for undermount installation. Laminate countertops, for example, don’t provide a waterproof edge and can swell if exposed to water.
Best materials:
- Granite
- Quartz
- Solid surface (like Corian)
Data: According to the Marble Institute of America, natural stone counters must be at least 1.25 inches thick to support undermount sinks safely.
13. Cabinet Damage From Hidden Leaks
Leaks from undermount sinks often go unnoticed until they cause major cabinet damage. Water can soak into the wood base or sides, leading to warping, swelling, or mold.
Long-term risks:
- Structural weakening
- Expensive cabinet replacement
Practical advice: Place a moisture alarm or sensor under your sink. These inexpensive devices can alert you early if a leak starts.
14. Sink Movement Causing Countertop Cracks
Even small movements of the sink can stress the countertop. Over time, this can create hairline cracks or even break off small pieces at the edge.
Why it matters: These cracks are not only unsightly but also allow more water to penetrate, worsening the problem.
Tip: After installation, avoid leaning or placing heavy objects directly on the sink edge.
15. Drain Alignment Issues
With undermount sinks, the drain must match perfectly with plumbing under the counter. Misaligned drains can cause slow draining, leaks, or require awkward plumbing adjustments.
How to avoid: Always dry-fit the sink and check drain alignment before final installation. If your sink has an offset drain, double-check that the plumbing is designed to fit.

Credit: crowleysgranite.com
Comparing Undermount Sinks And Drop-in Sinks
Here’s a quick side-by-side look at how undermount sinks compare with traditional drop-in models:
| Feature | Undermount Sink | Drop-In Sink |
|---|---|---|
| Installation Difficulty | High | Low |
| Risk of Leaks | Higher if not sealed well | Lower |
| Cleaning Ease | Seamless but seam needs attention | Lip collects grime |
| Repair/Replacement Cost | Higher | Lower |
Real-world Data: Most Reported Problems By Homeowners
A recent survey of homeowners who installed undermount sinks found the following to be the most reported issues:
| Problem | % of Homeowners Reporting |
|---|---|
| Leakage/Moisture | 38% |
| Sink Separation | 26% |
| Countertop Cracks | 18% |
| Staining | 9% |
| Other (Noise, Drain issues, etc.) | 9% |
Credit: www.houzersink.com
How To Prevent Common Problems
While undermount sinks have their challenges, most problems can be prevented with good installation and regular maintenance.
- Hire experienced installers. Cheap labor or DIY can lead to costly mistakes.
- Use high-quality materials. Stainless steel clips, strong adhesive, and stain-resistant sealant are worth the investment.
- Inspect annually. Check for leaks, loose edges, and discoloration.
- Clean gently. Avoid harsh chemicals and abrasive scrubbers near the seam.
- Address issues early. Small cracks or leaks can usually be fixed if caught soon.
Frequently Asked Questions
What Is The Best Sealant For Undermount Sinks?
100% silicone sealant is recommended for undermount sinks. It provides a waterproof, flexible bond that can handle daily use and temperature changes. Choose a kitchen- or bath-rated formula for best results.
How Long Should An Undermount Sink Installation Last?
With proper installation and maintenance, an undermount sink can last 15-20 years or more. However, regular inspection and resealing are important to ensure longevity.
Can I Install An Undermount Sink With Laminate Countertops?
It’s not recommended. Laminate countertops do not provide a waterproof edge, and moisture can quickly cause swelling and separation. Stone or solid surface materials are a better choice.
How Do I Know If My Undermount Sink Is Leaking?
Look for water stains, musty smells, or soft wood under the sink. You might also see gaps or dark lines at the seam. A moisture alarm under the cabinet can catch leaks early.
Are Undermount Sinks Harder To Repair Than Drop-in Sinks?
Yes, undermount sinks are more difficult and costly to repair or replace due to their installation method and the risk of damaging the countertop.
If you want to learn more about proper installation techniques and maintenance, the official National Kitchen & Bath Association offers professional guides and resources.
Choosing an undermount sink means enjoying a modern, clean look—but it also means being aware of potential pitfalls. By understanding these common undermount sink problems, you can protect your investment and enjoy a trouble-free kitchen or bath for years to come.
Credit: northamptonappliance-repairs.co.uk