Skip to content
Figuring out how long to cook large chicken breast in air fryer is trickier than most recipe cards suggest. A 10-ounce breast is not the same as a 5-ounce cutlet. Thickness, starting temperature, and your air fryer’s wattage all shift the answer.
The USDA sets 165°F as the safe internal temperature for poultry. The clock is only a rough guide. Carryover heat can push the center up another 3 to 5°F after you pull the basket.
A thick breast pulled at 160°F or so can finish safely as it rests.
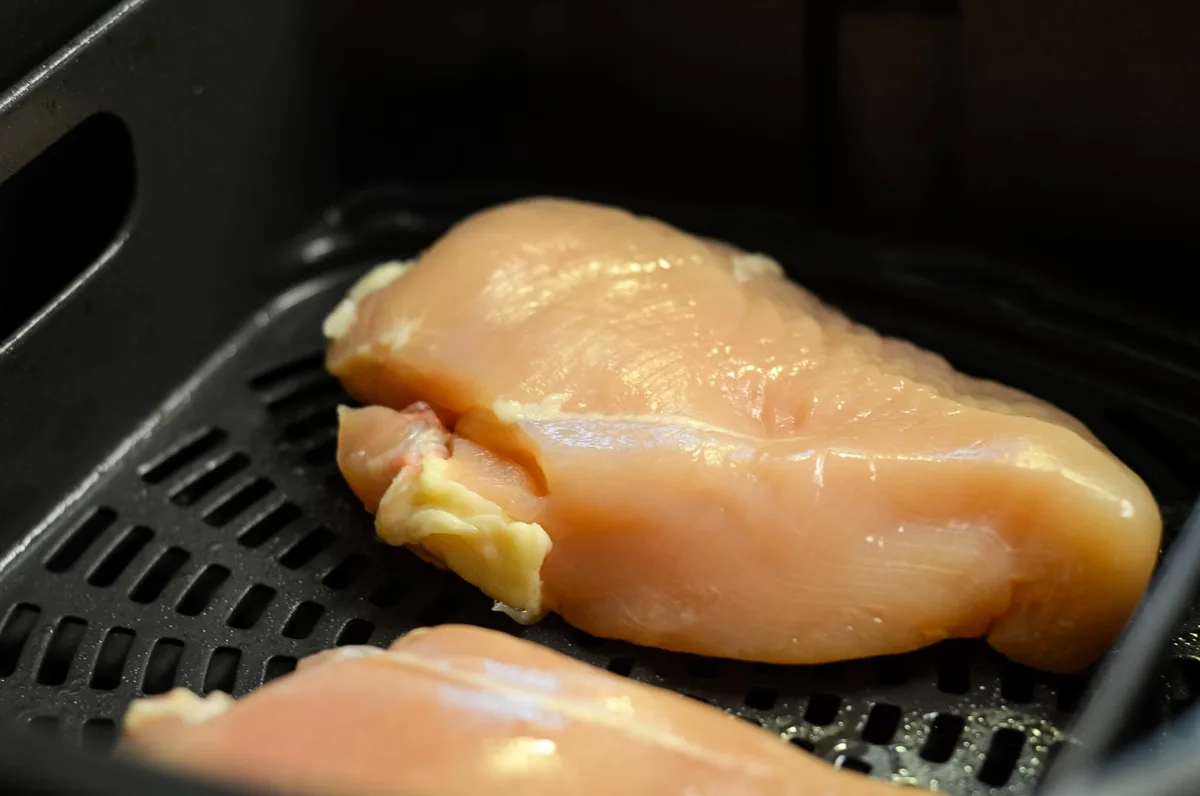
Image source: Bing (Web (fair-use with source credit))
Why a Large Chicken Breast Needs More Than a Single Timer Setting
A large chicken breast sitting in an air fryer gets cooked from the outside in. Hot air hits the surface first. The middle takes longer to catch up.
When a recipe says “cook 12 minutes,” it usually assumes a small, thin breast. A large one can weigh 7 to 10 ounces and measure well over an inch thick. That extra mass slows heat transfer.
If you set one timer and walk away, the outside can dry out before the center reaches 165°F. That leads to the rubbery, chalky texture people hate. The fix is simple.
Treat time as a range, and let temperature be the real decision maker.
The same lesson applies to other thick items. Air fryer times for bratwurst follow a similar logic because those links are dense and can also cook unevenly on the surface.
Quick Answer: Realistic Time and Temperature Ranges for Air Fryer Chicken Breast
How long to cook large chicken breast in air fryer? Set the air fryer to 375°F. Cook for 18 to 24 minutes.
Check the thickest part with an instant-read thermometer. Pull it at 165°F, then rest 5 minutes before slicing.
This quick answer works for fresh, boneless, skinless breasts around 1 to 1.5 inches thick. Frozen breasts need a lower starting temperature and more time, usually 25 to 35 minutes.
| Chicken Breast Condition | Air Fryer Temperature | Approximate Time |
|---|---|---|
| Fresh large breast, 1 to 1.5 inches thick | 375°F | 18 to 24 minutes |
| Frozen large breast | 350°F to 375°F | 25 to 35 minutes |
| Thinner breast, 1 inch or less | 375°F | 12 to 16 minutes |
The Real Doneness Signal: Internal Temperature, Not Clock Time
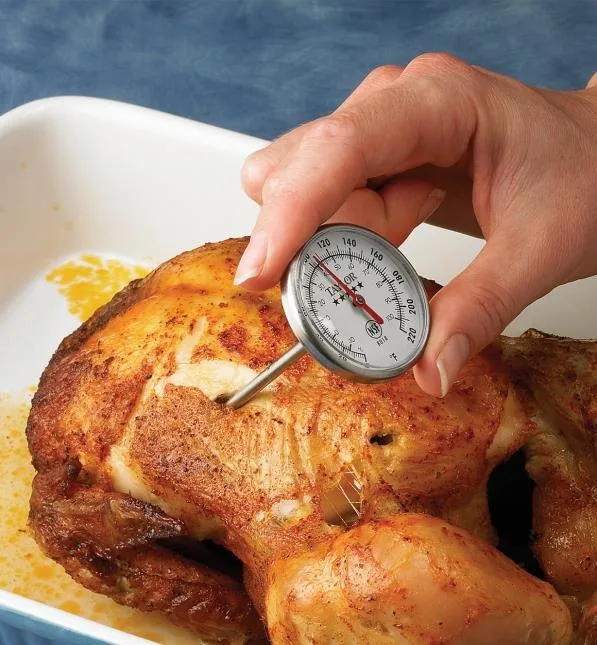
Image source: Web (Bing) / storage.googleapis.com (Web image (fair-use with source credit))
The only number that tells you chicken is safe is 165°F. That is the internal temperature set by the USDA Food Safety and Inspection Service. The clock can get you close, but it cannot see the center.
An instant-read thermometer takes the guesswork out. Insert the probe into the thickest part of the breast, away from bone or fat. You want the tip sitting in the middle of the meat.
Carryover heat matters here. Once you pull the breast from the hot air fryer, the outer layers are still transferring heat inward. A breast pulled at 160°F to 162°F will usually climb to 165°F during a five-minute rest.
This is why timing is always approximate. Air fryers with higher wattage push heat faster, and different basket shapes move air differently. Checking the temperature means you never serve undercooked poultry or overcook a dry, stringy slab.
Variables That Change Your Cook Time
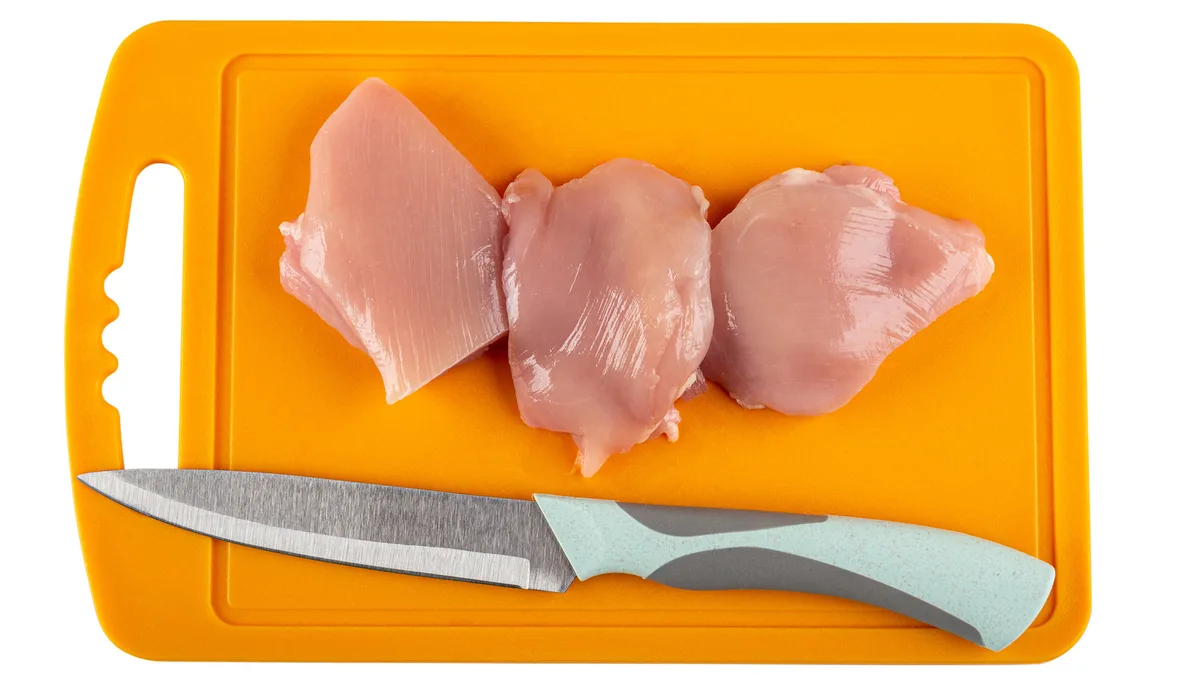
Image source: Web (Bing) / mashed.com (Web image (fair-use with source credit))
A large chicken breast is not a standard unit. You can buy two breasts, same weight, with very different shapes. The cook time shifts based on a handful of physical conditions.
Breast Thickness and Weight
The thickest part of the breast is the slowest to heat. A 1-inch breast behaves more like a cutlet. A 2-inch breast acts like a small roast.
If your breast is uneven, pound the thick end with a meat mallet or slice it in half horizontally. That evens out the cook time and prevents the thin side from turning leathery.
| Breast Thickness | Approximate Time at 375°F |
|---|---|
| 1/2 inch | 8 to 10 minutes |
| 1 inch | 12 to 16 minutes |
| 1.5 to 2 inches | 18 to 24 minutes |
Fresh vs Frozen Starting Temperature
Fresh chicken starts around 38°F to 40°F. Frozen chicken starts at 0°F or lower. That gap adds 8 to 12 minutes.
Frozen breasts also release more moisture as they thaw in the air fryer. Starting at a lower temperature, around 350°F, lets the center warm through without burning the outside. Then a higher-temperature finish crisps the surface.
Air Fryer Wattage and Basket Size
Air fryers vary widely. As of 2026, most US models fall between 1,400 and 1,800 watts. A 1700-watt machine runs hotter and faster than a 1400-watt unit.
If your basket is packed, rotate or cook in batches. The general rule is a single layer. If the air cannot move around each breast, the bottom stays pale and the top takes all the heat.
Fresh Large Chicken Breast: Step-by-Step Air Fryer Workflow
This is the core process for a fresh, boneless, skinless large chicken breast. Follow it once, and you can adapt the same logic to frozen chicken or smaller cuts.
Preheating, Drying, and Seasoning
Set the air fryer to 375°F. Let it preheat for 3 to 5 minutes. Most basket-style models need that warmup to get the walls hot.
Pat the chicken completely dry with a paper towel. Moisture on the surface steams instead of browning. Lightly coat the breast with a high smoke point oil, like avocado oil or light olive oil.
Season generously. Salt, pepper, garlic powder, and paprika work well. For a wetter finish, a quick brine or a 20-minute marinade adds moisture.
Cooking at 375°F and Flipping Halfway
Place the breast in the basket in a single layer. Leave a small gap around it for airflow. Do not stack or overlap pieces.
Cook for 9 to 12 minutes. Open the basket and flip the breast with tongs. This is where the question of whether flipping matters comes up often.
It does help with even browning.
Continue cooking for another 9 to 12 minutes. Start checking the internal temperature after the 18-minute mark for a thick breast. Use an instant-read thermometer in the thickest part.
If the surface looks too dark before the center reaches 165°F, lower the heat to 350°F and add a few minutes. A light coat of the right spray oil before cooking also helps browning without burning.
Resting and Carryover Cooking
Pull the chicken when the thermometer reads 160°F to 162°F. Transfer it to a clean plate or cutting board. Let it rest for 5 to 10 minutes.
The center temperature will continue to rise. Check it after resting. It should sit at or above 165°F.
Slice against the grain. The juices should stay inside instead of running all over the board. This is the difference between a juicy meal prep protein and a dry, stringy slab.
Frozen Large Chicken Breast: Step-by-Step Air Fryer Workflow
Frozen chicken breasts skip the thawing step entirely. You can cook them straight from the freezer. The trade-off is more time and a different heat strategy.
Start at 350°F. Preheat the air fryer for 3 minutes. Pat the frozen breast dry as much as possible.
The surface may have ice crystals. That extra moisture will steam, so start lower.
Place the frozen breast in the basket. Do not stack. Cook for 12-15 minutes to start the thaw-and-cook process.
Then flip it.
Increase the temperature to 375°F. Cook for another 13-20 minutes. The total time depends on thickness and your unit.
A large frozen breast usually needs 25-35 minutes start to finish.
Check the internal temperature at the 25-minute mark. Insert the thermometer into the thickest part. If it reads below 160°F, keep cooking in 5-minute checks.
When the center hits 160°F to 162°F, pull it. Let it rest 5-10 minutes. Carryover heat will finish the job.
If the surface looks too pale, give it a 2-minute high-heat burst at 400°F after it reaches 150°F in the center.
| Frozen Breast Size | Temperature Approach | Total Time |
|---|---|---|
| 1 inch thick | 350°F for 12 min, then 375°F | 25-28 minutes |
| 1.5 inches thick | 350°F for 15 min, then 375°F | 30-35 minutes |
| Uneven or very thick | 350°F start, finish at 375°F | Up to 40 minutes |
The lower starting temperature is crucial. It lets the center thaw while the outside warms gradually. A 400°F start would scorch the surface long before the middle is safe.
Basket-Style vs Oven-Style Air Fryer Adjustments
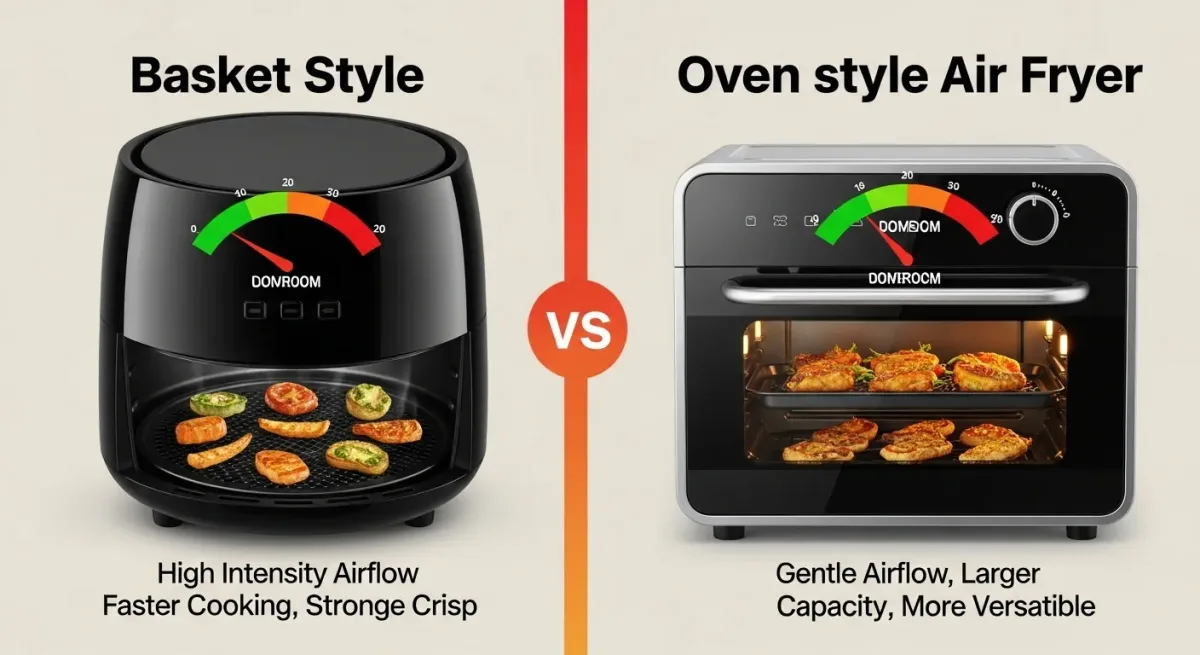
Image source: Bing (Web (fair-use with source credit))
Not all air fryers cook the same. The two main types are basket-style and oven-style. They move air differently, and that changes your cook time.
Basket-style units are compact. The heating element sits above the food, and a powerful fan pushes air down through a small chamber. That concentrated airflow browns food fast.
Times for basket-style are usually on the shorter end of a range.
Oven-style air fryers have more interior space. They often use a rear heating element and a fan that circulates air across multiple racks. That means gentler, more even heat.
But it also means a large breast can take 2 to 4 minutes longer than in a basket model.
If you have an oven-style air fryer, set the temperature 10°F higher. Then check the breast at the lower-middle end of the time range. For example, if a recipe says 18-24 minutes at 375°F, start checking at 19 minutes.
If the inside still reads under 150°F, add time in 3-minute bursts.
The rack position also matters. In an oven-style model, use the middle rack. It gets the most balanced airflow.
The top rack sits closer to the element and can overbrown.
For both types, the single-layer rule stays. Good airflow beats extra time. If you want to understand exactly how the air moves, it helps to know what the inside of an air fryer looks like.
That visual makes the airflow pattern easier to picture.
Common Mistakes That Dry Out the Outside or Leave the Center Raw
Dry chicken is rarely a mystery. It almost always comes from one of a few avoidable mistakes.
Crowding the basket. When breasts touch or overlap, hot air cannot reach all sides. The result is a pale, uneven cook. Use a single layer with a little space between pieces.
Skipping the preheat. A cold air fryer starts the chicken in a warming-up chamber. That adds time and can steam the surface. Preheat for 3-5 minutes.
Cooking at too high a temperature. A 400°F setting on a thick breast chars the outside before the center is safe. For large breasts, 375°F is more reliable.
Cutting without resting. Juices need time to settle. If you slice immediately, the moisture runs out onto the board. Rest for 5-10 minutes.
Relying on time alone. Every breast and basket is different. The only safe check is an instant-read thermometer. Pull at 160°F to 162°F and let carryover finish the job.
Blocking airflow with liners. Some people line the basket with foil to catch drips. That can trap moisture and change the air pattern. If you use foil, keep it away from the basket sides or use a perforated liner.
Forgetting to pat the chicken dry. Wet chicken steams instead of browning. Dry it with paper towels before oiling.
Fix these issues and the texture improves immediately. Juicy inside, browned outside.
Safety Rules for Raw Poultry, Minimum Temperatures, and Leftovers
Raw chicken can carry Salmonella and Campylobacter. The safe final temperature is 165°F. That is the USDA Food Safety and Inspection Service standard for all poultry.
Do not wash raw chicken. Splashing spreads bacteria around the kitchen. The CDC and UK Food Standards Agency both say to skip the rinse.
Keep the raw chicken away from ready-to-eat food. Use separate cutting boards and utensils. Wash your hands with warm soapy water after handling raw poultry.
The danger zone is between 40°F and 140°F. Do not leave cooked chicken out for more than 2 hours. In a warm kitchen, that window shrinks to 1 hour.
Refrigerate leftovers in shallow containers. They cool faster. Reheat leftover chicken to 165°F before serving.
When you check the internal temperature, use a clean thermometer. Do not let the probe touch bone, fat, or the basket surface. The tip needs to sit in the center of the meat.
Follow the same rules for air-fried chicken as you would for oven-baked. The appliance does not change food safety basics. The USDA Food Safety and Inspection Service publishes the full poultry guidance if you want the official numbers.
Decision Guide: Match Your Breast Thickness and Air Fryer to the Right Time
This is the part where all the earlier sections come together. If you know your starting condition and your machine, you can land on the right time without guessing.
If you have a fresh breast about 1 inch thick: Cook at 375°F for 12 to 16 minutes. Flip once. Check the center at 12 minutes.
If you have a fresh breast 1.5 to 2 inches thick: Cook at 375°F for 18 to 24 minutes. Flip once. Start checking at 18 minutes.
If the breast is uneven: Pound it to an even thickness, or butterfly it into two thinner pieces. That prevents the thin end from overcooking.
If the breast is frozen: Start at 350°F for 12-15 minutes. Flip. Finish at 375°F until the center reaches 160°F, usually 25-35 minutes total.
If you have an oven-style air fryer: Add 2 to 4 minutes to the fresh breast times. Set the temperature 10°F higher if your unit runs cool.
If your air fryer runs hot: Drop the temperature to 350°F and add a few minutes. A thermometer will tell you more than any timer.
If your basket is small: Cook in batches. Overcrowding extends time and gives uneven results.
If you want to reduce total cook time: Slice the breast in half horizontally before cooking. Two thinner pieces cook faster than one thick one. You can also shorten the overall cooking time by preheating properly and keeping the basket clear.
Always pull at 160°F to 162°F. Let carryover heat take it to 165°F. That is the single most reliable rule for every branch of this decision tree.
FAQs About Cooking Large Chicken Breast in an Air Fryer
How do I know when the chicken is done without a thermometer?
You can’t reliably know. Color and texture can deceive. Clear juices do not guarantee 165°F inside.
An instant-read thermometer is the only accurate way. A large breast cut open too early loses its juices. Spend a few dollars on a probe and never guess again.
Can I cook two large chicken breasts at the same time?
Yes, as long as they sit in a single layer. Leave a small gap between each breast for air to circulate. If the basket is too tight, cook in two batches.
Overcrowding steams the meat and adds uneven time. Check the thickest breast first when testing temperature.
Do I need to flip the chicken halfway through?
Flipping helps even browning. Air fryers push heat from above, so the top side gets more direct exposure. A quick flip at the halfway mark gives both sides a chance to brown.
It is not mandatory for safety, but it does improve texture.
Why does my air fryer chicken come out tough?
The breast probably overcooked. A large breast left even 3 minutes too long dries out fast. Use a thermometer and pull it at 160°F to 162°F.
Let carryover heat finish the job. Also pat the chicken dry. Wet surfaces steam instead of searing.
Can I use a marinade on the chicken before air frying?
Yes. A 20 to 30-minute marinade adds moisture and flavor. Pat the excess off before placing the breast in the basket.
Wet marinade can drip and smoke. If you want a saucier finish, brush extra on after the rest period.
What temperature is best for a thick chicken breast?
375°F is the sweet spot. It is hot enough to brown the outside but not so hot that the surface chars before the center cooks. For frozen breasts, start at 350°F first.
A 400°F setting works for thin cutlets, not large thick pieces.
Should I brine the chicken breast first?
A quick brine helps. Even 15 minutes in a saltwater solution pulls moisture into the meat. That extra moisture gives you a wider margin before the breast dries out.
It is optional, but it makes a noticeable difference with large, thick cuts.
Can I reheat cooked chicken breast in the air fryer?
Yes, and it stays crispier than a microwave. Set the air fryer to 350°F. Heat for 3 to 5 minutes.
Check the internal temperature reaches 165°F. A similar method works for bringing leftover wings back to life. Keep the time short to avoid drying the meat.