Skip to content
Cleaning a popcorn maker is more than just keeping your kitchen neat. A well-cleaned machine makes tastier popcorn, prevents burnt smells, and extends the life of your equipment. Whether you use a classic stovetop popper, an electric popcorn machine, or an air popper, knowing how to clean it the right way helps you avoid sticky oil buildup, smoke, and even fire risks. Many people skip this step, thinking popcorn makers are self-cleaning or “clean enough,” but a few minutes of care can make a big difference.
This guide takes you step by step through cleaning different types of popcorn makers. You’ll learn how often to clean, what tools you need, and common mistakes to avoid. Even if you have never cleaned your popcorn maker before, you’ll find everything you need here.
Cleaning your machine can turn a frustrating, disappointing snack into a fun and rewarding treat every time.
Why Cleaning Your Popcorn Maker Matters
Popcorn makers get greasy fast. Every batch leaves behind oil residue, bits of popcorn, and sometimes burnt sugar if you make kettle corn. If you don’t clean these, your popcorn can taste stale or bitter. Worse, leftover oil attracts bacteria and mold, which can make your popcorn unsafe.
A clean machine:
- Pops more kernels (less waste)
- Makes popcorn taste fresh
- Prevents mechanical problems
- Reduces fire risk
According to the National Fire Protection Association, cooking equipment is a leading cause of home fires, and oil buildup can spark flames. Cleaning is not just about taste—it’s about safety.
Many popcorn fans don’t realize that even a little leftover oil can break down over time, turning rancid and making every new batch taste off. Mold can also grow in hidden corners if moisture mixes with oil—something you can’t always see. Clean machines also pop more evenly, because heat spreads better across clean metal or plastic. The result: more popped corn, less waste.
Identifying Your Popcorn Maker Type
Before cleaning, know your machine. There are three main types:
1. Stovetop Popcorn Makers
Metal pots with a crank handle, used on the stove.
2. Electric Popcorn Machines
Countertop appliances, often with a heating plate and stirring arm.
3. Air Popcorn Poppers
Use hot air, no oil.
Here’s a quick comparison:
| Type | Uses Oil? | Cleaning Difficulty | Common Issues |
|---|---|---|---|
| Stovetop | Yes | Medium | Grease buildup |
| Electric | Yes | High | Sticky residue |
| Air Popper | No | Low | Burnt kernels |
Each type needs a slightly different approach. For example, stovetop models can hide oil under the gears, while air poppers mostly collect dust and burnt bits. Understanding your model helps you clean more effectively.
Credit: www.vevor.com
Essential Tools And Supplies
You don’t need fancy products. For most popcorn makers, you’ll need:
- Mild dish soap
- Warm water
- Non-abrasive sponge or soft cloth
- Small brush (like a toothbrush)
- Paper towels
- Vinegar (for tough stains)
- Drying rack or clean towel
Do not use steel wool or harsh chemicals. These can scratch the surface or ruin the flavor.
A soft-bristled brush is especially useful for cleaning small crevices where oil and crumbs hide. If you want to go the extra mile, a wooden skewer or cotton swab can help clean tiny corners, especially in crank handles or vent holes.
If your popcorn maker is older, check for food-safe lubricants for metal parts—they can keep moving parts working smoothly.
How Often Should You Clean?
Clean after every use for best results. If you pop daily, deep clean once a week. For occasional use, deep clean monthly. Here’s a frequency chart:
| Usage | Quick Clean | Deep Clean |
|---|---|---|
| Daily | Every use | Weekly |
| Weekly | Every use | Monthly |
| Occasional | Every use | Bi-monthly |
Skipping cleaning leads to flavor transfer and poor popping. Even if you only use your machine now and then, dust can collect on surfaces, and that can affect both taste and hygiene. If you make sweet popcorns like caramel corn, you’ll need to clean even more often, since sugar burns easily and sticks to surfaces.
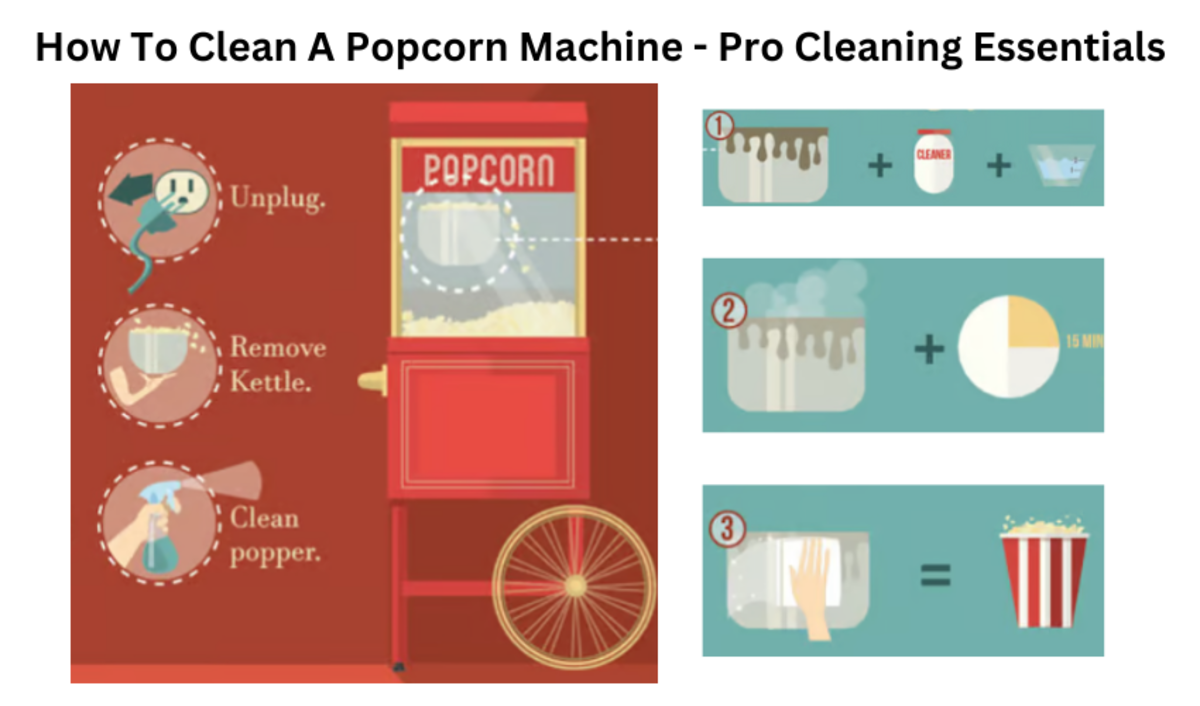
Credit: www.youtube.com
Step-by-step Cleaning For Stovetop Popcorn Makers
Stovetop poppers are popular for their flavor but can get very greasy.
1. Let It Cool
Never touch a hot popcorn maker. Wait until it is room temperature before cleaning. Even a slightly warm metal part can burn your skin, so give it at least 15–20 minutes.
2. Disassemble
Remove the lid, crank handle, and any loose parts. Some models have a small nut or screw holding the crank—unscrew gently and keep all parts together to avoid losing them.
3. Wash Each Part
- Use warm, soapy water
- Clean inside and outside of the pot
- Use a soft sponge—scrub away oil, but don’t scratch
Pay special attention to the rim, where oil can drip and dry. Soak stubborn spots for a few minutes before scrubbing.
4. Handle Stuck-on Oil
If oil is stubborn, mix equal parts vinegar and water. Let sit for 5 minutes, then scrub gently.
For older buildup, try heating the pot slightly (not hot!) Before applying vinegar—warmth softens old grease.
5. Rinse And Dry
Rinse thoroughly—soap residue can spoil popcorn taste. Dry completely to prevent rust.
Non-obvious tip: Pay attention to the crank mechanism. Tiny bits of popcorn can jam the gears. Lubricate with a drop of food-safe oil if it feels stiff.
If your popper has wooden handles, avoid soaking them in water. Wipe with a damp cloth and dry right away to prevent cracking.
Cleaning Electric Popcorn Machines
Electric popcorn makers need careful cleaning, especially around the heating plate.
1. Unplug And Cool Down
Always unplug before cleaning. Wait until all parts are cool.
2. Disassemble Removable Parts
Take out the tray, stirring arm, and bowl. Never submerge electrical parts.
3. Clean Removable Parts
- Wash with warm, soapy water
- Use a soft brush for corners
If the stirring arm or tray has stuck-on oil, soak them for 10–15 minutes. Rinse well to remove all soap.
4. Clean Heating Plate
Wipe with a damp cloth. If sticky, use a vinegar solution. Avoid too much water—moisture can damage electronics.
You can also use a silicone spatula to gently scrape off any stuck bits from the plate.
5. Wipe Exterior
Use a soft cloth. Dust and oil often gather here. A microfiber cloth works well, especially on shiny surfaces.
6. Dry Thoroughly
Moisture can cause electric shorts. Let parts air dry before reassembly.
Non-obvious tip: If your machine has a nonstick surface, don’t use baking soda—it can scratch.
If you notice any odd noises or slow stirring, check for buildup under the stirring arm. Sometimes a quick wipe solves mechanical problems.

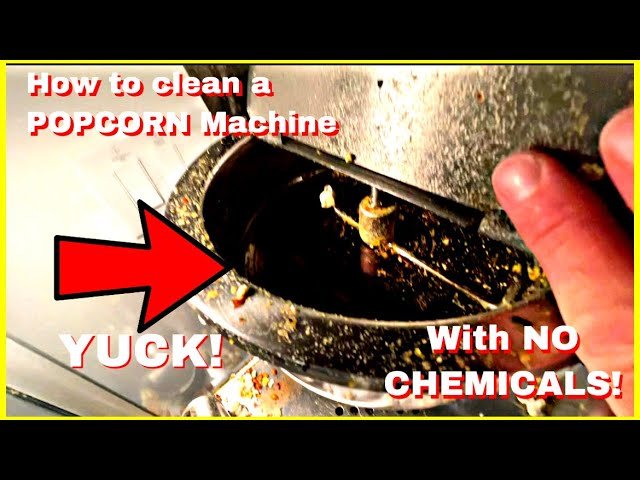
Credit: www.wikihow.com
Cleaning Air Popcorn Poppers
Air poppers are simple but still need care.
1. Unplug And Cool
Safety first—always unplug.
2. Clean Popper Chamber
- Wipe with a dry cloth to remove loose kernels
- Use a damp cloth for the chamber
Don’t pour water directly inside. Just a damp cloth is enough.
3. Clean Chute And Bowl
Most chutes are plastic. Wash with mild soap and water.
If the chute is stained, a little vinegar can help. Rinse well to avoid leaving a vinegar taste.
4. Brush Away Burnt Bits
Sometimes burnt kernels stick inside. Use a small brush or toothpick.
Don’t use metal tools—they can scratch or damage the popper.
5. Dry Completely
Plastic parts can trap moisture—dry well to prevent mold.
Experience-based tip: Many people forget the air vents. Dust here affects performance.
Run a dry brush or a can of compressed air around the vents every few uses to keep airflow strong.
Handling Tough Stains And Odors
Sometimes, popcorn makers smell burnt or have sticky stains. Here’s what you can do:
- Vinegar wipe: Removes odors and sticky residue
- Baking soda paste: Mix baking soda and water, rub gently, rinse
- Lemon juice: Neutralizes strong smells
If smell persists, leave the machine open overnight to air out. For really tough odors, leave a small bowl of baking soda nearby to absorb smells.
For sugar burns, try soaking the spot with a damp paper towel for 10 minutes before cleaning. This softens the sugar, making it easier to wipe away.
Common Mistakes To Avoid
1. Using Abrasive Cleaners
Scratches surfaces, ruins flavor.
2. Not Drying Fully
Causes rust or mold.
3. Ignoring Small Parts
Crank gears and air vents collect debris.
4. Submerging Electrical Parts
Destroys electronics.
5. Rushing The Process
Skipping steps leads to build-up and poor performance.
Another common mistake: forgetting to check under the lid or inside handles for trapped oil. These hidden spots can develop mold or make popcorn taste “off.”
Practical Tips For Longer Life
- Store your popcorn maker in a dry place
- Oil your stovetop popper’s moving parts lightly (use food-safe oil)
- Check for loose screws or broken parts monthly
- Use only recommended cleaning products (check your manual)
A popcorn maker can last 5–10 years with proper care. Without cleaning, you may need to replace it after only 2–3 years.
If you notice any strange noises or uneven heating, inspect for buildup and clean again. Sometimes regular maintenance can save you from buying a new machine.
Comparing Popcorn Maker Cleaning Time
How long does it take to clean each type? Here’s a quick look:
| Type | Quick Clean (min) | Deep Clean (min) | Special Steps |
|---|---|---|---|
| Stovetop | 5 | 15 | Crank gears |
| Electric | 7 | 20 | Heating plate |
| Air Popper | 3 | 8 | Air vents |
Most people underestimate cleaning time for electric models. Deep cleaning takes longer, but it’s worth it for the taste and safety. Setting aside a few extra minutes can prevent problems later.
Safety Reminders
- Always unplug before cleaning
- Never use water on electrical parts
- Dry everything before reassembly
- Clean oil spills quickly—oil can cause slips
For extra safety, check the cord and plug for damage each time you clean. A frayed cord can be a fire hazard.
Real-life Example: Cleaning Routine
Mary, a popcorn lover, uses her electric popcorn maker twice a week. She noticed burnt smells after a few months. After following the steps above, especially cleaning the heating plate and stirring arm, her popcorn tasted fresh again. She now spends 10 minutes cleaning after each use and 20 minutes for deep cleaning every month.
She also wipes the exterior with a microfiber cloth every week, which keeps her machine looking new. Mary recommends setting a reminder on your phone so cleaning becomes a habit, not a chore.
Where To Find More Guidance
If you want more details or troubleshooting tips, check your popcorn maker’s manual or visit FoodSafety.gov for safe cleaning practices.
You can also find videos from manufacturers online. Watching someone clean the same model you own can make the process easier.
Frequently Asked Questions
How Do I Clean Burnt Popcorn Off My Machine?
Let the machine cool. Scrape burnt bits gently with a small brush or toothpick. For stubborn stains, use a baking soda paste and rinse well.
If the stain remains, repeat the process or soak with vinegar for 10 minutes before trying again.
Can I Put Popcorn Maker Parts In The Dishwasher?
Most removable parts are dishwasher safe. Check your manual first—electrical parts should never go in the dishwasher.
Plastic parts may warp in high heat, so use the top rack only if your manual allows.
What If My Popcorn Maker Smells After Cleaning?
Wipe with vinegar or lemon juice. Leave the machine open to air out. If the smell continues, check for hidden residue.
Persistent odors often mean oil is trapped in a hidden spot—try cleaning under lids and inside vents.
How Often Should I Deep Clean My Popcorn Maker?
Deep clean weekly if you use it daily, or monthly for occasional use. Quick clean after every batch.
If you pop sweet popcorn, deep clean more often as sugar sticks easily.
Is It Safe To Use Bleach?
Bleach is not recommended. It can damage surfaces and leave strong odors. Use mild dish soap and vinegar instead.
If you need to sanitize, use a food-safe sanitizer recommended by your manufacturer.
Cleaning your popcorn maker may seem like a small task, but it pays off in freshness, safety, and enjoyment. With these steps, tools, and tips, your popcorn will always taste its best—and your machine will last for years. A few extra minutes of care can turn every popcorn night into a delicious event, free from weird tastes or safety worries.