Skip to content
Keeping your refrigerator water dispenser clean is more important than most people realize. This small feature can affect your family’s health, the taste of your water, and even the life of your fridge. Many users think cleaning means only wiping the outside, but the real challenge is inside.
Mold, bacteria, and mineral deposits can build up in the lines, nozzle, and filter. If you notice odd tastes or smells, or your water flow slows down, it’s time for a deep clean. In this guide, you’ll learn practical steps for cleaning your refrigerator water dispenser, tips to avoid common mistakes, and how to keep your water safe and fresh.
Why Cleaning Your Refrigerator Water Dispenser Matters
Most people use their refrigerator water dispenser daily. Over time, bacteria, mold, and mineral deposits can build up. The U.S. Environmental Protection Agency warns that dirty water dispensers can be a source of contamination, especially if filters are not changed regularly. According to a 2021 study, water dispensers can harbor more bacteria than kitchen sinks if not cleaned well.
Health risks include stomach upset, allergies, and even more serious infections for young kids or older adults. If you notice cloudy water or a strange taste, cleaning is urgent. Regular cleaning also prevents blockages and keeps your refrigerator working well.
How Often Should You Clean Your Water Dispenser?
Experts recommend cleaning your refrigerator water dispenser at least every three months. If your water is hard (high in minerals), monthly cleaning is better. If you see mold, slime, or any buildup, clean it right away. Changing the water filter is usually recommended every six months, but check your manufacturer guidelines.
Tools And Supplies You’ll Need
Before you start, gather these items:
- Soft cloths
- Small brush (like a toothbrush)
- White vinegar
- Mild dish soap
- Warm water
- Bucket
- Rubber gloves
- Paper towels
- Phillips screwdriver (sometimes needed to remove parts)
- Cotton swabs
Some fridges need special cleaning kits for the dispenser lines. Check your owner’s manual for details.
Step-by-step Guide: Cleaning The Refrigerator Water Dispenser
Cleaning a water dispenser is not difficult, but you must be thorough. Here’s a step-by-step approach.
1. Turn Off The Water Supply
First, locate the water shut-off valve (usually behind the fridge or under the sink). Turn it off to stop water flow during cleaning.
2. Remove The Dispenser Tray And Nozzle
Most trays and nozzles pull out easily. If not, check your manual. Take these parts out for better access.
3. Wash Removable Parts
- Soak the tray and nozzle in warm, soapy water for 10 minutes.
- Use a brush to scrub away any dirt or deposits.
- Rinse with clean water and dry completely.
4. Clean The Exterior
- Wipe the dispenser area with a damp cloth and mild soap.
- Pay attention to buttons and the area around the nozzle.
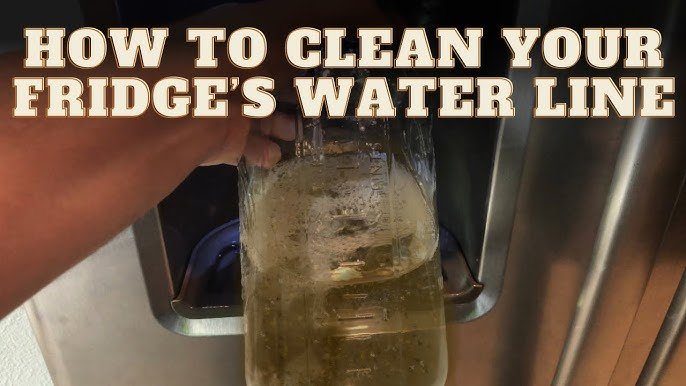
5. Clean The Water Lines
This step is often skipped, but it’s crucial. Water lines can hold bacteria and mold.
- Mix one cup of white vinegar with one cup of water.
- Use a funnel to pour the mixture into the water line (some models let you do this easily; others may need you to disconnect the line).
- Let the mixture sit for 10 minutes.
- Flush the lines by running water through the dispenser until the smell of vinegar disappears.
6. Clean The Filter
If your fridge has a filter, check the manufacturer’s instructions. Most filters twist out easily.
- Replace the filter if it’s old or dirty.
- If the filter is reusable, rinse it under running water and soak it in vinegar for 10 minutes.
- Rinse again with water and reinstall.
7. Reassemble And Test
Put all parts back together. Turn on the water supply. Run water through the dispenser for a few minutes to flush any remaining cleaning solution.
8. Final Wipe Down
Use a clean cloth to wipe all surfaces and dry them. Make sure no moisture is left around the dispenser.
Common Cleaning Mistakes To Avoid
Some mistakes can reduce cleaning effectiveness or damage your fridge.
- Using harsh chemicals: Stick to mild soap and white vinegar.
- Skipping the water lines: Most bacteria grow here.
- Forgetting the filter: An old filter can make cleaning useless.
- Not drying parts fully: Moisture encourages mold growth.
- Ignoring the tray: This part often holds slime and dirt.
Deep Cleaning: If You Suspect Mold Or Heavy Build-up
If you notice visible mold, a bad smell, or slimy deposits, you need to deep clean.
Steps For Deep Cleaning
- Remove all removable parts.
- Soak parts in a mixture of one part vinegar, one part water for 20 minutes.
- Use a toothbrush to scrub every part.
- Clean water lines with a vinegar flush (let it sit for up to 20 minutes).
- Rinse everything thoroughly.
- Replace the filter if you suspect mold.
Some users report using hydrogen peroxide (3%) for stubborn mold. Pour a small amount into the lines, let sit for 5 minutes, then flush with water. Always check with your fridge’s manufacturer before using new chemicals.
Keeping Your Water Dispenser Clean: Prevention Tips
Cleaning is easier if you avoid problems in the first place. Here are expert tips:
- Change filters every 6 months.
- Wipe the dispenser area weekly.
- Dry the tray after every use.
- Use filtered water if your tap water is hard.
- Check for leaks or drips—moisture encourages bacteria.
- Don’t touch the nozzle with dirty hands.
Comparison: Refrigerator Water Dispenser Vs. Standalone Water Dispenser
If you wonder about the differences in cleaning and maintenance between refrigerator dispensers and standalone units, see the comparison below.
| Feature | Refrigerator Dispenser | Standalone Water Dispenser |
|---|---|---|
| Cleaning Frequency | Every 3 months | Every 1-2 months |
| Filter Replacement | Every 6 months | Every 3-6 months |
| Cleaning Difficulty | Moderate | Easy |
| Parts to Clean | Nozzle, tray, lines, filter | Nozzle, tank, lines |
| Common Issues | Blockages, mold, bad taste | Algae, mold, leaks |
Signs Your Water Dispenser Needs Cleaning
Sometimes the signs are subtle. Watch for:
- Slow water flow
- Cloudy water
- Bad taste or smell
- Visible mold or slime
- Unusual noises from the dispenser
If you see any of these, clean your dispenser right away.
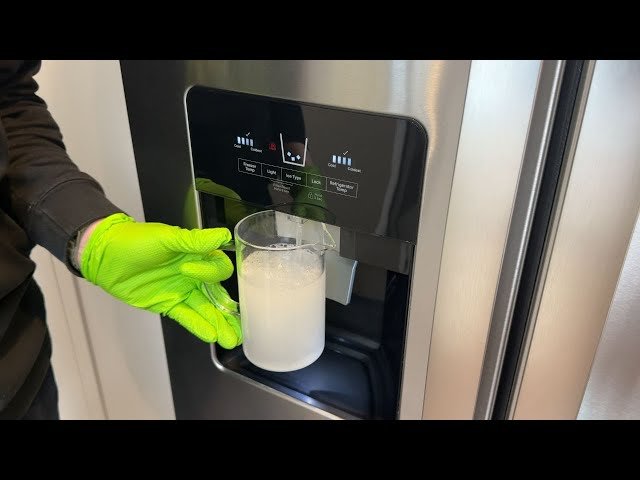
Data: How Dirty Can Refrigerator Water Dispensers Get?
Studies show that water dispensers can have high bacteria levels if neglected. According to the National Sanitation Foundation, up to 60% of household water dispensers tested positive for bacteria, including E. coli, when not cleaned often. Mold is also common, especially in humid climates.
| Contaminant | Risk Level | Common Source |
|---|---|---|
| Bacteria | High | Water lines, nozzle |
| Mold | Moderate | Tray, nozzle |
| Mineral Deposits | Low | Hard water |
Credit: www.youtube.com
How Refrigerator Water Dispensers Work
Understanding how your dispenser works helps you clean better. Most refrigerators use a water line from your plumbing. Water flows through a filter and into a cooling tank inside the fridge. When you press the lever, water moves through the nozzle. Any part of this path can hold bacteria or deposits.
Newer models have auto-cleaning features or warning lights when cleaning is due. Always check your manual before starting.
Cleaning Different Refrigerator Brands
Some brands make cleaning easier than others. Here are tips for popular brands:
Whirlpool
- Trays and nozzles remove easily.
- Filters are usually twist-out.
Samsung
- Some models have hidden trays; check the manual.
- Filters often need a special tool to remove.
Lg
- Water lines are easy to access.
- Filters are located in the fridge compartment.
Ge
- Nozzles may be fixed; clean with a brush.
- Filter replacement is straightforward.
Always check your manual for the exact steps. Some brands recommend special cleaning kits.
:max_bytes(150000):strip_icc()/SPR-how-to-clean-fridge-water-dispenser-7556573-Step-04-c445b93e607542b9858a53d1d734a923.jpg)
Credit: www.thespruce.com
Practical Example: Cleaning A Whirlpool Refrigerator Water Dispenser
A Whirlpool model is common in many homes. Here’s how to clean it:
- Turn off the water supply.
- Remove the tray and nozzle.
- Soak in warm, soapy water.
- Clean water lines with vinegar using a funnel.
- Replace the filter if needed.
- Reassemble and run water for 5 minutes to flush.
- Wipe down all surfaces.
Most users report that cleaning takes about 30–45 minutes.
What To Do If Water Still Tastes Bad After Cleaning
Sometimes, after cleaning, water still tastes odd. Here’s what to check:
- Filter: Replace with a new one.
- Water lines: Run water for 10 minutes to flush.
- Nozzle: Scrub again with vinegar.
- Water source: Test tap water for taste.
If problems continue, contact a professional or check for plumbing issues.
Comparison: Cleaning Frequency Vs. Water Quality
Cleaning frequency changes water quality. See the table below:
| Cleaning Frequency | Water Taste | Bacteria Level |
|---|---|---|
| Monthly | Excellent | Low |
| Every 3 months | Good | Moderate |
| Once a year | Poor | High |
Safety Precautions
Always follow safety steps:
- Unplug the fridge if cleaning inside or near electrical parts.
- Wear rubber gloves to protect your hands.
- Never use bleach or strong chemicals—they can damage parts and leave harmful residues.
Non-obvious Insights Most Beginners Miss
- Water lines are often the dirtiest part: Many people only clean the tray and nozzle but skip the lines. This is where mold and bacteria often hide.
- Drying all parts is crucial: After cleaning, leaving parts wet can cause mold to grow again quickly.
- Vinegar is safer than bleach: Vinegar cleans well without leaving dangerous residues, unlike bleach.
Cleaning Water Dispenser For Hard Water Areas
If your home has hard water, mineral deposits can build up fast. Use vinegar more often. You may need to clean monthly instead of every three months. Some users install extra filters or use bottled water to reduce buildup.
When To Call A Professional
If you notice heavy mold, bad smells, or water leaks even after cleaning, contact a professional. Some problems come from plumbing, not the fridge. Professionals have tools to clean water lines deeply.
Environmental Impact: Using Safe Cleaning Solutions
Using white vinegar and mild soap helps protect the environment. Avoid bleach or harsh chemicals. Filters should be disposed of according to local recycling rules.
Keeping Your Water Dispenser Clean Between Deep Cleans
- Wipe down the dispenser after every use.
- Remove and dry the tray weekly.
- Run water through the dispenser for 1 minute daily to flush the lines.
These habits help keep bacteria and mold away.
Frequently Asked Questions
How Often Should I Clean My Refrigerator Water Dispenser?
Clean your water dispenser every three months. If you live in a hard water area, clean it monthly. Always change filters every six months or as recommended by your fridge’s manufacturer.
Can I Use Bleach To Clean My Water Dispenser?
No, bleach is not recommended. It can damage parts and leave harmful residues. Use white vinegar and mild soap instead. Vinegar is safe, effective, and easy to rinse out.
What If My Dispenser Still Smells Bad After Cleaning?
If the smell remains, check and replace the filter, flush the water lines again with vinegar, and clean the nozzle thoroughly. Persistent odors may mean mold inside the lines, which may require professional cleaning.
Is It Safe To Drink Water From The Dispenser After Cleaning?
Yes, as long as you flush the water lines and run water for several minutes after cleaning. This removes any leftover cleaning solution. If the water tastes normal and is clear, it is safe.
Where Can I Find More Information About Refrigerator Water Dispensers?
For technical details and safety guidelines, visit the official EPA website or your fridge’s manufacturer site. One reliable source is EPA Water Research.
Cleaning your refrigerator water dispenser keeps your water fresh, protects your health, and extends your fridge’s life. With regular care and the steps above, your water will stay safe and taste great. Whether you have a Whirlpool, Samsung, LG, or GE, these methods work for most refrigerators.
Take a few minutes each month, and your family will enjoy better water every day.
Credit: www.youtube.com