Skip to content
Cleaning your home regularly is important, but most people forget one key step: disinfecting the vacuum cleaner after cleaning. Your vacuum works hard, picking up dust, dirt, pet hair, bacteria, and sometimes even mold spores. If you don’t disinfect it, you risk spreading germs each time you use it. Learning how to disinfect a vacuum cleaner after cleaning is simple and can help keep your home healthier. In this article, you’ll get clear, step-by-step advice, practical tips, and useful comparisons to make sure your vacuum stays safe for your family.
Why Disinfecting Your Vacuum Cleaner Matters
Vacuum cleaners don’t just pick up visible dirt. Studies show that vacuums can carry bacteria, fungi, and allergens even after the dust is gone. For example, a 2026 study found that 30% of vacuums tested had traces of E. coli inside the dust compartments. If you have allergies or young children at home, disinfecting your vacuum cleaner can help reduce exposure to these harmful particles.
Here’s a quick comparison of what happens if you disinfect your vacuum vs. if you don’t:
| Action | Result |
|---|---|
| Disinfect vacuum after cleaning | Removes germs, reduces odors, keeps air healthier |
| Skip disinfection | Germs stay inside, risk of spreading bacteria & allergens |
Many people mistakenly believe that emptying the dustbin is enough. In reality, dangerous particles can stay inside the filters, hose, and brush heads.
Preparing To Disinfect Your Vacuum
Before you start, gather the right supplies. Using the correct items makes disinfection more effective and safer.
- Disposable gloves – Protects your hands from germs and chemicals.
- Microfiber cloths – Good for wiping surfaces without scratching.
- Mild soap – For basic cleaning before disinfecting.
- Disinfectant spray or wipes – Use EPA-approved products for best results.
- Soft brush – Helps clean crevices and filters.
- Screwdriver – Needed for opening some parts.
- Replacement filters – If your filter is not washable, keep a spare.
Make sure your vacuum is unplugged and cool before you begin. Remove the dust bag or bin, and take your vacuum outside or to a well-ventilated area. This prevents dust from spreading in your home.
Credit: www.homedepot.com
Step-by-step Guide To Disinfecting A Vacuum Cleaner
Follow these steps for thorough disinfection. The process works for most upright, canister, and stick vacuums.
1. Empty The Dust Bin Or Bag
Take out the dust bin or bag. For bagged vacuums, dispose of the bag in a sealed trash can. For bagless vacuums, empty the bin outside and tap it gently to remove loose debris.
2. Wash The Dust Bin
Rinse the bin with warm water and mild soap. Use a brush to scrub corners. Let it air dry completely before putting it back. Moisture left inside can grow mold.
3. Clean And Disinfect Filters
Most vacuums have at least one filter. Check your vacuum’s manual to see if your filter is washable. Wash washable filters in water only—never use soap unless the manual allows it. For non-washable filters, gently tap to release dust or replace them if very dirty.
Spray washable filters with disinfectant, but avoid soaking them. Let them dry fully before reinstalling.
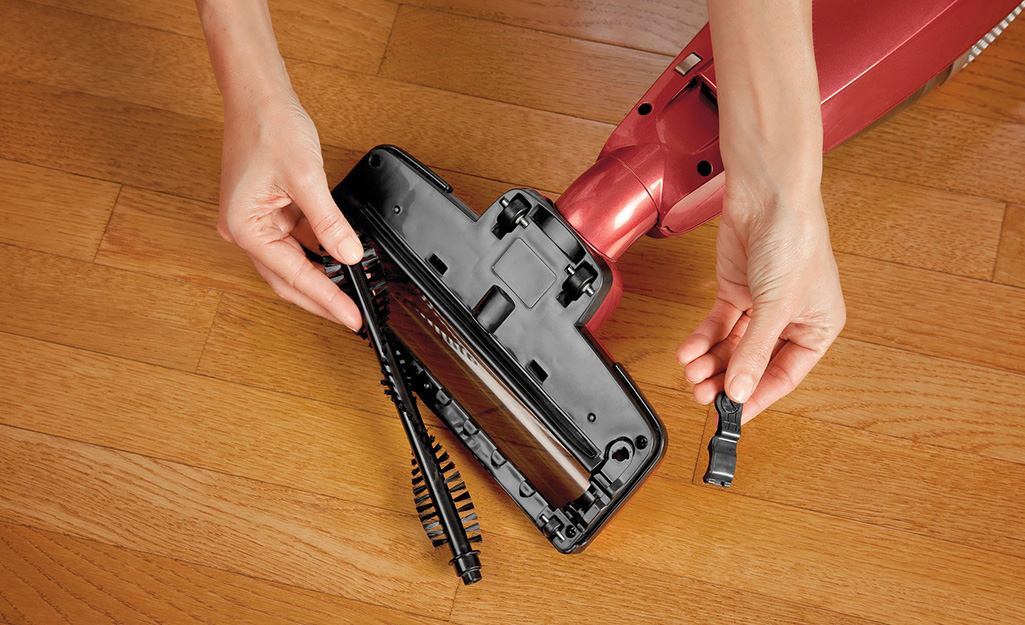
4. Disinfect Brush Roll And Attachments
Remove the brush roll and all attachments. Pick out hair and debris using scissors or a comb. Wipe them with a disinfectant wipe or spray. Pay attention to crevices and corners.
Here’s a quick comparison of common brush roll materials and their cleaning needs:
| Material | Cleaning Method | Disinfection Notes |
|---|---|---|
| Plastic | Soap and water | Safe for most disinfectants |
| Rubber | Wipe only | Avoid harsh chemicals |
| Metal | Soap and water | Dry quickly to prevent rust |
5. Wipe The Vacuum Body
Use a damp microfiber cloth and a mild soap solution to wipe the outside. Avoid spraying liquid directly onto controls or electrical parts. After cleaning, use disinfectant wipes for high-touch areas, like handles and buttons.
6. Clean The Hose
Detach the hose if possible. Run warm water with a little soap through the hose, then rinse. Hang it to dry. Once dry, wipe the outside with disinfectant. For hoses that cannot be removed, use a long brush or compressed air.
7. Reassemble And Final Disinfect
Once all parts are dry, reassemble the vacuum. Wipe down the whole unit one last time with a disinfectant wipe. Plug in and run the vacuum for 30 seconds to clear any dust left inside.
Extra Tips For Better Disinfection
Many beginners miss these important steps or make small mistakes that reduce the effectiveness of cleaning.
- Don’t skip drying: Even a little moisture can cause mold or bad smells.
- Replace filters regularly: Most filters last 3–6 months, depending on usage.
- Avoid harsh chemicals: Bleach can damage plastic parts and rubber seals.
- Ventilate well: Disinfectants can create strong smells; open windows if cleaning indoors.
- Clean after vacuuming risky areas: Always disinfect after cleaning up pet messes, sick rooms, or food spills.
Here’s a quick summary of filter replacement frequency:
| Filter Type | Replace Every | Notes |
|---|---|---|
| HEPA | 6 months | Best for allergies |
| Foam | 3 months | Washable, but replace if torn |
| Carbon | 6 months | Good for odors |
Common Mistakes And How To Avoid Them
Understanding what can go wrong helps you get the best results. Here are problems beginners often face:
- Using too much water: Extra water can leak into electrical parts and damage your vacuum.
- Not checking the manual: Some filters or parts can’t handle certain cleaners. Always read instructions.
- Skipping attachments: Tools and extensions collect bacteria but are often forgotten.
- Reassembling while wet: This traps moisture, causing mold and bad smells.
- Ignoring the hose: Hoses can hold dust and germs; clean them regularly.
If you’re unsure about a cleaning step, check your vacuum’s manual or visit the brand’s website for guidance.
How Often Should You Disinfect?
The right frequency depends on usage. For most homes, disinfecting after every major cleaning is good practice. If you have pets, allergies, or young children, do it more often.
- Normal use: Once a month
- Pet owners: Every 2 weeks
- After cleaning sick areas: Immediately
Disinfecting too often with harsh chemicals can wear out parts. Instead, use mild cleaners and follow the tips above.

Credit: www.nytimes.com
Choosing The Best Disinfectant For Your Vacuum
Picking the right disinfectant is important. The wrong product can damage your vacuum or leave harmful residues.
Look for EPA-approved disinfectants. Avoid bleach, strong acids, or products with solvents. Alcohol-based wipes are usually safe for plastic and metal. For washable parts, use soap and water, then spray with disinfectant.
Here’s a quick comparison of common disinfectant types:
| Disinfectant | Safe For | Effectiveness |
|---|---|---|
| Alcohol wipes | Plastic, metal | High |
| Soap & water | Most parts | Moderate |
| Bleach | None | Very high (but risky) |
| Hydrogen peroxide | Plastic, metal | High |
For more information on safe disinfectants, check this EPA guide.
Signs Your Vacuum Needs Disinfection
Sometimes, your vacuum will show signs that it needs cleaning:
- Bad smells even after emptying the bin
- Loss of suction because filters are clogged
- Visible mold or dirt inside the bin or on attachments
- Dust blowing out from the exhaust
- Sticky or oily residue on parts
If you notice any of these, disinfect your vacuum as soon as possible.

Credit: www.choice.com.au
Frequently Asked Questions
How Long Does It Take To Disinfect A Vacuum Cleaner?
Most vacuums can be disinfected in about 30 to 60 minutes, depending on how dirty they are and how many parts need cleaning. Drying time can add another hour.
Can I Use Vinegar To Disinfect My Vacuum?
Vinegar is a natural cleaner but not a strong disinfectant. It’s good for removing smells, but for killing germs, use EPA-approved disinfectants or alcohol-based wipes.
What Should I Do If My Vacuum Smells Bad Even After Disinfection?
If odors stay, check for hidden mold or dirt in the hose or filters. Replace filters if they smell, and deep clean attachments. Sometimes, leaving parts in sunlight helps kill bacteria.
Is It Safe To Wash All Vacuum Parts In Water?
Not all parts are safe for water. Avoid washing electrical parts and non-washable filters. Always check your vacuum’s manual before cleaning with water.
How Often Should I Disinfect My Vacuum If I Have Allergies?
If you or your family have allergies, disinfect your vacuum every 2 weeks. Replace filters more often, especially HEPA filters, to keep allergens low.
Disinfecting your vacuum cleaner after cleaning is a simple habit that can make a big difference in your home’s health. With the right tools and steps, you protect your family from germs and allergens. Remember to check your manual, dry all parts carefully, and use safe disinfectants.
By making this part of your cleaning routine, your vacuum will last longer and your home will stay fresher and safer.