Skip to content
If you love the sweet and crunchy taste of caramel corn, making it at home is easier than you think. Using a popcorn machine gives you fluffy, consistent popcorn, and combining it with a simple caramel sauce creates a delicious treat that rivals store-bought versions. Many people think caramel corn is tricky because of the sticky caramel, but with the right steps, anyone can master it. This guide will walk you through every detail, from choosing the best popcorn machine to troubleshooting common mistakes. Whether you’re making caramel corn for a party, movie night, or as a gift, you’ll learn how to achieve perfect results every time.
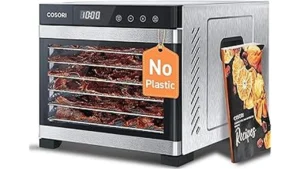
Choosing The Right Popcorn Machine
Not all popcorn machines are the same. The type you use affects the taste and texture of your caramel corn.
Types Of Popcorn Machines
There are three main kinds:
- Hot air poppers: Use air, not oil. They’re healthier and easier to clean, but sometimes popcorn can be dry.
- Stovetop poppers: Require manual stirring and oil. They give rich flavor and crispy popcorn.
- Electric popcorn makers: Have built-in heat and stirring mechanisms. They’re convenient and good for large batches.
Here’s a quick comparison to help you choose:
| Machine Type | Pros | Cons |
|---|---|---|
| Hot Air Popper | Healthier, easy to use, quick | Popcorn can be dry, less flavor |
| Stovetop Popper | Flavorful, crispy popcorn | Requires oil, manual stirring |
| Electric Popcorn Maker | Large batches, automatic | Bulky, more cleaning |
Why Machine Choice Matters
For caramel corn, even popping is important. If some kernels are burnt or unpopped, your caramel corn won’t taste right. Electric popcorn makers often work best, but hot air poppers are a close second. Stovetop poppers give great flavor but need more attention.
Ingredients And Equipment
Before you start, gather everything you need. Precise ingredients and tools make the process smoother.
Ingredients
- Popcorn kernels: ½ cup (yields about 16 cups popped popcorn)
- Unsalted butter: 1 cup (2 sticks)
- Brown sugar: 2 cups, packed
- Corn syrup: ½ cup
- Salt: 1 teaspoon
- Baking soda: ½ teaspoon
- Vanilla extract: 1 teaspoon
Equipment
- Popcorn machine
- Large mixing bowl
- Saucepan
- Wooden spoon or heatproof spatula
- Baking sheet (preferably rimmed)
- Parchment paper
- Oven (for final crisping)
- Measuring cups/spoons
Some people skip baking soda, but it’s essential. It reacts with the caramel, making it lighter and easier to coat the popcorn. Many beginners overlook this step.
Making Popcorn In The Machine
Popcorn is the base. If it’s not popped properly, your caramel corn won’t be crunchy.
Steps For Popping
- Preheat machine: Turn on your popcorn maker for 2-3 minutes. This helps kernels pop evenly.
- Add kernels: Pour in ½ cup of kernels.
- Pop the corn: Let the machine do its work. Listen for popping to slow down (about 3-5 seconds between pops).
- Remove popcorn: Empty into a large bowl. Remove any unpopped kernels (they can break teeth when coated with caramel).
- Cool popcorn: Let it sit for 5-10 minutes. This prevents steam from making the popcorn soggy.
A common mistake is adding too many kernels. This leads to uneven popping and burnt pieces. Stick to the recommended amount.
Making The Caramel Sauce
Caramel sauce is the heart of caramel corn. It needs to be smooth and golden.
Step-by-step Caramel
- Melt butter: Use medium heat in a saucepan.
- Add brown sugar, corn syrup, and salt: Stir until combined.
- Boil: Bring to a boil, stirring constantly. Once boiling, stop stirring and let it bubble for 4-5 minutes.
- Add vanilla and baking soda: Remove from heat. Stir in vanilla and then baking soda. The mixture will foam—this is normal.
- Pour over popcorn: Immediately pour hot caramel onto popcorn.
Here’s a quick reference for caramel steps:
| Step | Action | Tip |
|---|---|---|
| 1 | Melt butter | Low heat avoids burning |
| 2 | Add sugar, syrup, salt | Stir until smooth |
| 3 | Boil | Do not stir while boiling |
| 4 | Add vanilla & soda | Work quickly, mixture foams |
| 5 | Pour over popcorn | Mix while caramel is hot |
Most beginners stir the caramel too much or too little. Stir constantly until boiling, then stop. Stirring while boiling can cause grainy caramel.
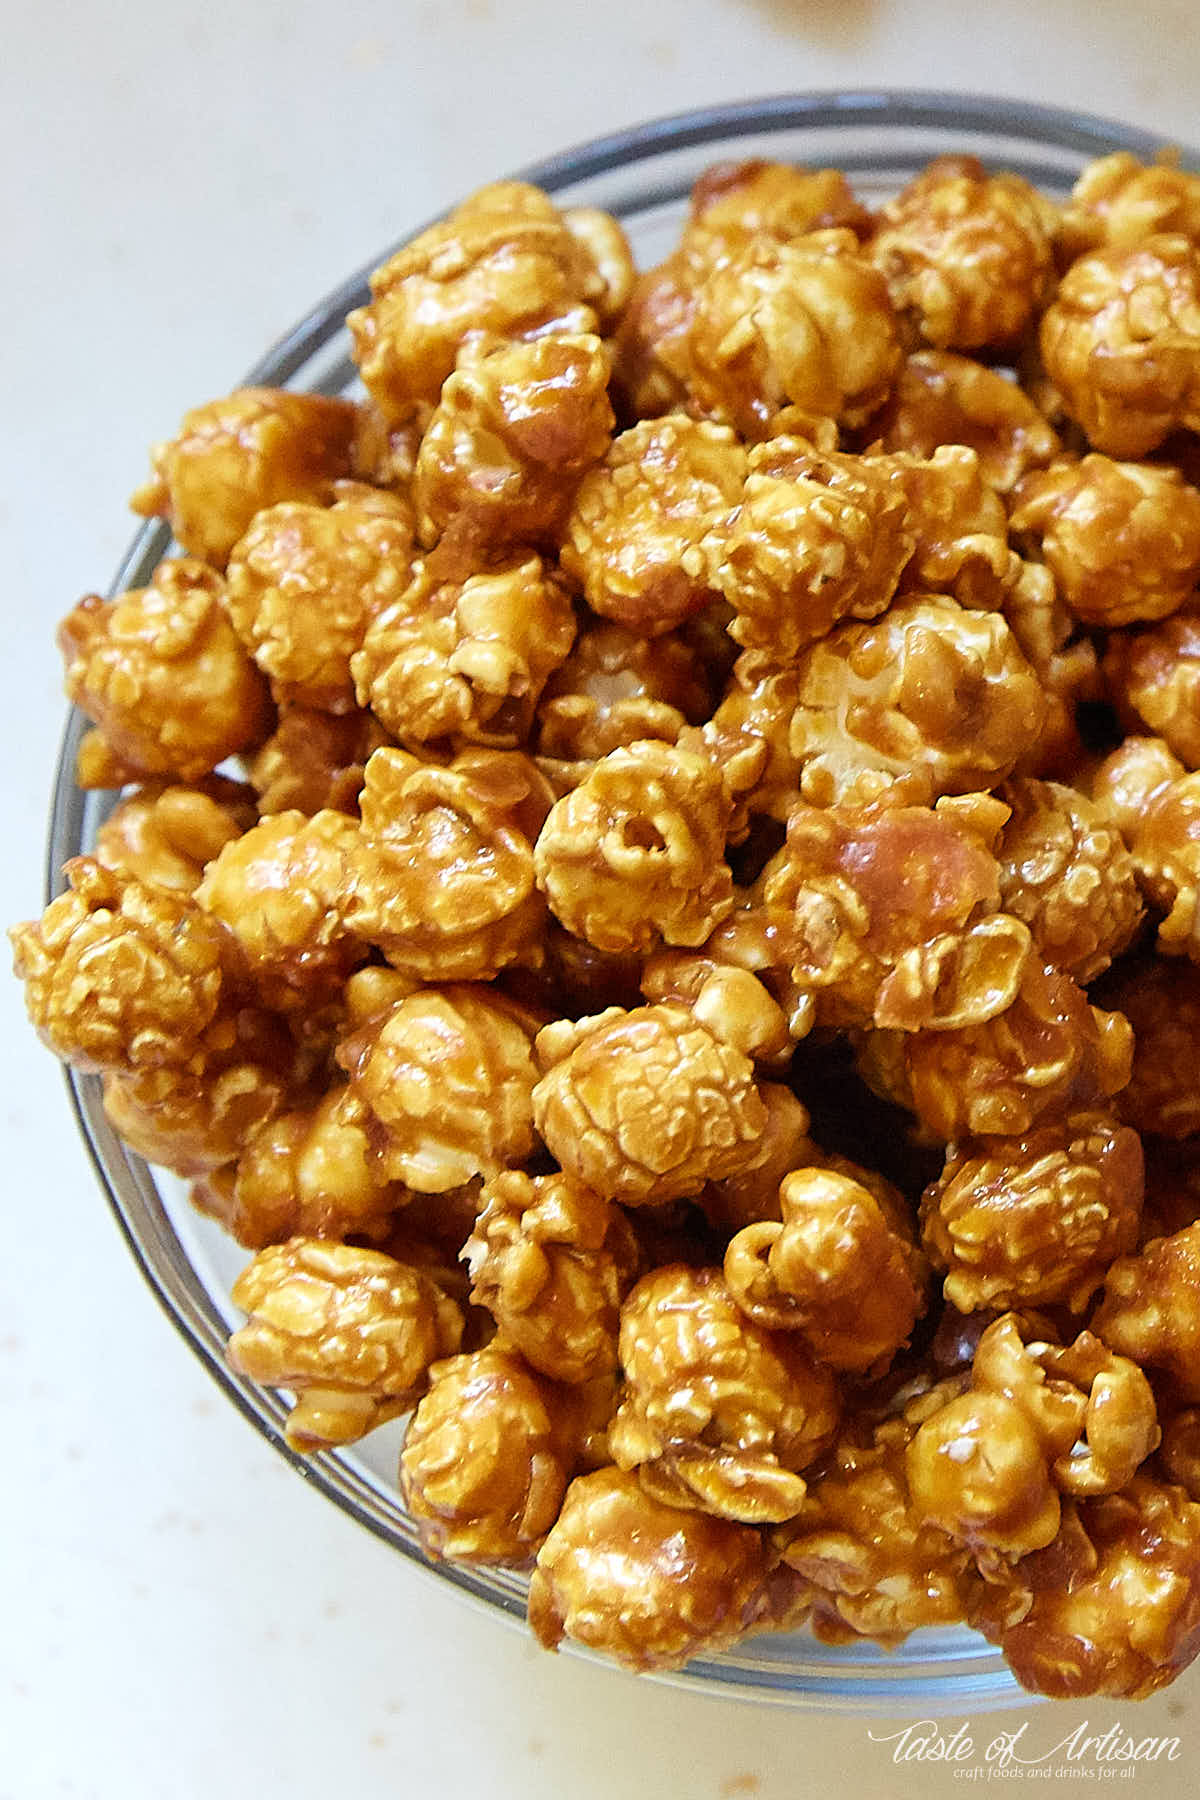
Coating And Baking The Popcorn
Coating is where many struggle. If caramel isn’t spread evenly, some pieces become sticky and others dry.
Coating Steps
- Mix popcorn and caramel: Use a wooden spoon or spatula. Toss gently to coat every piece.
- Spread on baking sheet: Line with parchment paper. Spread popcorn in a single layer.
- Bake for crispiness: Bake at 250°F (120°C) for 45-60 minutes. Stir every 15 minutes for even coating.
- Cool completely: Let popcorn cool before breaking into pieces.
Baking is not just for drying. It helps caramel harden and gives the popcorn a satisfying crunch. Skipping baking leads to soft, sticky caramel corn.
Practical Tips For Perfect Caramel Corn
Many guides miss small details that make a big difference. Here are some practical tips:
- Use fresh kernels: Old popcorn kernels pop poorly and make chewy caramel corn.
- Check humidity: Moisture in the air can make caramel corn sticky. Choose a dry day, or store in airtight containers.
- Don’t rush cooling: Wait until popcorn is fully cooled before breaking into pieces. Warm caramel can stick to your hands.
- Experiment with flavors: Try adding chopped nuts, sea salt, or even chili powder for a twist.
- Avoid overmixing: Mixing too much can crush the popcorn and make it dense.
A non-obvious insight: If your caramel sauce hardens too quickly, microwave it for 10 seconds to loosen before pouring. Few recipes mention this, but it saves wasted batches.

Credit: www.recipetineats.com
Serving And Storing Caramel Corn
Caramel corn is best enjoyed fresh, but storing it the right way keeps it crisp.
Serving Ideas
- Movie nights: Serve in bowls or popcorn boxes.
- Party treats: Portion into small bags for guests.
- Gift jars: Layer caramel corn in glass jars for homemade gifts.
Storing For Freshness
- Airtight containers: Keeps caramel corn crunchy for up to 2 weeks.
- Avoid fridge: Cold air can make caramel corn sticky.
- Add silica gel packs: For humid areas, food-safe packs help absorb moisture.
Here’s a quick storage comparison:
| Method | Duration | Result |
|---|---|---|
| Airtight container | 2 weeks | Crunchy |
| Plastic bag | 1 week | Less crunchy |
| Fridge | 3-4 days | Sticky |
A second insight: If caramel corn loses crunch, bake it again at 250°F for 10 minutes. It will crisp up without burning.
Troubleshooting Common Problems
Even experienced cooks face issues when making caramel corn.
Burnt Popcorn
If you notice black pieces, you probably used too many kernels or let the machine run too long. Always measure kernels and watch popping closely.
Grainy Caramel
Grainy caramel happens when sugar crystallizes. This usually comes from stirring the caramel while it boils. Stick to the step-by-step process.
Sticky Or Soft Corn
Humidity, skipping baking, or not cooling fully cause sticky caramel corn. Bake longer and cool completely.
Uneven Coating
If caramel doesn’t coat evenly, you may have poured it when it was too thick. Work quickly after adding baking soda, and stir gently but thoroughly.
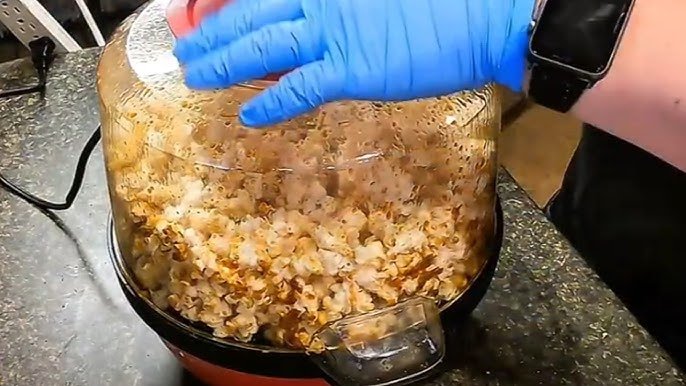
Credit: www.youtube.com
Health And Nutrition Facts
Caramel corn is a treat, but it’s good to know the nutrition details.
- 1 cup of caramel corn has about 120 calories
- Contains 2g fat, 24g carbohydrates, 1g protein
- High in sugar due to caramel
- Gluten-free (if using pure ingredients)
For healthier options, use air-popped popcorn and reduce butter and sugar. You can find more nutrition details at NutritionData.
Frequently Asked Questions
Can I Make Caramel Corn In Any Popcorn Machine?
Yes, you can use most types of popcorn machines. Hot air poppers and electric makers work best. Stovetop poppers need more attention but give rich flavor. Always follow your machine’s instructions for best results.
How Do I Prevent Caramel Corn From Becoming Sticky?
Always bake the coated popcorn at a low temperature. Store in airtight containers and avoid humid environments. If it becomes sticky, rebake for 10 minutes at 250°F.
Is Caramel Corn Gluten-free?
Usually, yes. Popcorn is naturally gluten-free, and most caramel sauce ingredients are too. Always check labels on corn syrup and vanilla extract, as some brands add gluten-containing fillers.
Can I Add Nuts Or Other Toppings?
Absolutely. Add chopped nuts, dried fruit, or chocolate chips after baking, when the caramel corn is still slightly warm. Stir gently to avoid crushing popcorn.
How Long Does Homemade Caramel Corn Last?
Stored properly in an airtight container, caramel corn stays fresh for up to 2 weeks. If it loses its crunch, bake again for a few minutes to restore texture.
Making caramel corn in a popcorn machine is simple once you understand the key steps. Choosing the right machine, measuring ingredients accurately, and following the caramel process closely are essential for success. With a bit of practice and attention to detail, you’ll enjoy sweet, crunchy caramel corn at home whenever you like.
Whether you serve it at parties or keep it for yourself, this homemade treat is sure to impress.
Credit: tasteofartisan.com