Image source: Web (Bing) / coffeefile.com (Web image (fair-use with source credit))
How to Remove Mildew Smell From Coffee Maker
You know that moment. You go to brew, hit the button, and instead of rich roasty aroma, you get a damp musty punch. That’s mildew, and it means your coffee maker is growing something it shouldn’t.
If you’ve searched for how to remove mildew smell from coffee maker, the good news is this is fixable, and you probably already have what you need in your kitchen cupboard.
But mildew isn’t just cosmetic. It’s a food-contact surface issue, and brewing hot water through it doesn’t kill mold spores or the biofilm. A study from NSF International found coffee maker reservoirs among the top five most germ-contaminated kitchen items, with yeast and mold in over 50% of tested units.
It doesn’t matter if you used a cheap drip machine or a high-end espresso rig. The fix is about moisture, acid, and patience.
Quick Answer
You can remove mildew smell from a coffee maker by flushing it with a 1:1 white vinegar and water solution. Run this through a full brew cycle, let it sit for 30 minutes, then run two to three fresh water cycles. Remove every removable part and wash it in hot soapy water.
Dry all components fully with the lid open before reassembly. This kills mold and removes the odor.
The fastest path depends on machine type. Drip machines need a reservoir soak. Pod machines need a chemical flush through the brew head.
Espresso machines need a backflush and gasket check. If the smell lives in internal rubber seals, you may need to replace those parts. We walk through each branch below.
Is It Mildew or Limescale? Why It Matters
Before you grab vinegar and start scrubbing, diagnose the problem. Not every mystery smell is mildew, and treating the wrong culprit wastes your time. Mildew and limescale require different cleaning agents. Using the wrong one either eats mineral deposits for no reason or spreads mold spores without killing them.
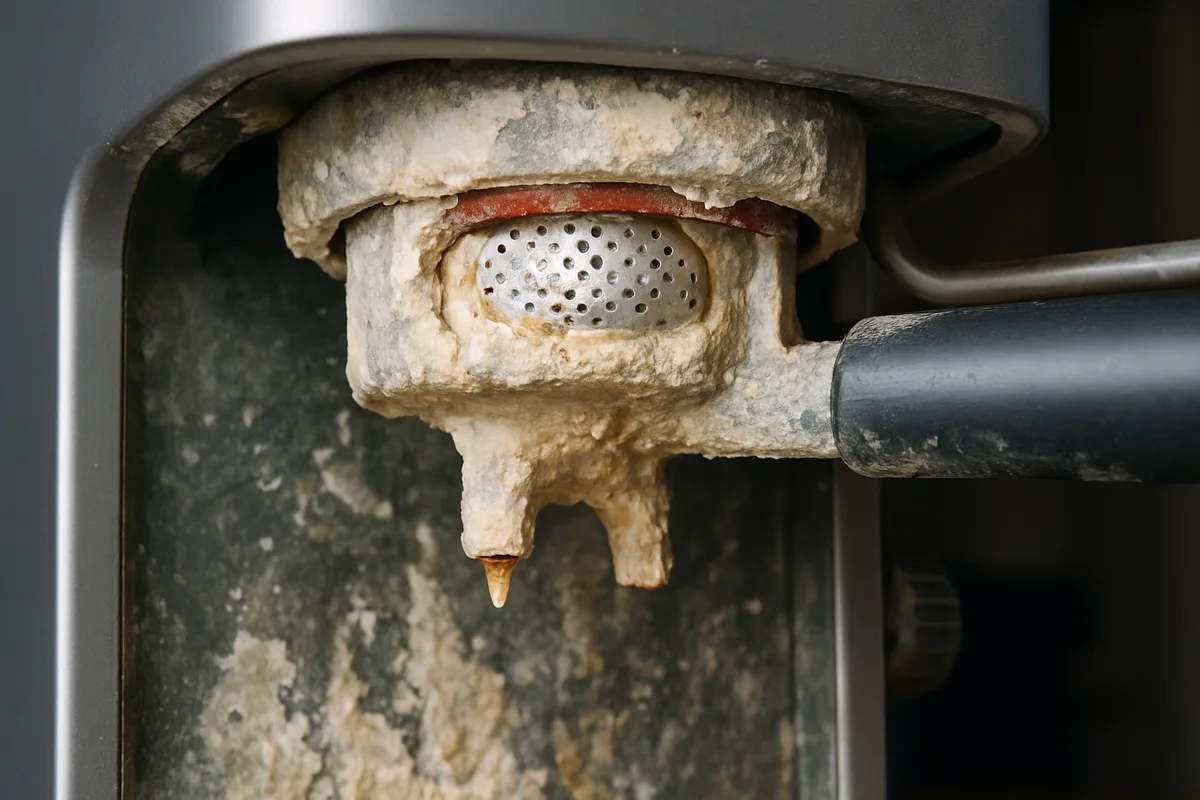
Image source: Web (Bing) / thirdwavewater.eu (Web image (fair-use with source credit))
Mildew is a living organism, a type of mold that thrives in damp, dark, warm places. Your coffee maker’s water reservoir is a perfect resort. Mildew appears as black, green, or grey speckles, usually in the water tank, along the carafe lid seam, or under the drip tray. It smells musty, like a wet basement or a gym bag. It spreads if you don’t kill it at the root.
Limescale is not alive. It’s the chalky white or tan mineral crust left when hard water evaporates. It builds up inside the heating element, internal tubing, and water reservoir. Limescale smells metallic or bitter, and it makes coffee taste flat. But limescale creates a rough surface that traps organic matter, which becomes food for mildew.
Per manufacturer specifications and aggregate reviews, you often deal with both at once.
So which is it? Quick diagnostic test: fill the reservoir with water, let it sit for 10 minutes, then pour it out. If the water is clear but walls have slimy green or black speckles, it’s mildew. If water is cloudy with white flakes, it’s limescale. If you see both, clean the scale first, then kill the mildew. Scale protects mildew from acid.
One more check: what does the smell smell like when the machine is cold versus heated? If cold is fine but first brew is musty, the biofilm is inside internal lines, not visible parts. That changes the process—you can’t just scrub the reservoir. You must run a chemical flush through the whole internal pathway.
Why does this matter? The wrong first move can make things worse. A simple vinegar cycle on mild mildew might kill surface mold but leave spores in rubber gaskets, and the smell returns in three days. Most people abandon cleaning halfway because they think it failed. They cleaned the wrong quadrant.
The takeaway: diagnose before you act. Match the smell to the cause, and you’ll know which cleaning playbook to follow below. If you’re also wondering whether your machine’s odd beeping signals a bigger problem, checking our rundown on fixing a beeping Cuisinart is a smart detour.
Your Cleaning Playbook: Choose Your Machine Below
Now the actual work. This section is a decision tree because coffee makers aren’t one-size-fits-all. A drip machine, pod brewer, and espresso machine each have different internal components, each requiring a different cleaning sequence. The solution is nearly the same—loosen the gunk, kill the mold, flush thoroughly—but steps, timing, and risk of damage differ.
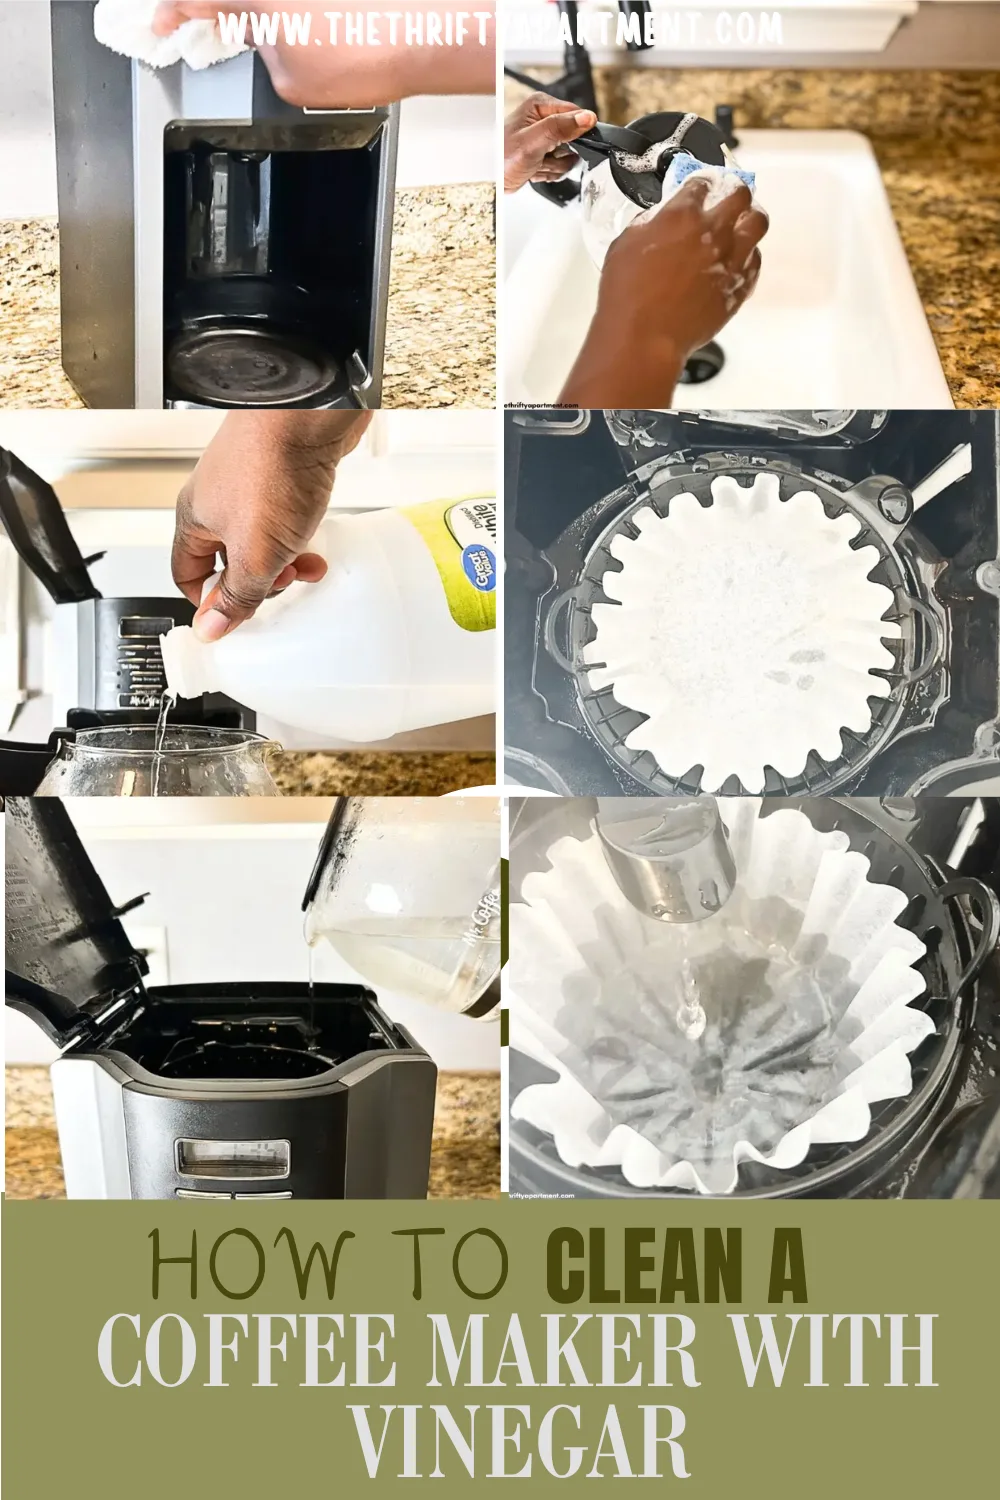
Image source: Web (Bing) / pinterest.com
Before you pick a path, universal starting point: unplug the machine. You’re working with water near electrical components. Then remove every part that comes off without tools: carafe, filter basket, water reservoir lid, drip tray. Wash in hot soapy water or dishwasher if allowed. Set aside to dry completely. Do not reassemble until done.
Once visible parts are clean, the real work begins. The biggest difference between a fresh-tasting machine and a stale-smelling one is the internal lines—dark, wet, warm after every brew. Perfect mold breeding ground. Pouring water through doesn’t disinfect; it moves warm water past the biofilm.
A quick safety note: never mix vinegar with bleach. Never use bleach on a coffee maker—it leaves toxic residue. Never use harsh chemical oven cleaners, ammonia, or anything with strong fragrance. Stick to white vinegar, citric acid, or a commercial descaler labeled food-safe.
One more universal tip: use filtered water for final rinse cycles if you have it. Tap water can leave minerals that help mold gain a foothold. The rinse quality matters.
Drip Machine Cleaning Path
Drip machines are the most common and most forgiving to clean. Whether $20 basic or $200 programmable, the cleaning principle is the same: flush the heating element and internal tube with an acidic solution, soak parts, and rinse thoroughly.
Step 1: Mix the Vinegar and Water
Mix equal parts white vinegar and water. For standard cleaning, about 4 cups each for a 10-cup carafe. For smaller machines, 1:1 ratio works; just fill to the fill line. For heavy mildew, use full-strength vinegar. Per manufacturer specs, vinegar is safe on plastic and rubber seals in these quantities, but check your manual first.
Step 2: Run the Vinegar Solution
Pour solution into reservoir, place carafe on hot plate, start a standard brew cycle. Let half the solution pass through, then switch it off. Let sit for 30 minutes. That soak time is critical—acetic acid dissolves mineral scale and kills mold spores. Running the full cycle passes the solution through too fast.
Step 3: Finish the Brew Cycle
Turn machine back on to finish dripping. Let cool five minutes, dump carafe contents.
Step 4: Rinse the Coffee Maker
Fill reservoir with fresh water, run a full brew cycle, dump. Repeat two or three times. Do not skip rinses. If you still smell vinegar or mustiness after first rinse, run one more. Vinegar smell is harmless; mustiness means more biofilm.
Step 5: Clean the Water Outlet Nozzle
While rinses run, use a small brush or pipe cleaner to scrub the water outlet nozzle above the filter basket. It clogs with mineral dust and old coffee oils—the hidden source of stale trace.
What If the Smell Persists?
Next step: open the machine. Flip it over; look for a cleanout port, a round plug near the bottom. Remove plug, let standing water drain (you may see spent grounds, brown slime, hard water flakes). Use a flashlight to check internal rubber tubing. If black slime, spray vinegar onto a folded paper towel and run around. For narrow tubing, use a cotton swab.
Troubleshooting Corner
If the machine has a “clean” button or descaling light, run the vinegar cycle through that mode—it intervals heat and soak automatically. Non-toxic descaling may need a few rounds if it’s been a while. If two full vinegar cycles and smell remains, problem is probably the carafe gasket. Pop off the rubber seal and scrub. If smell etched into rubber, replace that part—rubber gaskets are cheap and easy to swap.
When to Call It Quits
If after two vinegar cycles, complete disassembly, and smell persists, it’s likely in the plastic reservoir itself. Plastic is porous; mildew can stain over time. Apply a paste of baking soda and water to the damp reservoir, let sit 15 minutes, scrub, rinse. If that doesn’t fix it, retire the machine or replace the reservoir. Don’t ignore it—you have options.
Pod Machine Cleaning Path
Pod machines (Keurig, Nespresso) have internal components unreachable without tools, but they have a dedicated cleaning cycle built into the firmware that pushes hot water through the needle, brew head, and drain. You supply the cleaning solution. Pod machines are the worst offenders for hidden mold because hot water only passes through a tiny portion of internals; the rest sits idle for days.
How to clean a pod machine that smells? Start by removing the water reservoir and washing in hot soapy water. Look for the black rubber O-ring at the connection—often collects slime. Scrub it.
Next, remove the pod holder (the part that punctures the foil capsule). On Keurigs, snap-out; on Nespresso, spring-loaded chamber. Wash in warm soapy water, inspect entry and exit needles. Use a paperclip or specialist cleaning pin to poke out blockages—gently, don’t bend needles.
Then chemical rinse. Fill reservoir with equal parts white vinegar and water. Place a large mug on drip tray (double regular size) to catch flow. Run a water-only cycle until machine prompts to add water. Do this twice.
Next, run the cleaning cycle specifically. On most Keurigs: turn on, open/close lever, press “large cup” button twice. Machine draws vinegar solution through and flushes internal line. For Nespresso, use descaling mode from menu (more aggressive cycling, 10–15 minutes). Follow manufacturer’s timing chart.
Now the slow draw. Unplug machine and let sit 30–60 minutes. This lets vinegar soak into internal limescale protecting mold cells. Don’t just let vinegar sit in the reservoir—internal tubing needs contact time, not just a pass-through.
When soak is done, plug back in, dump vinegar from reservoir, fill with fresh water. Run a water-only cycle, dump. Repeat two more times. Run at least three full cycles to guarantee vinegar smell is gone. If you still smell it after three, run a fourth.
What about descaling agents vs. vinegar? The internet is split, but it comes down to the machine. Some manufacturers (especially Keurig) warn against vinegar, citing rubber degradation over time, recommending their own branded descaling solution (more expensive but gentler). Commercial descaler is food-safe; vinegar for occasional use is fine. Weekly vinegar may shorten gasket life; monthly is okay. For mildew killing, vinegar wins because commercial descalers are mostly citric acid—great for scale, less effective on organic mold.
One more caution: never put creamer pods or milk-based drink mixes through a pod machine. Fats leave a film inside that goes rancid, a mildew magnet. If you smell something sour, that’s likely the culprit. Fix: run a vinegar soak and several water cycles. Some users report success with diluted baking soda flush, but our research suggests a good rinse does the job.
Espresso Machine Cleaning Path
Espresso machines have a boiler, pump, pressure relief valve, and steam wand. Any of these can trap moisture and develop mildew. The portafilter and group head also come into direct contact with coffee, while the basket’s fine grooves can hold old coffee oils.
Step 1: Clean the Removable Parts
If you own an espresso machine and smell mildew, start with the parts you touch. Remove the portafilter, basket, and drip tray. Soak them in hot water with a few drops of dish soap for 15 minutes. Scrub with a soft brush—avoid wire brushes or scouring pads, as scratches can harbor bacteria. Rinse well and let the parts air dry.
Step 2: Clean the Group Head
Use a backflush basket (blank disc with no holes). Fill it with a cleaning detergent designed for espresso machines, such as Cafiza, Puly Caff, or Urnex. This food-safe powder dissolves coffee oils rather than scale.
Place the blank basket in the group head, add the recommended amount of cleaner, and lock it in without a regular portafilter basket.
Step 3: Run a Backflush Cycle
On semi-automatic machines, hold the brew button to let water flow, then release it to pause. Each brand has a specific backflush rhythm, so check your machine manufacturer’s manual for the correct procedure.
The goal is to push hot water through the group head in a pulsing pattern. This helps dislodge caked-on coffee residue. Let the cleaning solution sit for about 10 minutes, then run fresh water through the machine to rinse it.
Step 4: Flush the Internal Lines
Backflushing with espresso machine detergent removes coffee oils, but it may not address every source of mildew smell.
For mildew, run a tank filled with equal parts vinegar and water through the group head manually—about half a liter. Let the solution sit for 30 minutes. If your machine has a hot water wand, dispense some of the solution through it to flush the steam wand coil.
Step 5: Clean the Steam Wand
The steam wand can easily trap milk residue and moisture. If you do not purge it after frothing, the tip and inside of the tube can stay warm and damp.
To clean it, purge steam for 5 seconds and wipe the tip with a damp cloth.
For a deeper clean, mix warm water with a drop of dish soap. Dip the steam wand tip into the solution, open the steam valve briefly, then purge the steam again.
If the wand has a bad smell, soak the removable tip in a small bowl of vinegar for 10 minutes.
Step 6: Check the Portafilter Gasket
Remove the rubber gasket between the portafilter and group head. If it looks black, feels soft, or holds a bad smell, it may need cleaning or replacement.
Gently remove it with a small screwdriver or pick, taking care not to scratch the metal. Soak the gasket in a baking soda slurry for 30 minutes, then scrub, rinse, and reinstall it.
If the gasket is cracked or discolored, replace it. A worn gasket can also cause water leaks and affect brewing.
What If You Suspect Mold in the Boiler?
Many espresso machines use a sealed stainless steel boiler, so cleaning the boiler itself may not be straightforward. If you suspect mold inside the boiler, check your manufacturer’s cleaning instructions first.
For machines that allow it, the original approach is to flush with white vinegar diluted 1:2 with water, followed by several fresh-water cycles. However, manufacturer recommendations vary when it comes to vinegar.
If your machine is under warranty, use a citric acid-based descaler recommended by the manufacturer. After the cleaning cycle, open the steam wand to release pressure and flush the internal water lines. Leave the machine open and allow it to dry completely.