Whipped cream is more than just a topping. It can transform desserts, drinks, and even breakfast dishes. Many people struggle to get the perfect texture—sometimes it’s too runny, sometimes it turns grainy. Using a stand mixer makes the process fast and easy, but there’s a right way to do it.
If you’re hoping for fluffy, stable whipped cream every time, this guide will show you how, step by step. You’ll also learn some tips that most beginners miss, and see how stand mixers compare to other methods.
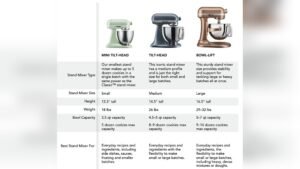
Why Whip Cream In A Stand Mixer?
A stand mixer is powerful and consistent. It can whip cream faster than a hand whisk or hand mixer, and you don’t have to hold it. The bowl is large, so you can whip big batches. The speed settings let you control how quickly the cream thickens. This means you can avoid over-whipping, which ruins the texture.
Not only is a stand mixer efficient, it also produces more uniform results. You get fewer lumps and more even aeration, leading to a smoother finish. If you use whipped cream often, investing in a stand mixer saves time and effort.
Ingredients And Tools Needed
To make whipped cream in a stand mixer, you need only a few items. Here’s what you should have ready:
- Heavy cream (also called heavy whipping cream): At least 30% fat. Lower-fat creams won’t whip properly.
- Sugar: Granulated or powdered, depending on your preference.
- Vanilla extract: Optional, for flavor.
- Stand mixer: With a whisk attachment.
- Chilled bowl: Metal bowls keep the cream cold, which helps it whip faster.
- Spatula: For scraping the bowl.
Ingredient Quantities (for 2 cups of whipped cream):
- 1 cup heavy cream (240 ml)
- 2 tablespoons sugar (25 g)
- 1 teaspoon vanilla extract (5 ml)
You can scale up or down as needed, but don’t fill the mixer bowl more than halfway for best results.
Step-by-step: Whipping Cream In A Stand Mixer
Follow these steps to get perfect whipped cream every time:
- Chill the Equipment
- Put the mixer bowl and whisk attachment in the fridge for at least 15 minutes.
- Cold tools keep the cream from warming up, which prevents it from separating.
- Pour the Cream
- Take the cream straight from the fridge.
- Pour it into the chilled bowl.
- Add Sugar and Vanilla
- Sprinkle sugar and vanilla over the cream.
- Adding sugar at the start helps it dissolve evenly.
- Start Mixing on Low Speed
- Attach the whisk to your stand mixer.
- Begin mixing on low speed (1–2) for about 30 seconds.
- This prevents splattering.
- Increase to Medium-High Speed
- Raise the speed to medium-high (6–8).
- Watch for the cream to thicken—this takes 2–3 minutes.
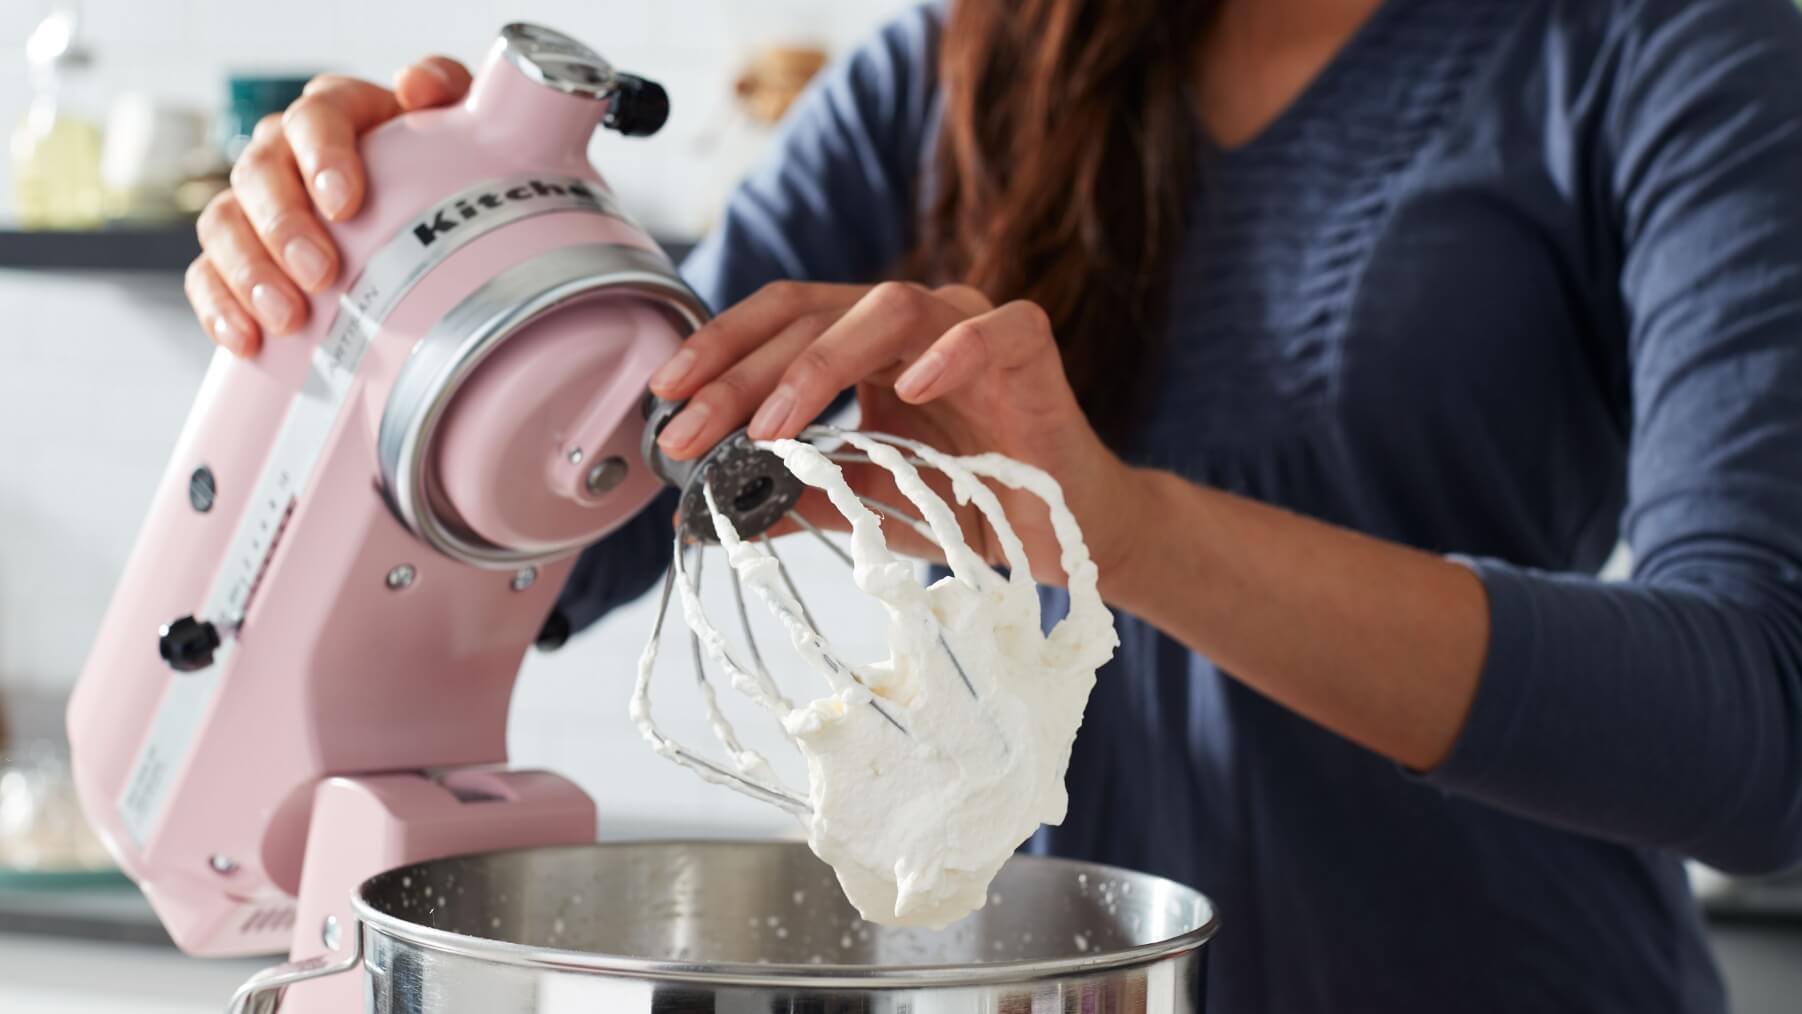
- Check Texture
- Stop the mixer and lift the whisk.
- You want soft peaks if the cream barely holds its shape.
- For firm peaks, keep mixing for another 30–60 seconds.
- Stop at the Right Moment
- Once the cream is fluffy and holds peaks, stop immediately.
- Over-whipping turns the cream grainy and eventually into butter.
- Scrape the Bowl
- Use a spatula to scrape down the sides and mix gently.
- Use or Store
- Serve right away, or cover and refrigerate for up to 24 hours.
Visual Guide: Whipped Cream Stages
Here’s a comparison table showing how whipped cream changes during mixing:
| Stage | Texture | Time (approx.) | Best For |
|---|---|---|---|
| Soft Peaks | Light, barely holds shape | 2 minutes | Cakes, mousse |
| Firm Peaks | Holds shape, fluffy | 3 minutes | Pies, topping, piping |
| Over-whipped | Grainy, separates | 4+ minutes | Not recommended |
Tips For Perfect Whipped Cream
Most guides mention chilling the bowl or not over-mixing, but there are a few extra tricks that can make a real difference.
- Use Heavy Cream, Not Light
- Light cream or half-and-half will not whip well. The fat content matters—at least 30% is ideal.
- Powdered Sugar for Stability
- Powdered sugar contains cornstarch, which helps the cream stay fluffy longer.
- Stabilize with Cream of Tartar or Gelatin
- For whipped cream that lasts hours (for cakes or hot weather), add 1/4 teaspoon cream of tartar or dissolved gelatin.
- Flavor Variations
- Try almond, lemon, or coffee extract instead of vanilla for unique whipped cream.
- Watch the Mixer, Don’t Walk Away
- Stand mixers are fast. The difference between perfect and over-whipped is sometimes only 10 seconds.
- Don’t Whip Too Much at Once
- If you fill the bowl above halfway, the cream won’t whip evenly.
Common Mistakes And How To Avoid Them
It’s easy to make errors when whipping cream. Here’s what to watch for:
- Over-whipping
- Cream turns from fluffy to grainy, then separates into butter and liquid.
- Solution: Stop as soon as you see firm peaks.
- Using Warm Cream
- Warm cream won’t whip. It stays liquid.
- Solution: Always chill cream and bowl.
- Wrong Attachment
- Using a paddle instead of a whisk results in poor texture.
- Solution: Always use the whisk attachment.
- Adding Sugar Late
- Sugar added after whipping won’t dissolve well.
- Solution: Add sugar before starting the mixer.
- Ignoring Fat Content
- Low-fat creams won’t thicken.
- Solution: Check the carton for at least 30% fat.
- Whipping Too Long
- Even 10–20 seconds too much can ruin the cream.
- Solution: Watch closely, stop frequently to check.
Stand Mixer Vs. Other Methods
How does a stand mixer compare to hand mixers and manual whisks? Here’s a quick look:
| Method | Speed | Consistency | Effort |
|---|---|---|---|
| Stand Mixer | Fast (2–3 min) | Very even | Minimal |
| Hand Mixer | Moderate (3–5 min) | Good | Medium |
| Manual Whisk | Slow (6–10 min) | Can be uneven | High |
Most home bakers prefer a stand mixer for both speed and reliability. If you need to whip large amounts, it’s the best choice.

Credit: www.kitchenaid.com
How To Store Whipped Cream
Whipped cream is best used fresh. If you need to store it:
- Place it in a covered container in the fridge.
- Use within 24 hours for best texture.
- If it starts to deflate, gently re-whip for 10–15 seconds.
For longer storage, consider stabilizing with powdered sugar or gelatin. Never freeze whipped cream—it loses its texture.
Using Whipped Cream In Recipes
Whipped cream is versatile. Here are some ways to use it:
- Desserts: Pies, cakes, trifles, mousse.
- Drinks: Coffee, hot chocolate, milkshakes.
- Breakfast: Pancakes, waffles, fruit.
- Decoration: Piping shapes or borders.
For piping, whip to firm peaks. For folding into mousse or using as a topping, soft peaks work best.
You might find this helpful: Best Stand Mixers for Bread Dough
Beginner Insights: What Most Miss
Many people miss these details:
- Temperature affects everything. Even the room temperature can make a difference. If your kitchen is warm, chill the bowl longer.
- Sugar choice changes stability. Powdered sugar keeps cream stable for hours, while granulated sugar is best for flavor.
- Batch size matters. Small batches whip faster, but very small amounts (less than 1/2 cup) might not whip well in large bowls.
These tips help avoid common problems and improve your results.
Advanced Techniques
If you want to take whipped cream to the next level, try these:
- Infused flavors: Steep herbs or spices in cream overnight, strain, and then whip. For example, mint or cinnamon.
- Chocolate whipped cream: Add 2 tablespoons cocoa powder to the cream and sugar before whipping.
- Alcohol whipped cream: For adult desserts, add 1 tablespoon liqueur (like Baileys or Grand Marnier) for unique flavor.
These variations can impress guests and add new dimensions to classic recipes.
Credit: www.kitchenaid.com
Nutritional Facts
Whipped cream is rich but not as unhealthy as many believe if used in moderation. Here’s a quick look:
| Ingredient | Calories (per cup) | Fat (g) | Sugar (g) |
|---|---|---|---|
| Heavy Cream | 820 | 88 | 0 |
| Added Sugar | 100 | 0 | 25 |
| Total (Whipped) | 920 | 88 | 25 |
Serving size is usually 2–3 tablespoons, which is about 60–90 calories.
Frequently Asked Questions
What’s The Best Cream For Whipping In A Stand Mixer?
Use heavy cream or heavy whipping cream with at least 30% fat. Lower-fat creams won’t whip properly. Avoid ultra-pasteurized cream if you can, as it sometimes gives a looser texture.
How Do I Fix Over-whipped Cream?
If you see grainy or separated cream, add a tablespoon of fresh cream and gently whisk by hand. This can bring back a smoother texture. If it’s fully separated, you’ve made butter—try using it in cooking instead.
Can I Whip Cream Ahead Of Time?
Yes, but whipped cream is best served fresh. If you need to make it in advance, stabilize with powdered sugar or cream of tartar. Store in the fridge for up to 24 hours. Re-whip if needed before serving.
Why Isn’t My Cream Whipping?
Usually, the cream is too warm or doesn’t have enough fat. Chill everything and check the carton for fat percentage. Also, make sure you’re using the whisk attachment, not the paddle.
Can I Add Flavors To Whipped Cream?
Absolutely. Vanilla extract is classic, but you can use almond, lemon, coffee, or even cocoa powder. Add flavors before whipping for even distribution.
Whipped cream is simple but easy to get wrong. With a stand mixer and these tips, you can make perfect whipped cream every time. Practice a few times, and soon you’ll know exactly when to stop the mixer and what texture works best for your recipes. If you want more details about cream types, you can check Wikipedia for scientific explanations. Enjoy your whipped cream creations!

Credit: freshaprilflours.com