Skip to content
Replacing a vacuum cleaner belt may sound complicated, but it’s actually one of the simplest ways to keep your vacuum running smoothly. Many people don’t realize how important this small part is. If your vacuum isn’t picking up dirt as well as before, or you hear strange noises, the belt is often the cause.
With the right guidance, you can change a vacuum belt yourself—saving money and avoiding unnecessary repairs. This guide covers everything you need, from choosing the right belt to step-by-step instructions, so you can feel confident tackling this task at home.
Why The Vacuum Cleaner Belt Matters
The vacuum belt is a rubber band connecting the motor to the brush roller. It spins the roller, which sweeps dirt and debris into the vacuum. If the belt breaks, slips, or stretches, your vacuum won’t clean properly. In fact, research shows that over 30% of vacuum performance issues are related to belt failure. Many vacuum models rely heavily on this part, especially upright types. Ignoring a worn belt can cause further damage to the vacuum’s motor and brush.
Some signs your belt needs replacement:
- The vacuum isn’t picking up dirt
- The brush roller isn’t spinning
- You smell burning rubber
- Loud or unusual noises
Regularly checking and replacing the belt can extend your vacuum’s life and improve cleaning results.
Choosing The Right Belt
Vacuum belts come in different sizes, shapes, and materials. Picking the wrong belt is a common mistake—about 1 in 5 users buy an incompatible belt, which can damage their vacuum or make installation impossible. Always match the belt to your vacuum’s model.
Types Of Vacuum Belts
Here’s a quick comparison of main belt types:
| Type | Material | Common Models | Durability |
|---|---|---|---|
| Flat Belt | Rubber | Upright vacuums | 6-12 months |
| Round Belt | Rubber | Older vacuums | 6-12 months |
| Cogged Belt | Rubber/Poly | High-end models | 12-18 months |
| Geared Belt | Rubber/Poly | Canister vacuums | 12-18 months |
To find the right belt:
- Check your vacuum’s model number (usually on the bottom or back).
- Look for the belt type in the manual or on the manufacturer’s website.
- Buy from a trusted retailer or directly from the vacuum brand.
It’s smart to buy two belts at once. Belts are inexpensive, and having a spare means you’re ready for the next replacement.
Preparing To Replace The Belt
Before starting, gather the right tools and create a safe workspace. Most people skip this step and end up searching for tools mid-task or damaging the vacuum.
Tools And Supplies Needed
- Replacement belt (specific to your vacuum)
- Screwdriver (usually Phillips or flat-head)
- Scissors (optional, for cutting old belts)
- Gloves (protect your hands)
- Soft cloth (for cleaning parts)
Clear a table or floor space and unplug the vacuum. If you’re working on carpet, lay a towel to catch dust and debris.
Step-by-step: How To Replace A Vacuum Cleaner Belt
Follow these steps for a safe and successful belt change. Most people finish in 15–30 minutes, even if it’s their first time.
1. Unplug And Prepare The Vacuum
Always unplug before starting. This prevents accidents and keeps you safe. Place the vacuum upside down or on its side so you can access the bottom.
2. Remove The Brush Cover
Locate the screws holding the brush cover. Using your screwdriver, gently remove these screws and set them aside. Some vacuums have clips or tabs instead of screws—check your manual if you’re unsure.
Carefully lift off the cover. If it’s stuck, wiggle it gently to avoid breaking plastic parts.
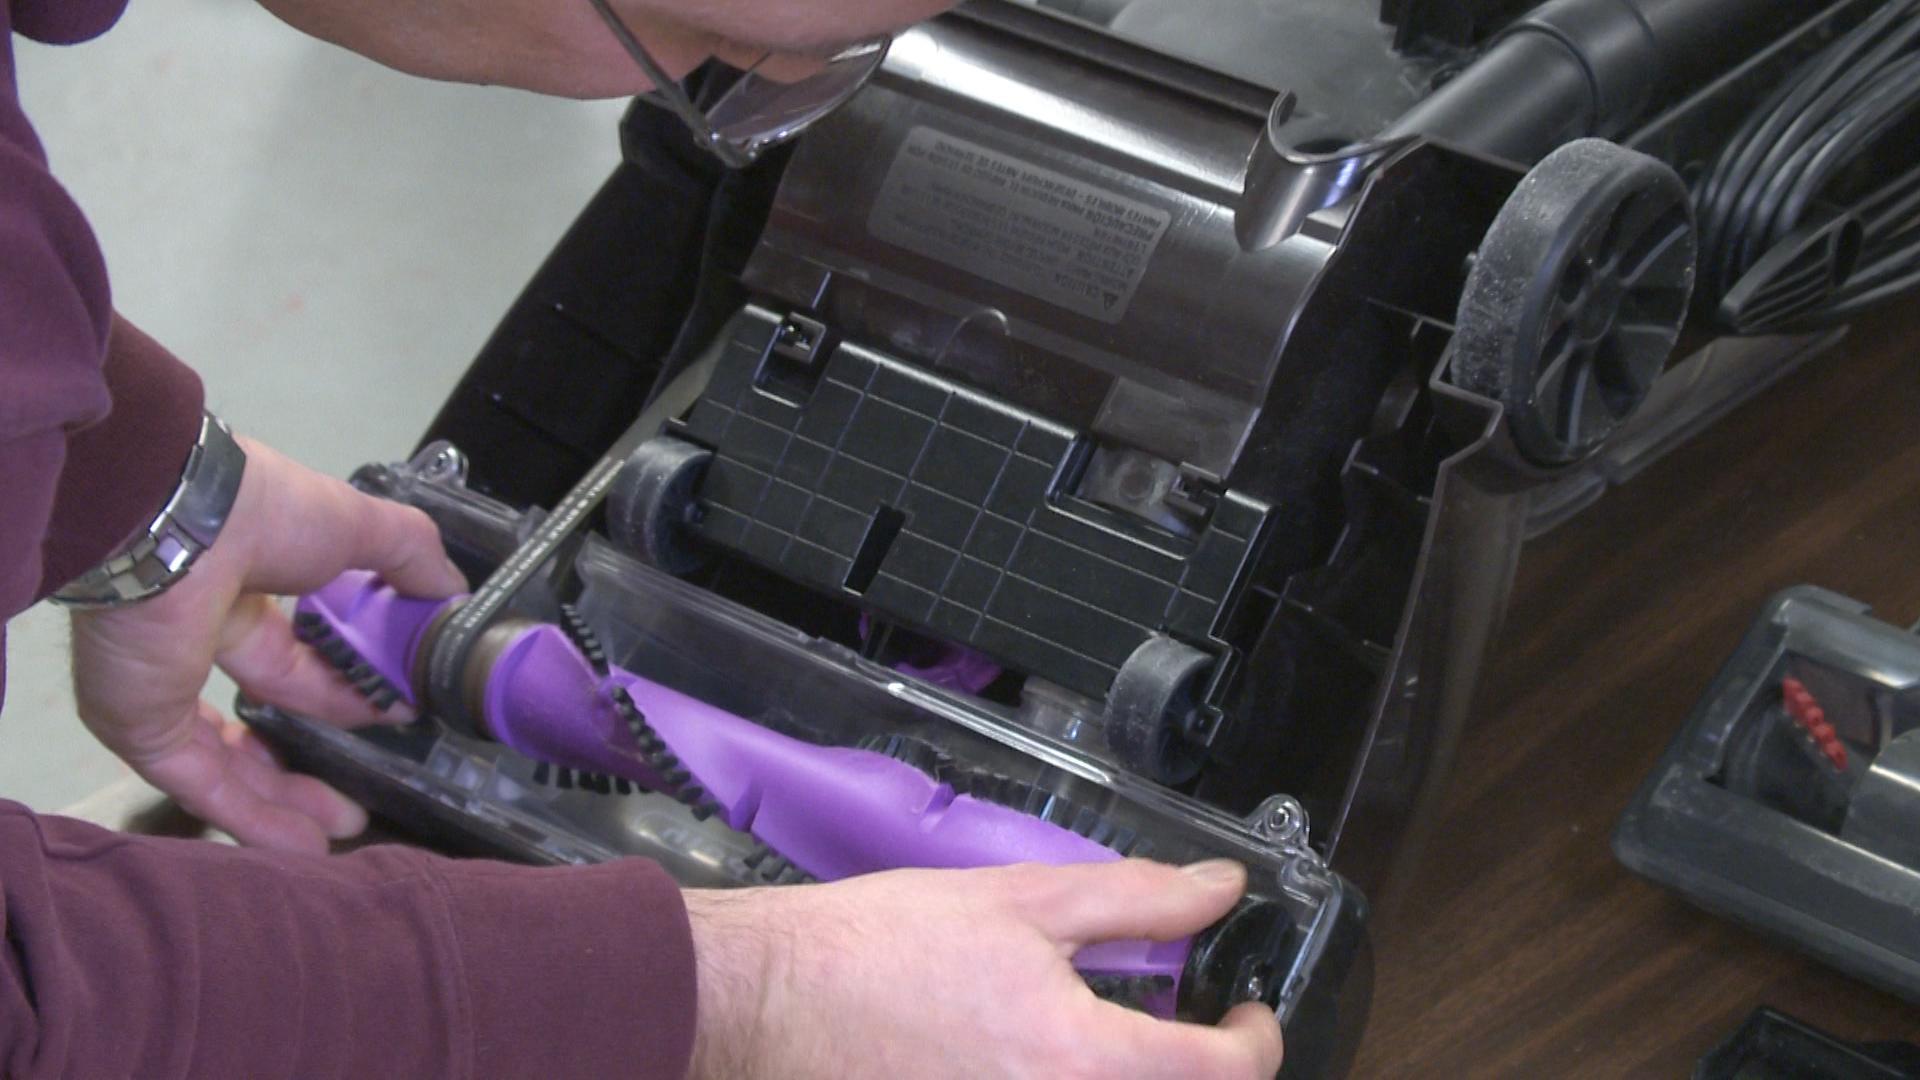
3. Take Out The Brush Roller
The brush roller sits in slots at both ends. Lift the roller out, noting how it fits. If your vacuum uses a belt guide or tension bar, take a photo before removing parts. This saves confusion later.
4. Remove The Old Belt
Inspect the belt. Is it broken, loose, or stretched? Use scissors to cut the old belt if needed. Sometimes belts melt or shred, leaving sticky residue. Clean any debris with a cloth.
5. Install The New Belt
Slip the new belt over the motor shaft (a small metal post) and then onto the brush roller. Stretch the belt gently—it should be tight, but not impossible to fit. A loose belt means you bought the wrong size.
Place the brush roller back into its slots. Spin it by hand to check if the belt is moving the roller.
6. Reassemble The Vacuum
Replace the cover and screw it back in. Make sure all screws or clips are secure. Double-check the belt’s position; it should be straight and not twisted.
7. Test The Vacuum
Plug the vacuum back in and turn it on. The brush roller should spin and the vacuum should pick up debris easily. If you hear strange noises or smell burning, turn it off and check the belt’s installation.
Credit: www.consumerreports.org
Practical Tips For Belt Replacement
Many beginners overlook these tips, which can make the process smoother and safer.
- Always unplug before starting
- Take a photo of the assembly before removing parts
- Use gloves to protect from sharp edges
- Clean the brush roller and cover before reassembly
- Don’t overtighten screws; gentle is better
- Keep extra belts handy
- If the belt is too tight, let it sit on the roller for 10 minutes before installation
If your vacuum is still under warranty, check if replacing the belt yourself affects coverage. Some brands require professional service.
Troubleshooting Common Issues
Sometimes, even after replacing the belt, problems remain. Here’s how to solve them:
The Brush Roller Still Doesn’t Spin
- Check if the belt is installed correctly
- Inspect the motor shaft for damage or debris
- Make sure the roller is seated in its slots
The Vacuum Makes Loud Noises
- The belt may be twisted or rubbing against plastic
- Remove the cover and adjust the belt’s position
Poor Suction After Belt Replacement
- Clean the roller and cover
- Check the vacuum’s filters (dirty filters can reduce suction)
- Make sure the belt is the correct size
If you still have problems, contact the manufacturer or visit a local repair shop.
How Often Should You Replace The Belt?
A vacuum belt’s lifespan depends on usage and the belt type. On average, replace flat and round belts every 6–12 months. Geared and cogged belts can last up to 18 months. If you vacuum often (more than once per week), check the belt every 6 months. If you notice performance drops, inspect the belt immediately.
Here’s a quick comparison of belt lifespans:
| Belt Type | Average Lifespan | Replacement Cost |
|---|---|---|
| Flat | 6–12 months | $5–$15 |
| Round | 6–12 months | $5–$15 |
| Cogged | 12–18 months | $10–$20 |
| Geared | 12–18 months | $10–$20 |
Replacing belts regularly keeps your vacuum working at its best and prevents costly repairs.
Mistakes To Avoid
Many people make simple errors during belt replacement. Avoid these to save time and money:
- Buying the wrong belt: Always check the model number and belt type.
- Forgetting to unplug: Never work on a plugged-in appliance.
- Losing screws: Use a small container to hold screws.
- Forcing parts: If something doesn’t fit, check for mistakes instead of forcing.
- Skipping cleaning: Dust and hair can clog the roller and cover, reducing performance.
A non-obvious tip: Some vacuums have hidden screws under stickers or rubber pads. Look carefully if you can’t find all the screws.
Credit: www.instructables.com
Safety Precautions
Vacuum cleaners use electricity and moving parts. Protect yourself and your appliance by following these safety rules:
- Unplug the vacuum before starting
- Don’t touch the motor shaft while plugged in
- Use tools properly to avoid injury
- Keep children and pets away from your workspace
- Wear gloves if you have sensitive skin
If you’re unsure about any step, consult the manual or watch a manufacturer video online. For extra guidance, the Consumer Reports guide offers visual instructions.
Frequently Asked Questions
How Do I Know If My Vacuum Belt Needs Replacing?
If your vacuum isn’t picking up dirt, the brush roller isn’t spinning, or you hear loud noises or smell burning rubber, the belt may be broken or worn. Check the belt visually—look for cracks, stretching, or missing pieces.
Can I Use Any Belt With My Vacuum?
No, you must use a belt designed for your vacuum’s model. Using the wrong belt can damage the vacuum or prevent it from working. Always check your manual or the manufacturer’s website for the correct part.
How Long Does It Take To Replace A Vacuum Cleaner Belt?
Most people can replace a belt in 15–30 minutes. If it’s your first time, take it slow and follow each step carefully. Having the right tools and a clear workspace helps speed up the process.
Is It Safe To Replace The Belt Myself?
Yes, as long as you unplug the vacuum and follow basic safety rules. If you’re unsure, consult the manual or ask for help from someone with experience. Some warranties require professional service—check before starting.
What Should I Do If The New Belt Doesn’t Fit?
Double-check the model number and belt type. If the belt is too tight or too loose, you may have bought the wrong part. Return it and get the correct belt from a trusted retailer or the vacuum manufacturer.
Changing a vacuum cleaner belt is a simple task that can make a big difference in your cleaning routine. By picking the right belt, following clear steps, and avoiding common mistakes, you’ll keep your vacuum working efficiently for years to come.
Remember, regular maintenance saves money and prevents bigger problems down the line.

Credit: www.amazon.com